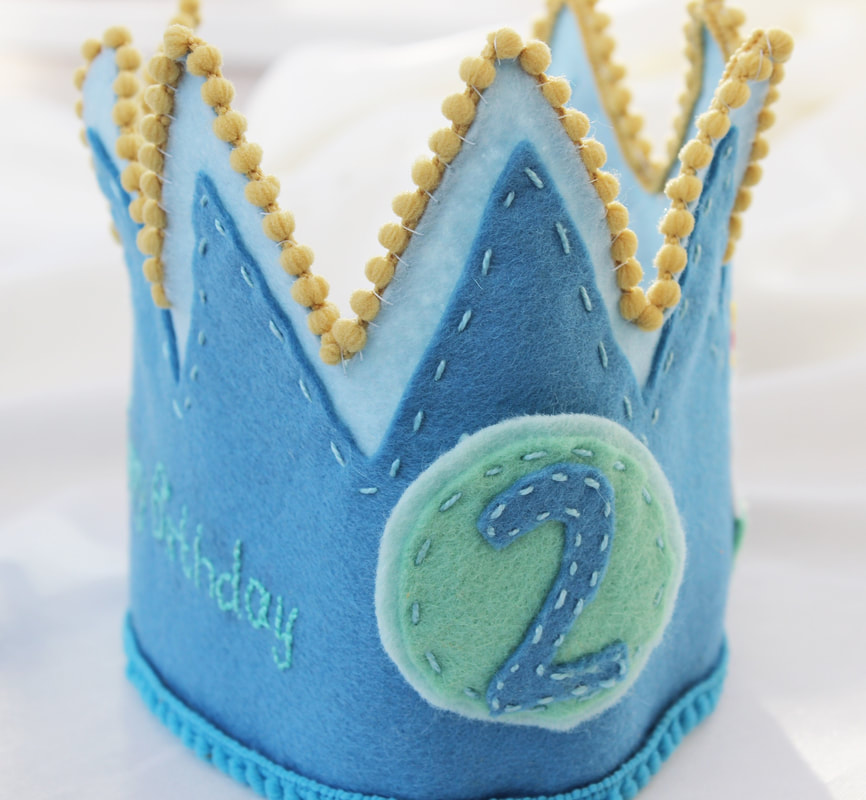
 Introducing the birthday crown pattern! A free pattern to make a birthday crown from felt. This pattern was inspired by my little one's birthday and I can safely say he loved wearing this crown and it helped to reinforce that it was his special day. 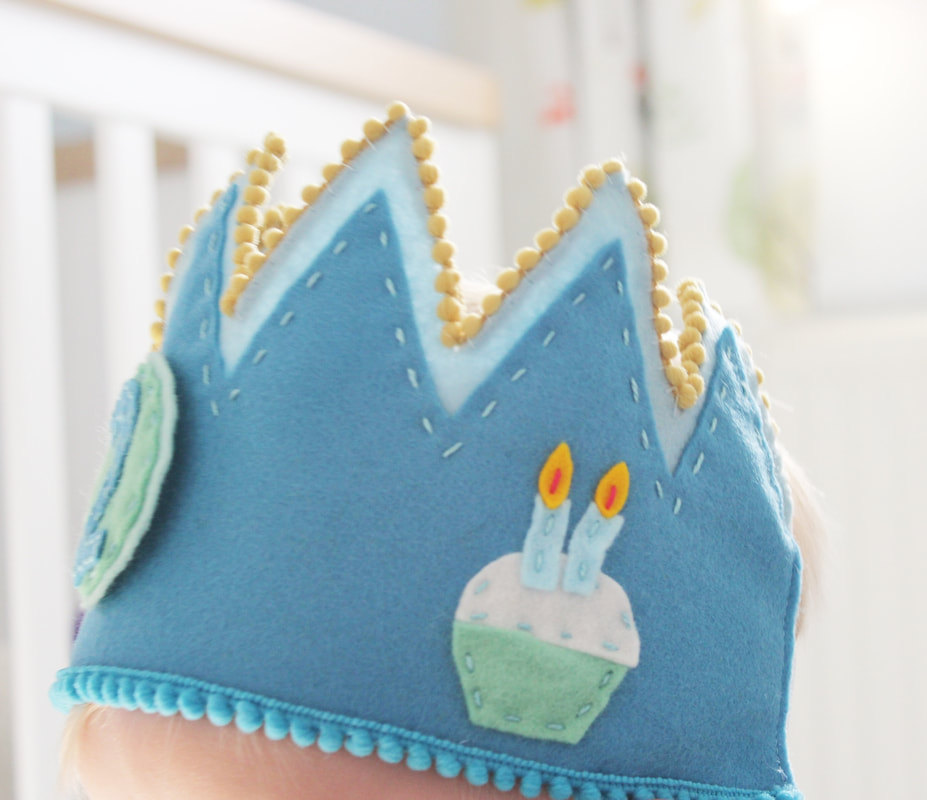 The design is simple and can be made in a few hours. But despite this, it was important to me that this design would grow with your child, particularly since we live in a throw-away culture and this is not something that I want to encourage. I believe that we should cherish our belongings, especially items we have made. So the number on the front of the crown is attached with Velcro so it can be changed each year. A candle can be added to the cake as your child becomes a year older and the elastic at the back allows for growth. The pattern only contains numbers up to 7 because after that age children might not want to wear the crown anymore but if they do, it is simple to make your own numbers from felt. Also, the ability to add and remove numbers and candles means other children in the family can use the crown. If you have more than one child, perhaps you could add the candles with Velcro rather than stitch them in place. 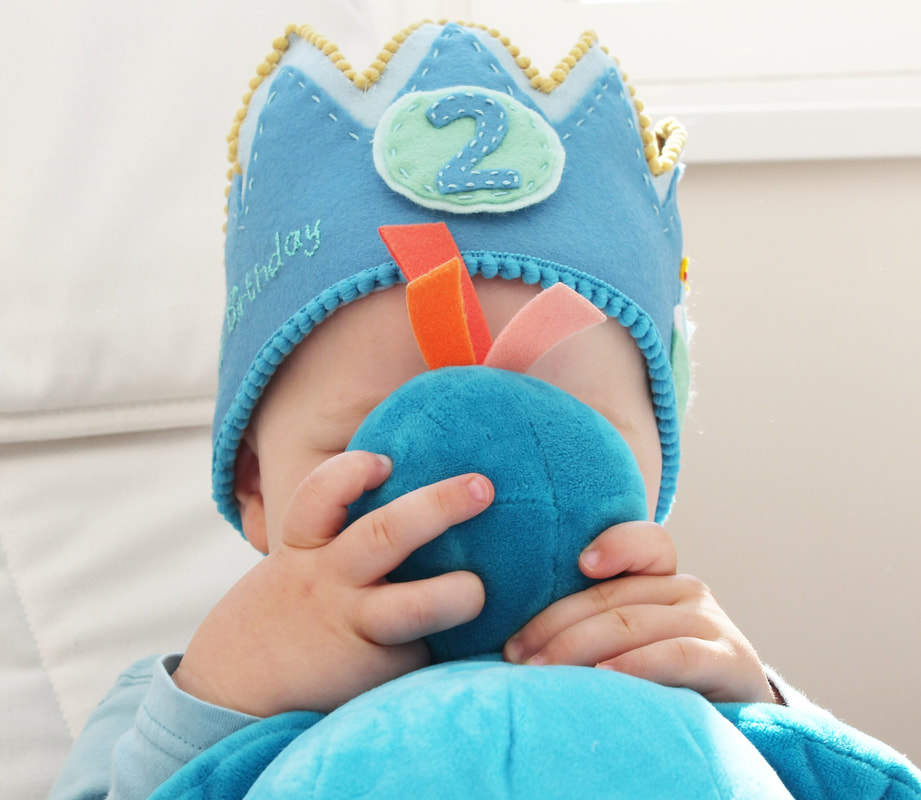 I hope you enjoy making this fun crown for the children in your life. Please share any pictures of what you make using the hashtag #rosepetalpatterns.
Happy sewing!
0 Comments
 To continue from yesterday's post, I am going to tell you about the next steps in my design process. Once I am happy with my pattern pieces and how they print out, I use them to make an example of my design. Whilst I am doing this, I try to take as many photographs of the making process as possible because I use them in my step by step instructions. I think photographs are a crucial part of any set of instructions because not everybody finds it easy to follow a written guide, I know I am more visual and always have more success when following pictures, diagrams or photographs. I also love following video tutorials which is why I offer those too, because sometimes just seeing exactly what somebody does can demystify a technique. A lot of effort goes into my photograph and videos. The lighting has to be bright, natural light, but not direct sunlight otherwise shadows can cause problems. Using a flash is a big no as it alters colours and makes things look artificial. The background needs to be simple so that the subject stands out. I am lucky enough to have a DSLR camera to use and this has taken my photography to another level although I still have a lot to learn. Gone are the days of shining lamps with daylight bulbs onto my items (this is what I used to do about 10 years ago when selling my handmade items on Etsy, Folksy and eventually my own website) as now we have a range of excellent photo editing apps available to us. I love Photoshop Fix with is a free, paired down version of Photoshop available on IPad and it is a brilliant app for anybody starting out in photo editing. 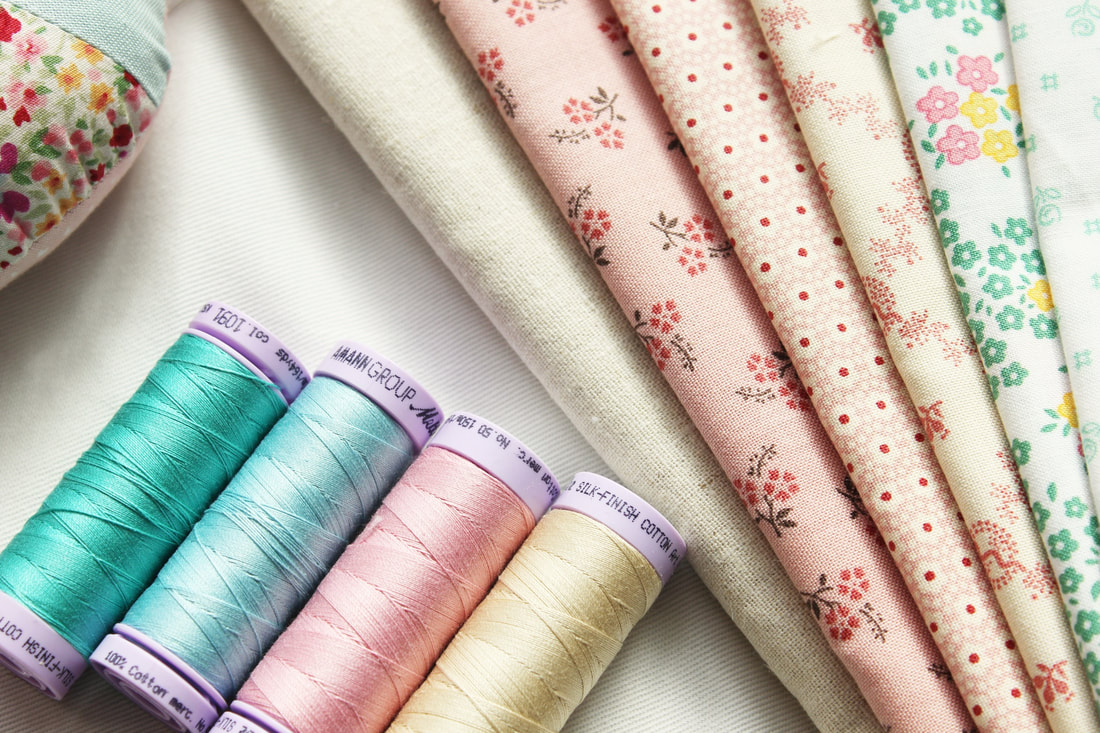 I tend to lighten photos, crop them and that's all. It just makes them bright and appealing and above all, easy to see. Whilst I am making the product, I jot down my process and use this to write the set of written instructions, adding in my photographs as I go. When this is complete, I have the pattern checked by two proof readers, one who a beginner sewer who checks it is easy to understand for people just starting out, and the other who is an experienced sewer and can check for errors. I then take more photographs of the finished item and write a blog post and an Instagram post about it to let people know what is available. I also design my own packaging for my kits. I don't want to give too much away but when you receive a kit in the post, it will be wrapped like a pretty gift for you to open. So a lot goes into each pattern and kit release. I pay a lot of attention to detail as I feel this is very important and I want to create products people love. I want people to know they will have success making their kit because the instructions are very clear and well thought out. Although it is hard work, I love creating these kits and I am just bursting with more ideas, there just aren't enough hours in a day to get them out quick enough!
 I thought it might be nice to share my design process here as it can be quite lengthy from start to finish and it might be interesting for you to hear about. All patterns and kits start from some spark of inspiration which can strike at any time! For me that usually comes from something I see in nature or the materials and fabrics I love using. Sometimes it can also come from something I would like for my son or myself that I can't find in existence. I'm a bit of a planner so when these ideas come to me I jot them down in notebooks and make rough sketches. When I've chosen what I want to work on, I begin drawing on paper. I sometimes use large sheets of tracing paper because if I need to make changes this makes it easy to trace the original and make slight alterations. When I am happy with a design, I scan it into my computer and open it on my Ipad. I find my Apple Pencil to be an invaluable tool for digitising my designs and I use packages such as Graphic to work on my sketches in digital form. Working in this way allows me to alter the size and scale of a design easily. At this stage I do a lot of printing out to ensure that what I see on screen is what comes out on paper. Once I am happy with the design, I focus on the colour palette and materials that I want to make it from and I gather them together. 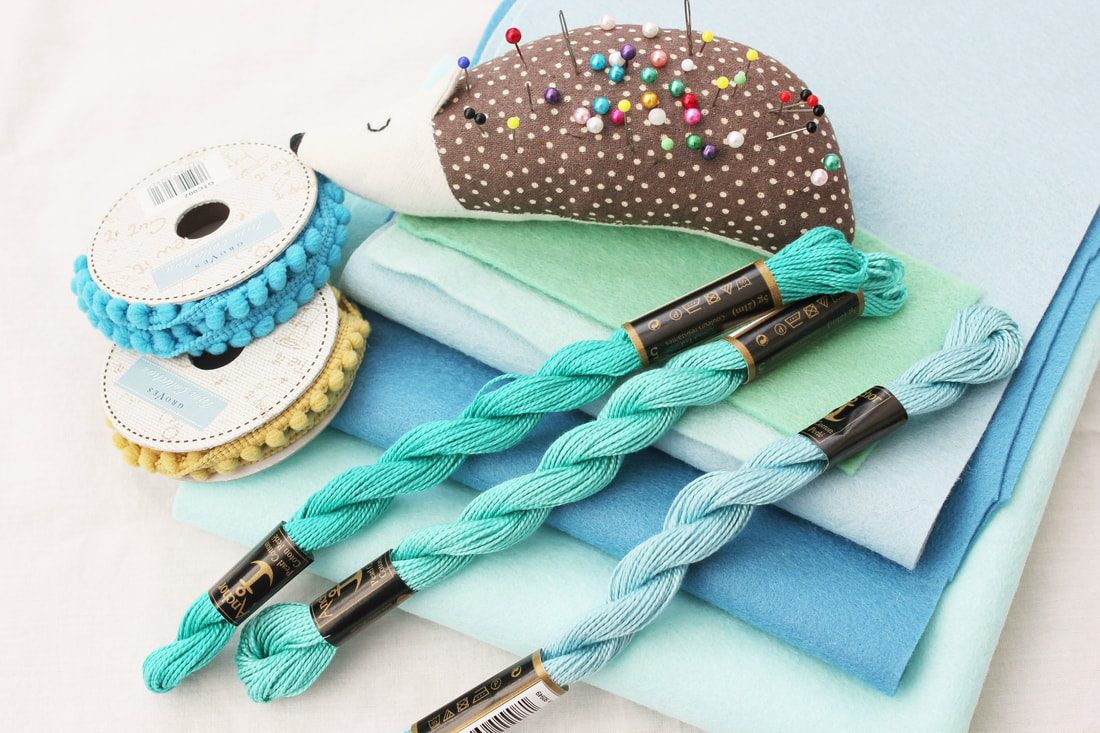 Gathering materials is one of my favourite parts of the design process. I love trying different combinations of fabrics and trims to create the look I have in my head. Tomorrow I will share part two of my design process and I will talk a bit about photography and actual pattern writing.
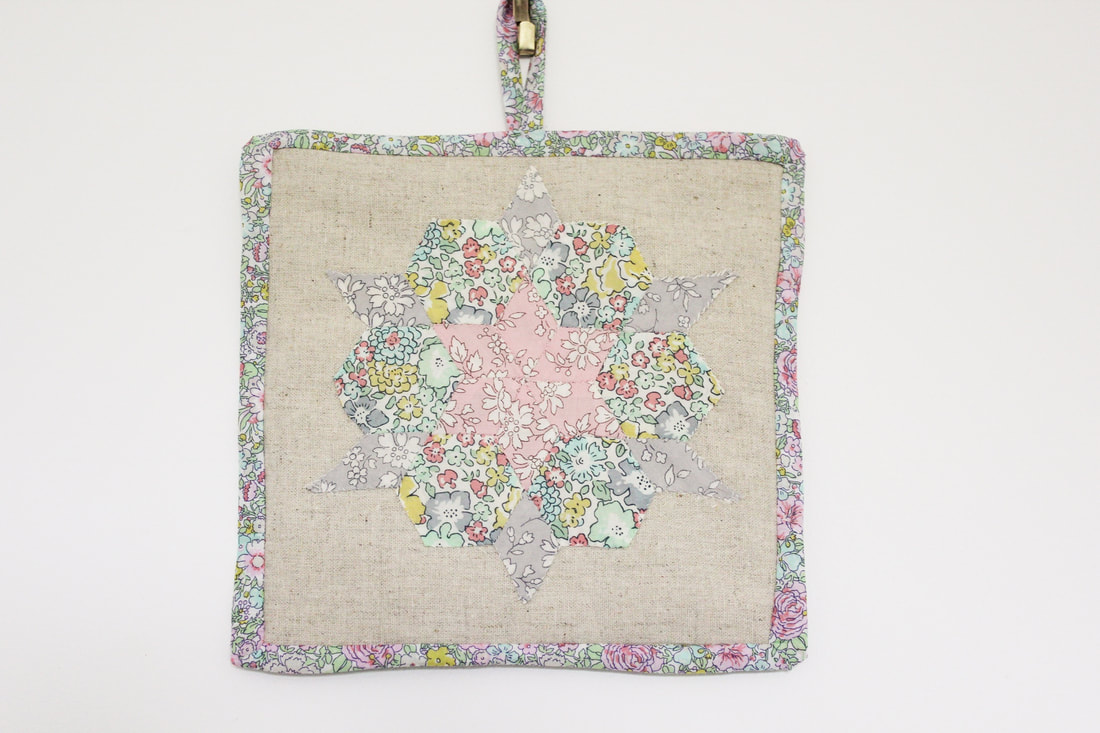 I'm really excited to announce the release of this kit. The Liberty Star wall hanging kit contains Liberty Tana Lawn, English Paper Pieces and full instructions to guide you through making this wall hanging. I think the muted colour palette is very sophisticated and would look lovely in any bedroom, I certainly love it in mine.  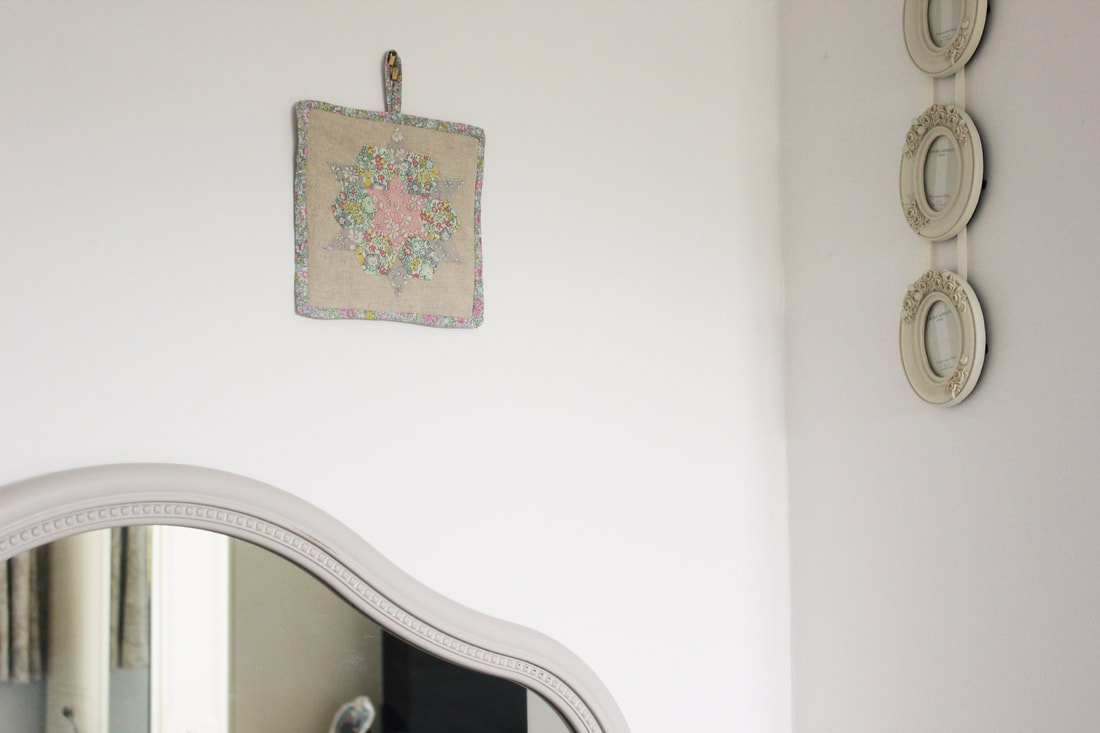 |
Follow me on InstagramAbout the Author
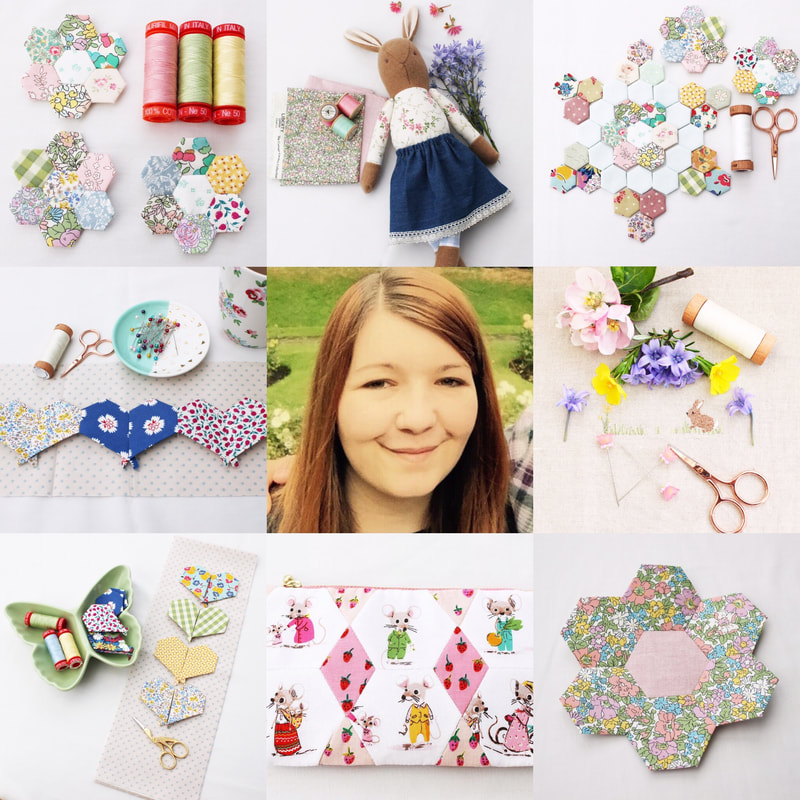
My name is Emma and I love all things sewing, especially EPP. My little blog is the place where I document what I'm making. I hope you enjoy reading what I'm up to! All opinions are my own and I only share things that I think you will love. Thank you for taking the time to stop by. Archives
September 2023
Categories
All
|
 RSS Feed
|
Copyright Vintage Sewing Box 2024
|
| ||||||