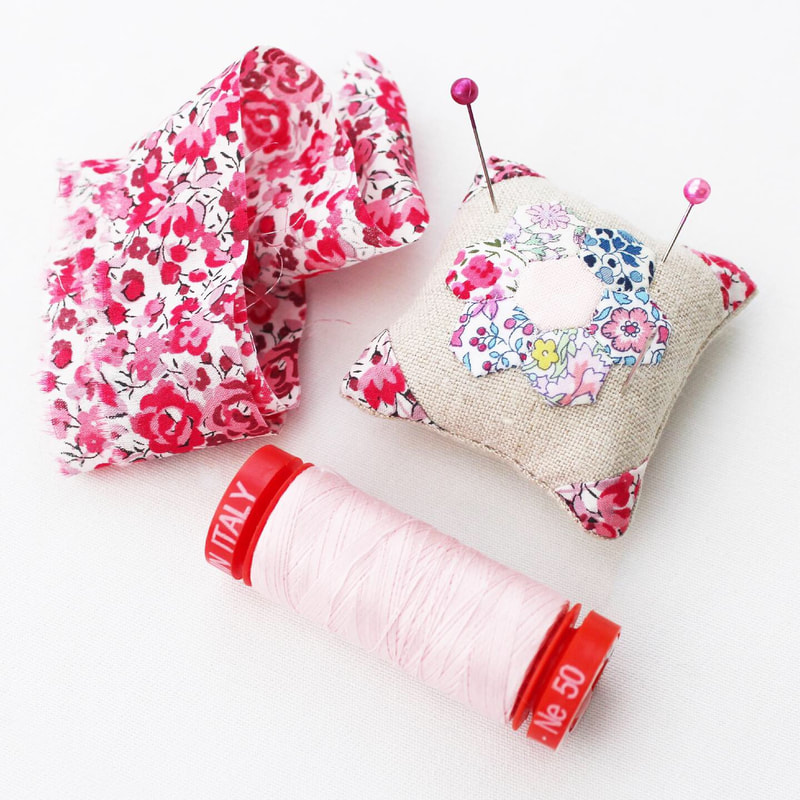
 I made these super cute tiny pincushions to take part in the teeny tiny pinnie parade that is taking place on Instagram at the moment. It is being hosted by Cheri @tinkerellen and I thought I'd share how I made them here just in case there's anybody out there who was curious or who would like to have a go too. They are perfect for using tiny scraps and the finished result is two inches square! I've linked to some products I've used but all links are just for your information and are not sponsored or affiliate in any way. If you have any questions you can always ask me on Instagram, in the comments here or through the contact form on the home page. I hope you like this tutorial! 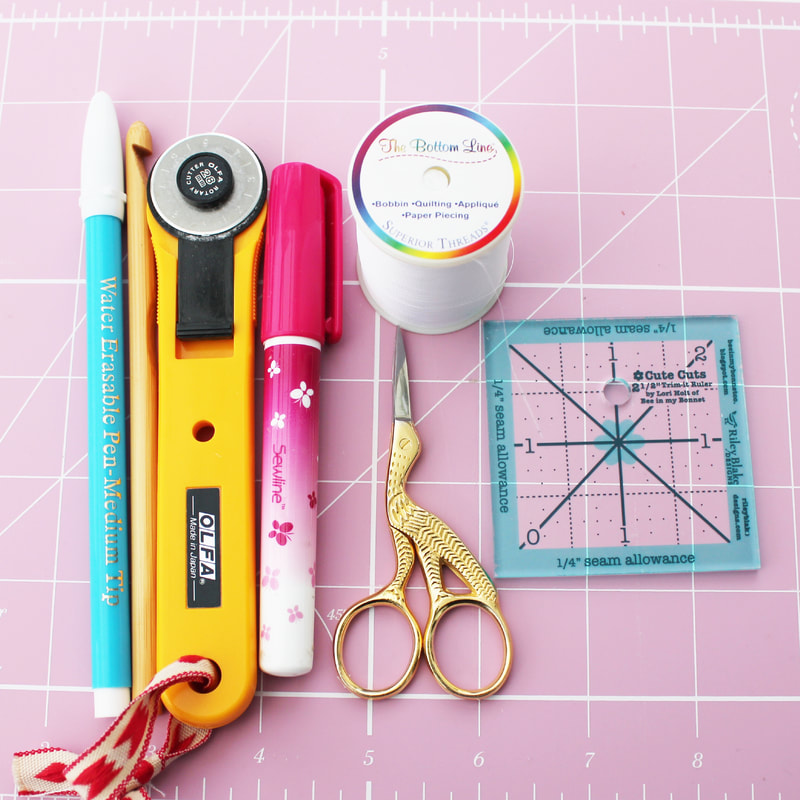 Tools To make this pincushion you will need the usual sewing supplies, needle, thread, sewing machine, rotary cutter, scissors, cutting mat, ruler, Sewline glue pen, erasable pen, point turner (I use a crochet hook). I'm a big believer in use what you have and in that you don't need fancy things to create beautiful projects, but I am going to recommend two things for this pincushion which are not in any way 'must have' items but they do make life easier. Firstly the little two and a half inch ruler pictured above. It is called Cute Cuts and I bought mine from Sew and Quilt. This is one of my most used tools for sewing as I find it to be the perfect size for most of the things I make and I use it daily. The other thing I am going to recommend is Superior Threads The Bottom Line thread. It is a polyester thread and it has been said that polyester thread can damage cotton fabrics over time (which I have no experience of) and whilst I do prefer using cotton thread, this thread is perfect for this project as it is strong and hardly visible. When making tiny things, your stitches can seem really big, so using this thread reduces this. Again, this can be bought from Sew and Quilt. You will also need seven, quarter inch hexagon templates. You can use paper or I use hexiform from Ashmead Designs. The hexiform doesn't need to be removed so this makes the process even easier. If you want to use paper, I have free printable templates here. Materials You will need:
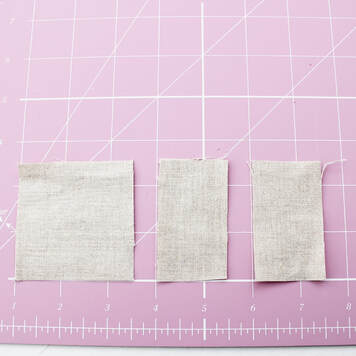 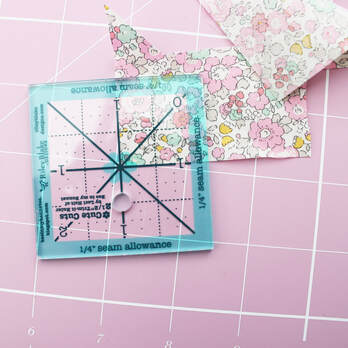 1. First make your English paper pieced hexagon flower. I have a video tutorial here showing how to make a larger hexagon flower. To make a small one the principals are the same, but I don't cut the thread after each seam, I carry it across the back, you can't see it so nobody will know! If using paper templates, you will need to press your flower, spray with spray starch and press again before removing the papers and then appliqué it onto your two and a half inch backing fabric. Again, the little ruler is so useful here as it helps you centre the hexie flower. 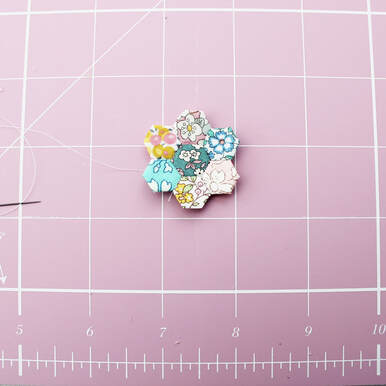 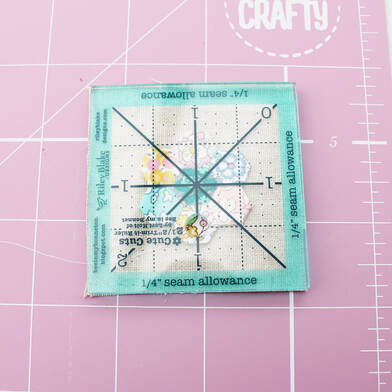 2. Next you need to mark where you will add the corners. On the top edge, I measured one inch in towards the centre from each corner and marked it with a water erasable pen. I then marked one inch down from each corner and marked it. I repeated this with the bottom corners, measuring and marking one inch in along the bottom edge and one inch up. 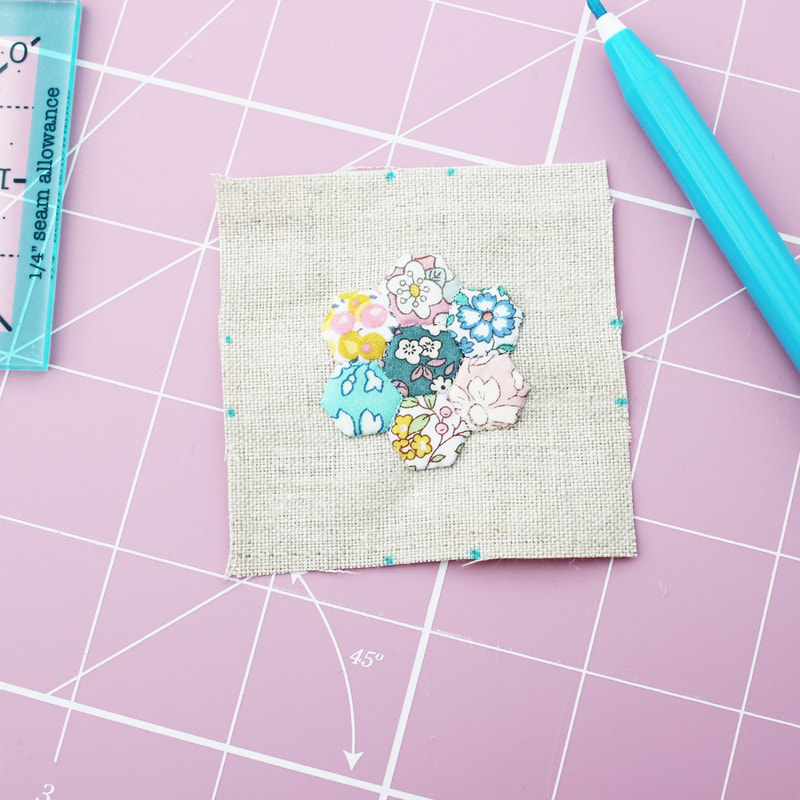 If it helps, you can draw a line across these points to mark the corners and show where you will stitch. 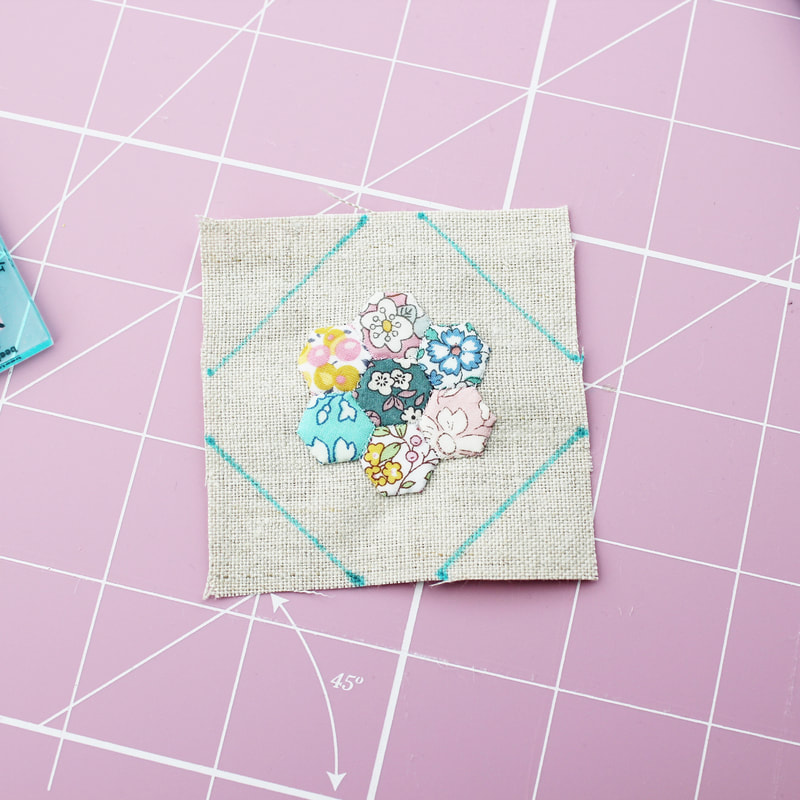 3. Next take your one inch squares and fold them in half. Finger press to get a visible crease across the square but take care not to stretch them out. If it helps, you could draw a line across the squares instead. 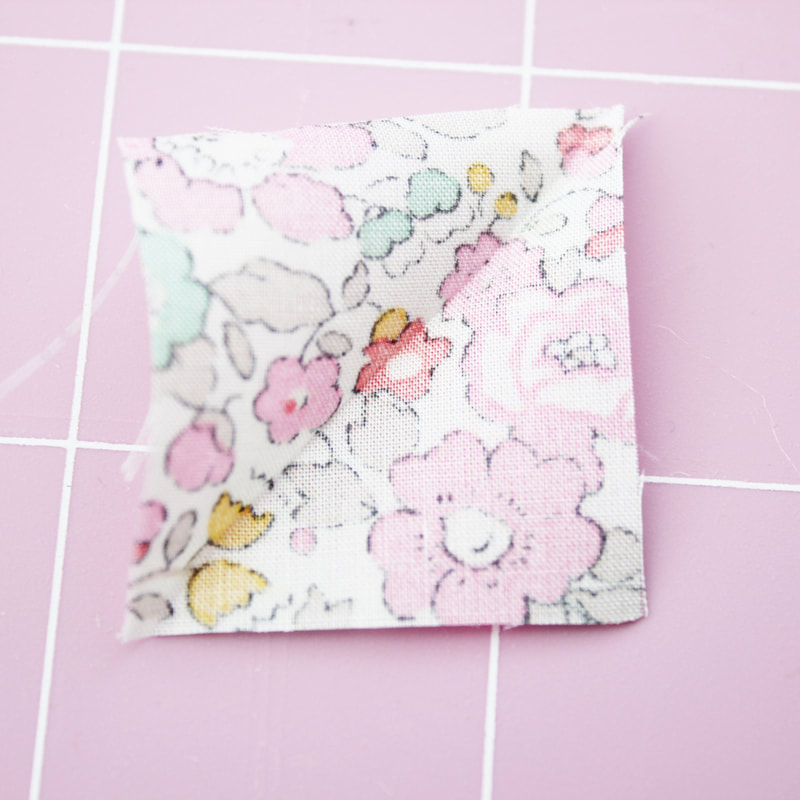 4. Place your fabric square on the corner of your pincushion top, right side facing down, lining up the diagonal lines. Your fabric square is slightly larger than the corner of your pincushion so it will overlap the edge. This will be trimmed off afterwards. I use a dab of Sewline glue to hold it in place as this works better than pins. Stitch across the diagonal line with your sewing machine and repeat for the remaining corners. 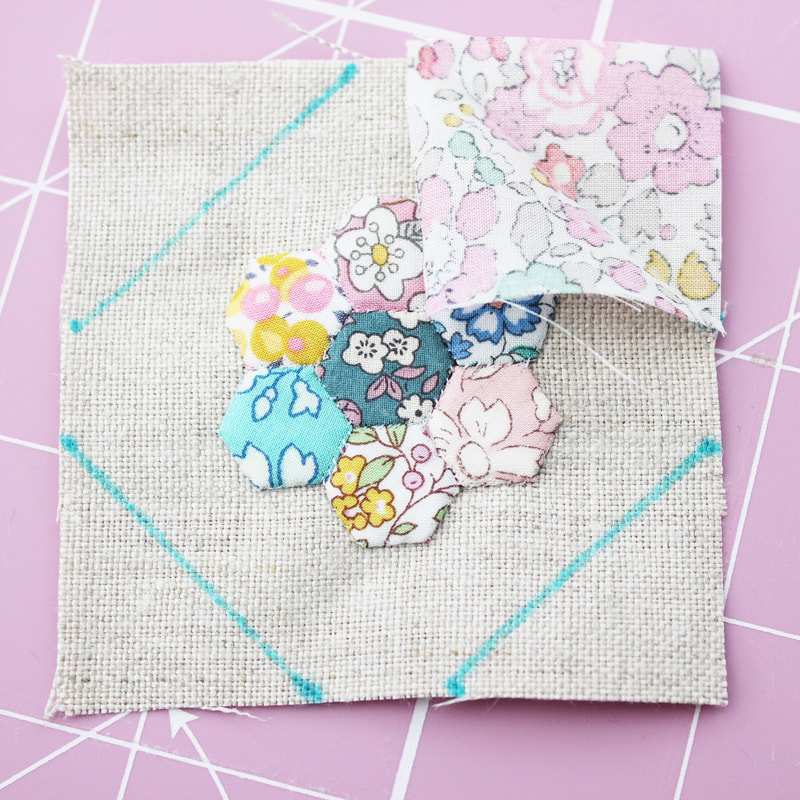 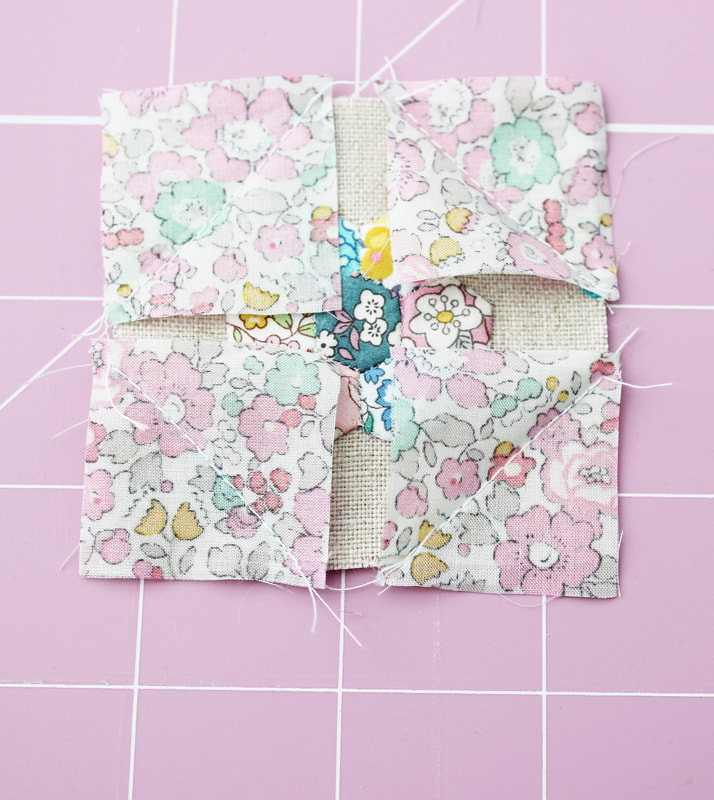 5. Trim the seam allowance at the corners back to a quarter inch and turn your corners out. Remove your water erasable pen marks and then press with an iron. Take care not to use the iron on the erasable ink as this can make it difficult to wash out. This is also the time to add any hand stitching details. I added a tiny running stitch around the edge of the hexie flower. 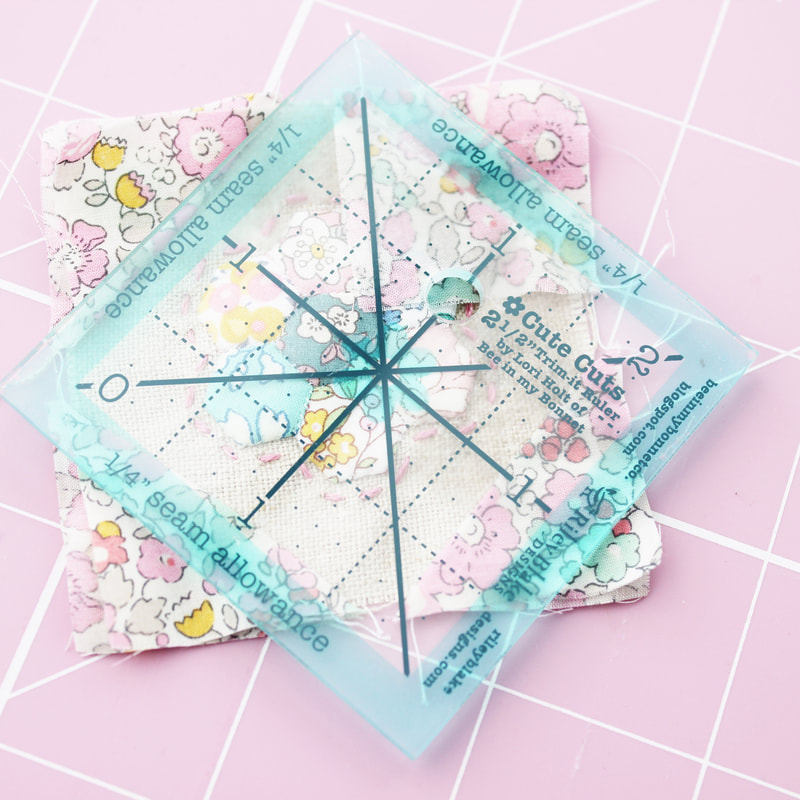 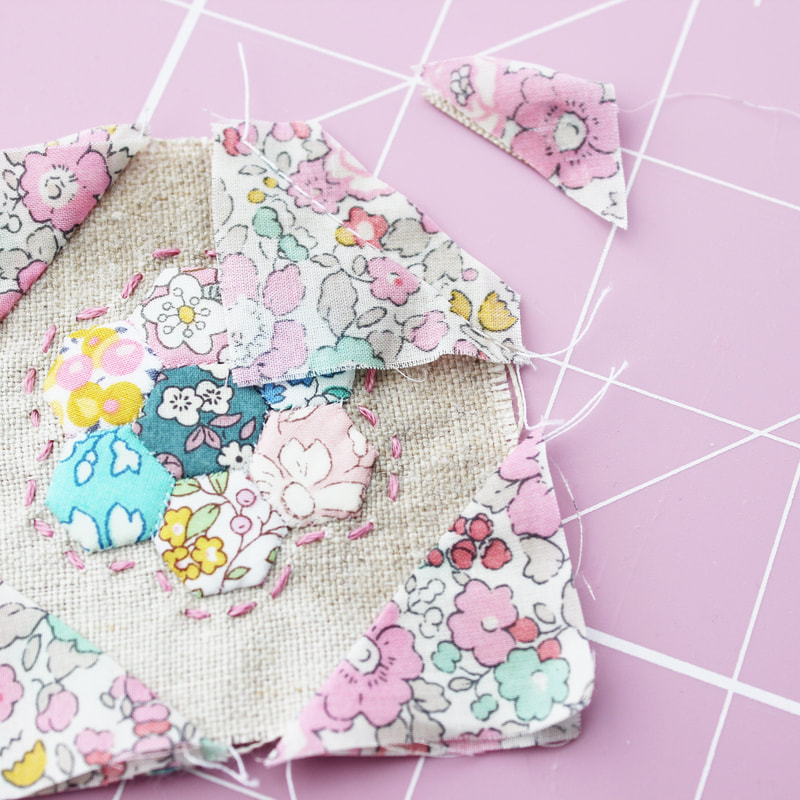 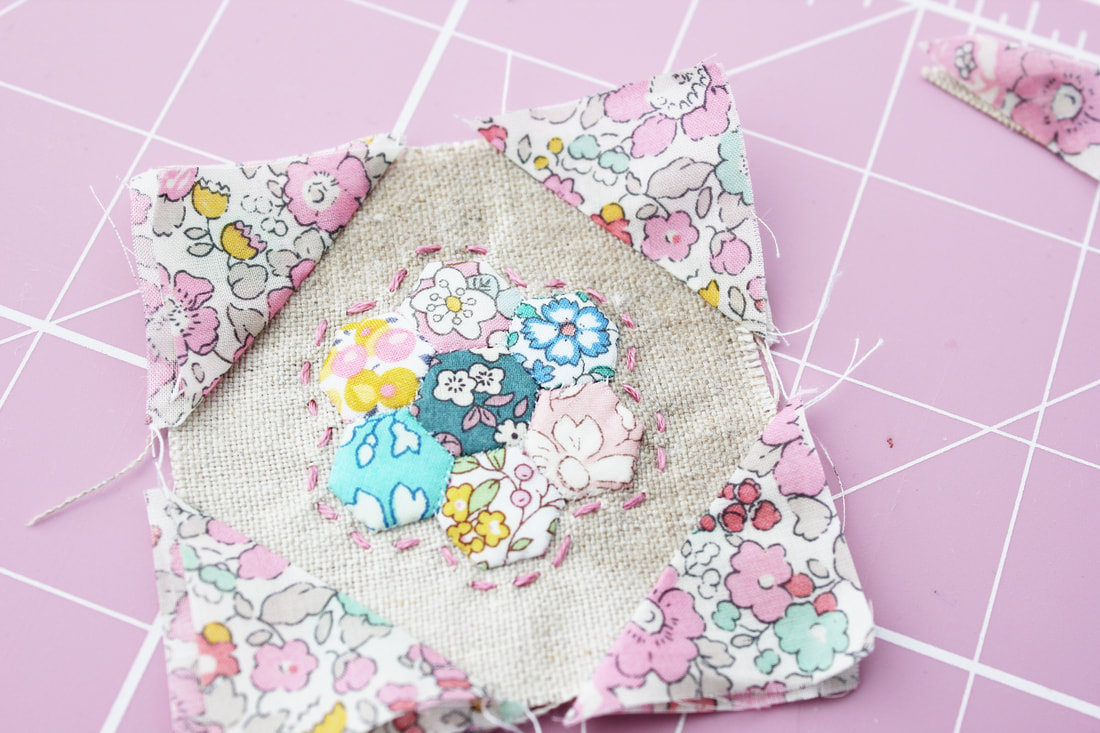 6. Using the little ruler, trim your block to make sure it is two and a half inches square. The two pictures below show before and after being trimmed, so it does make a difference. 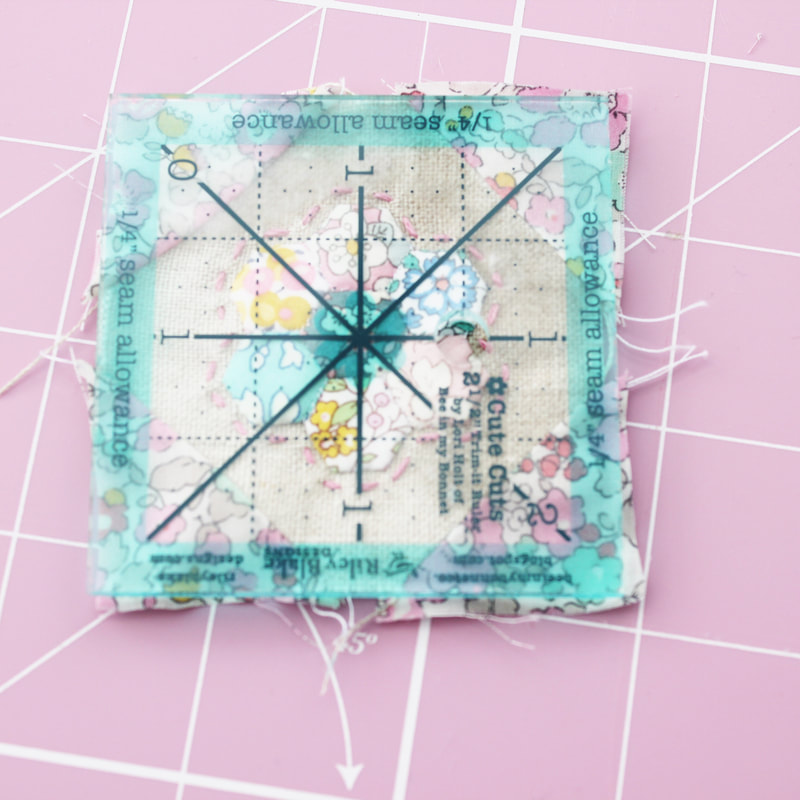 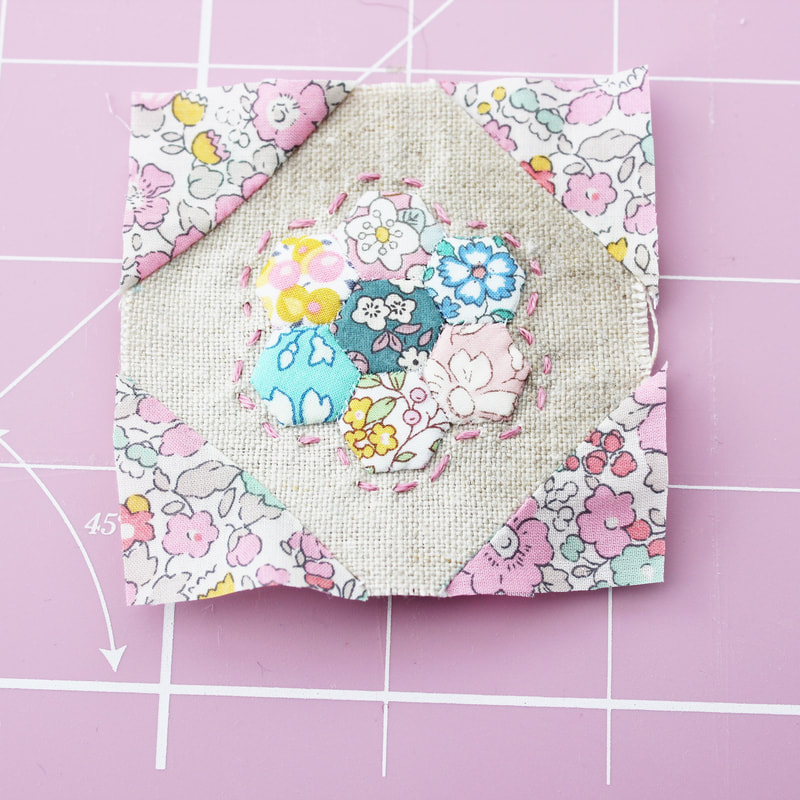 7. Now it's time to make the back. Take one of your rectangle pieces and fold over one of the long edges a quarter inch and finger press in place. Place it right sides together on top of one side of your pincushion top, making sure the folded edge in in the middle.  8. Stitch this in place along three sides, leaving the folded edge free. I started my stitching after the fold and finished it before the fold at the bottom. I used just less than a quarter inch seam allowance when sewing this together to allow for turning it right side out. Repeat for the other side with the other rectangle piece in exactly the same way.  9. Now gently turn your pincushion right side out. I used a wooden crochet hook to help push out the corners. Press with your iron.  10. Now it's time to stuff your pincushion. I used toy stuffing but you can use crushed walnuts for a really nice pincushion feel. Take care not to overfill it as this will make sewing up the opening tricky.  11. Now stitch the opening closed. I used a ladder stitch for this which is another reason why polyester thread is good for this project as when you pull the opening closed, your thread won't snap.  And that's it, your pincushion is complete! Such a fun little project and a great way to use teeny tiny scraps. 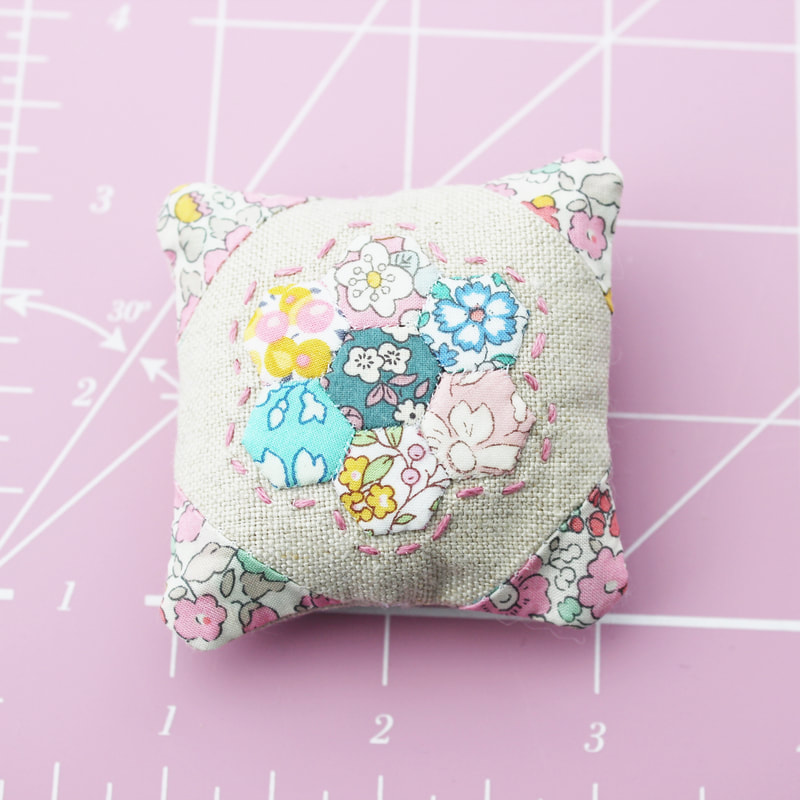 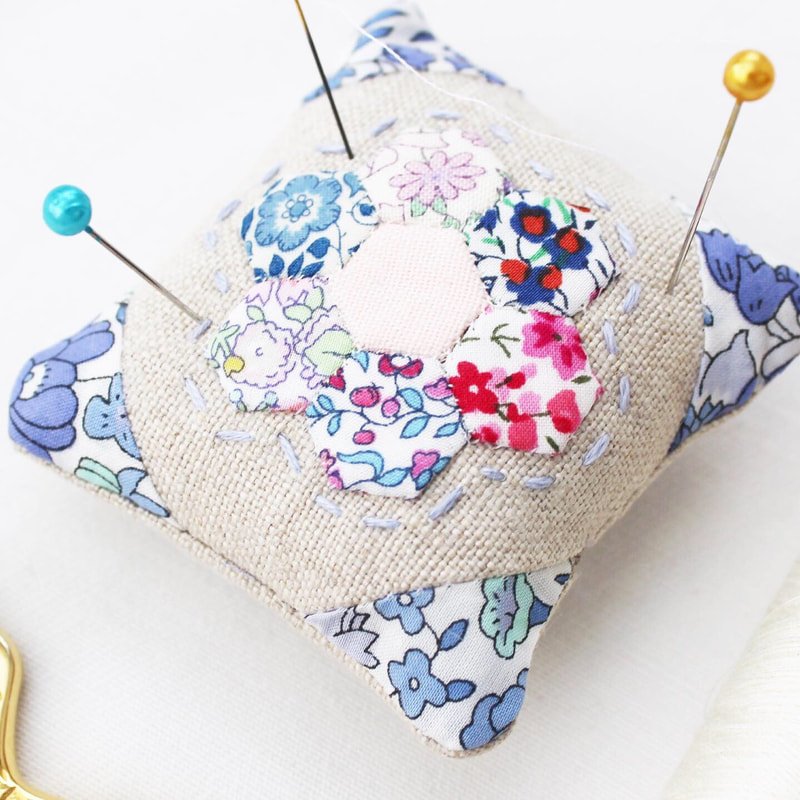 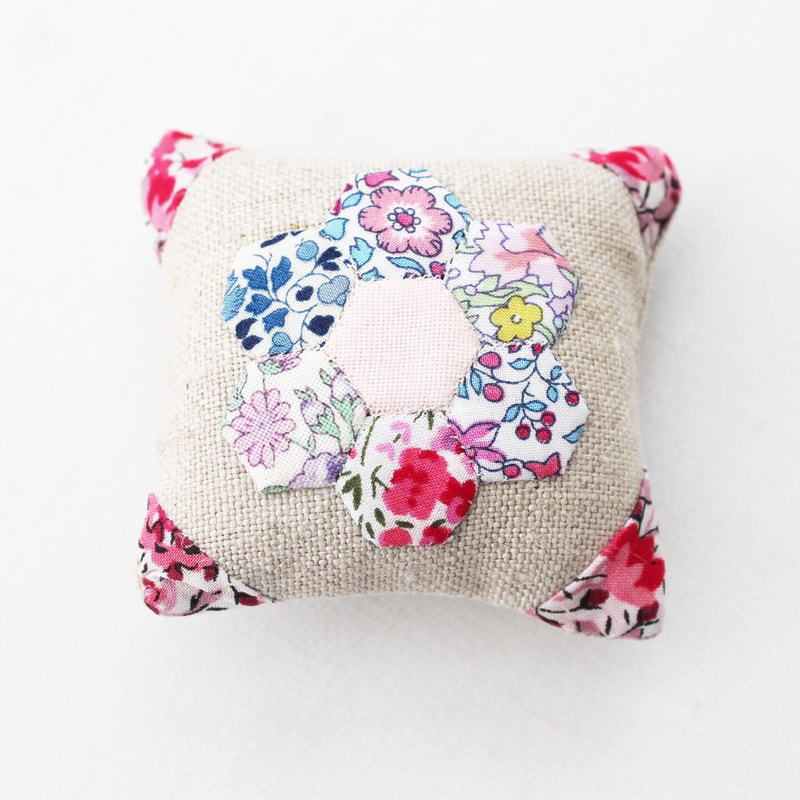 I hope you enjoyed this little tutorial and if you give it a try, I hope you love making your teeny tiny pincushion!
Happy sewing!
6 Comments
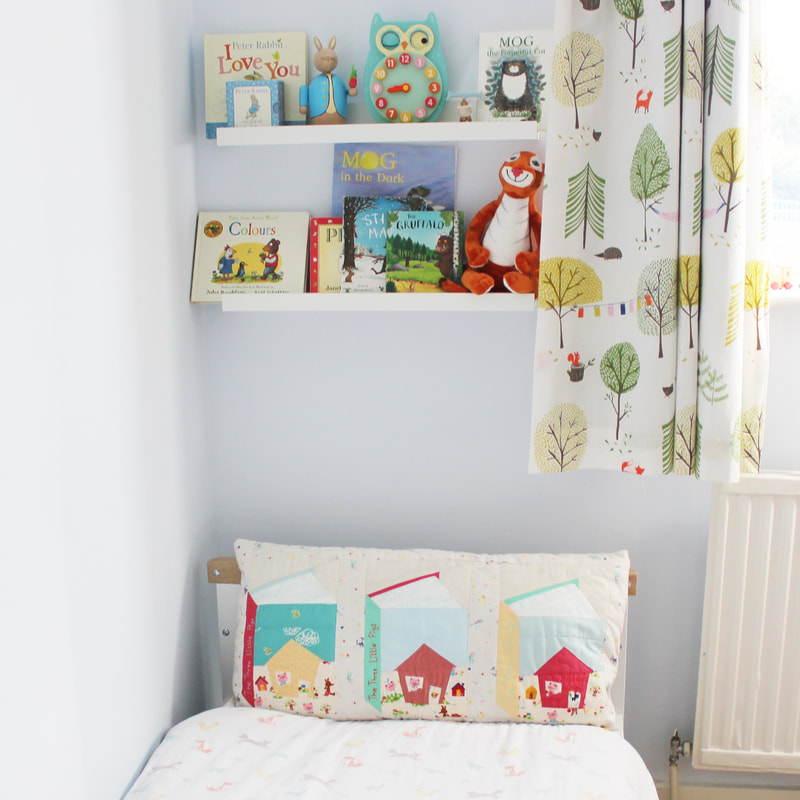 As a little change from the usual EPP topic of conversation around here, I'm going to share with you my finished FPP (foundation paper piecing) cushion. I started this as part of the Summer Book Club QAL run by Kate Basti using her Tall Tales book block pattern. When I began this project, I knew I was going to make a cushion/pillow rather than a quilt. Reading is one of my little boy's favourite things to do. I often find him in his room reading books to himself either sitting in his little armchair or lying in bed. It's hard for him to sit up in bed to read because there isn't anything comfortable to lean against, which brought me to the idea of making him a cushion and a book themed one would be perfect! After searching though my fabric stash and buying some story themed fabric to add to what I already had, I realised that my cushion needed a little something extra to make it really exciting. I had some Three Little Pigs fabric that I had bought about 10 years ago and that gave me the idea for incorporating The Wonky House pattern by Larisa who is @stitchingnotes on Instagram. It's such a cute pattern and I thought it would go perfectly with the books and I hoped that if I could get the sizing right then I could use the houses as the front covers. Well somehow I managed to pull it off! So it was my first attempt at FPP and even though it really isn't perfect, I really love this cushion.  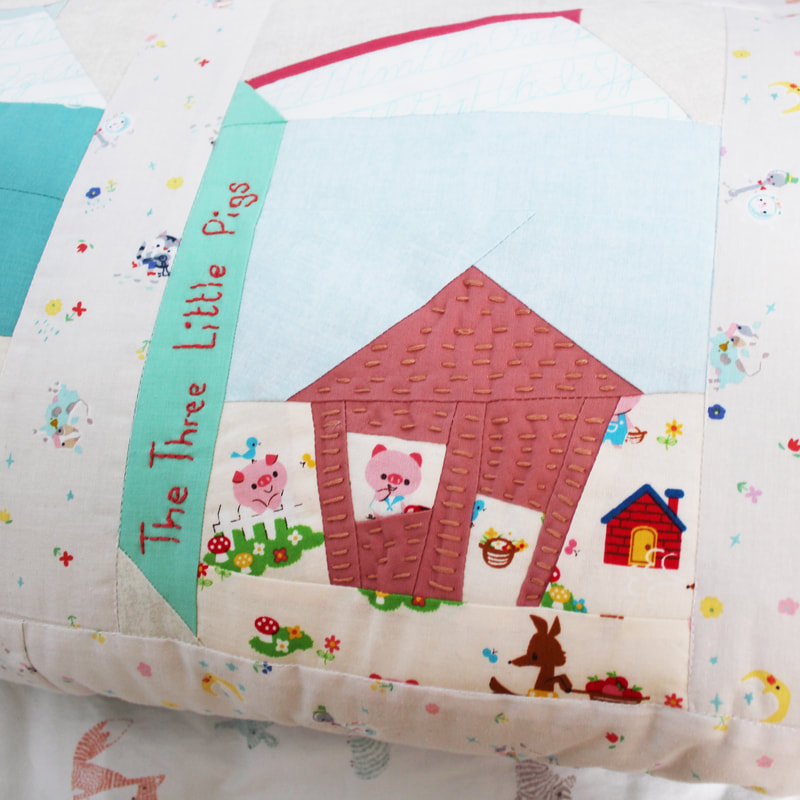 First of all it felt fantastic to actually finish something! Most of my projects are very much long term projects so I don't often experience the feeling of finishing something, and it feels nice! Secondly, the cushion is so soft and squishy and lovely to cuddle into. Once I'd pieced the front and back panels, I quilted them onto wadding by stitching with my machine in the ditch and adding hand quilting details. This gives it a lovely quilted effect and makes the cushion extra comfortable. I loved added the hand stitched details, I think that was my favourite part of making this cushion. There was something so soothing and relaxing about repetitively stitching into the quilted fabric, I loved it. Thirdly, I used some fabrics that were very special to me. I bought them many, many years ago in the hope of making a child of mine something special, and that has eventually come true and means so much to me. 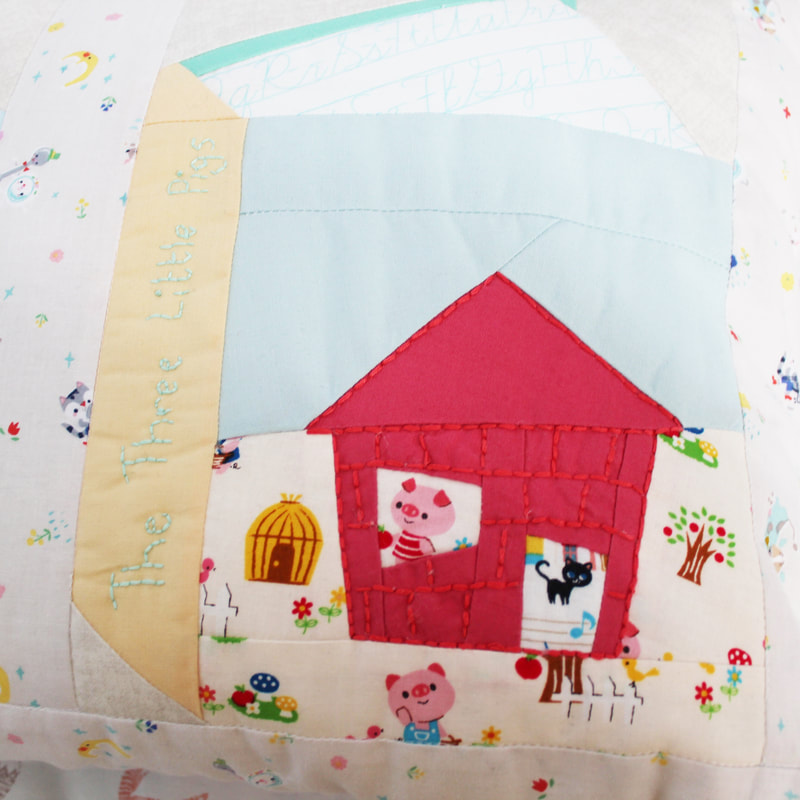 I will give this cushion to my little boy on his third birthday which is coming up very very soon! It's so incredibly important to me that I make things for him that he will love. He loves the story of the Three Little Pigs so I hope it will help him to retell the tale and I hope that beautiful illustrations on all of the fabrics I've used will be something he can use to help him develop his speech further. I remember being a similar age to him and having a dress that had a park scene printed on it. It was full of detail and I loved looking at it and imagining stories. I hope he does the same with his cushion. 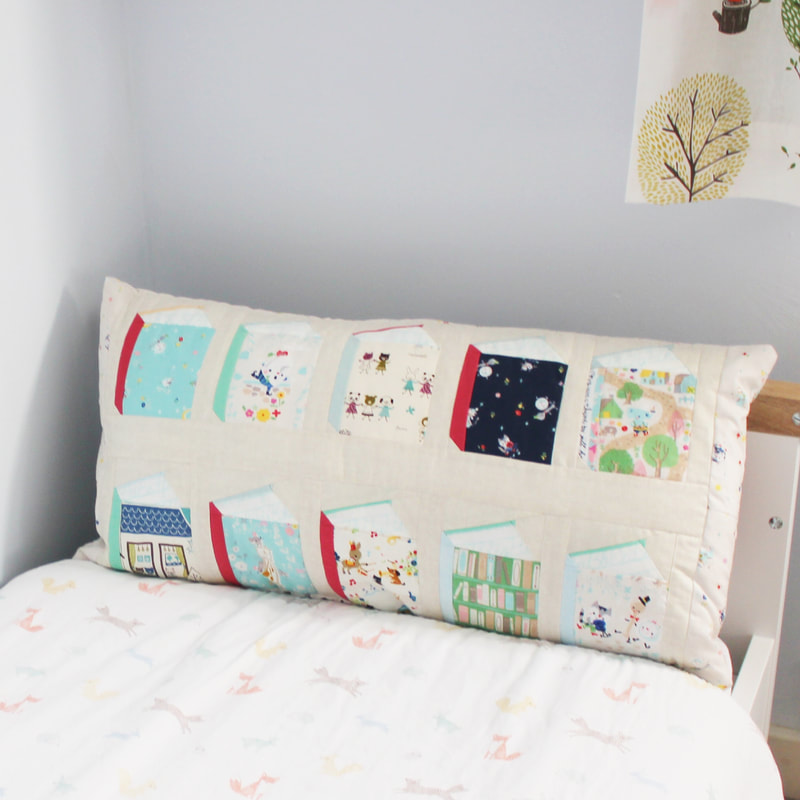 I really enjoyed FPP once I had got my head around the technique and I'm sure I will be trying it again. I think FPP is like magic! It's so fun how you can create images with your piecing, I can't wait to tackle some other patterns. If you are a beginner at FPP like me, I recommend both of the patterns I have mentioned here as they are definitely both achievable for beginners. I did have to use my seam ripper a few times but once I'd gained an understanding as to how to do FPP, it wasn't as tricky as I first thought. My piecing wasn't perfect but I am trying to embrace imperfections and learn from them for next time! And don't forget to check out this blog post of mine from a while back as it is full of useful hints and tips for FPP success! 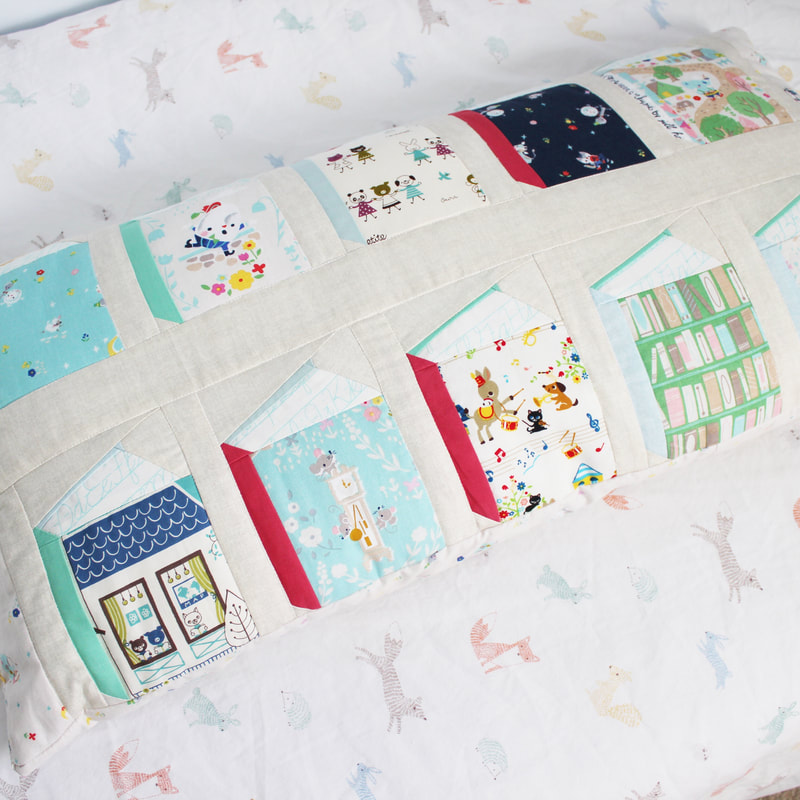 |
Follow me on InstagramAbout the Author
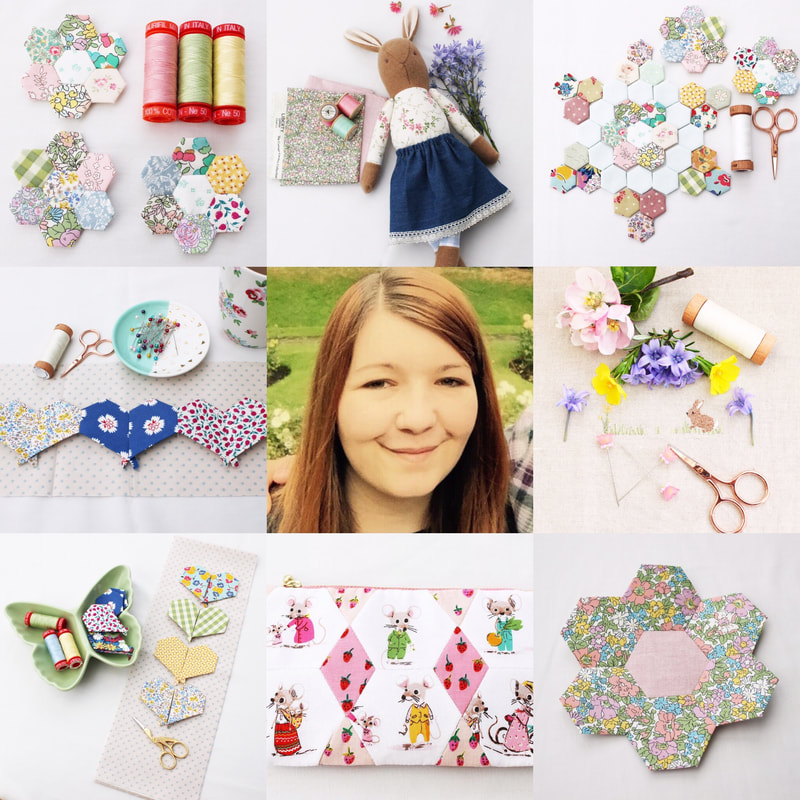
My name is Emma and I love all things sewing, especially EPP. My little blog is the place where I document what I'm making. I hope you enjoy reading what I'm up to! All opinions are my own and I only share things that I think you will love. Thank you for taking the time to stop by. Archives
September 2023
Categories
All
|
 RSS Feed
|
Copyright Vintage Sewing Box 2024
|
| ||||||