 Sew and Quilt Row by Row Block of the month As March draws to a close, I thought I would do a little round-up of the wonderful Slow Stitch Along that has been happening on Instagram. March hasn't really gone to plan due to the crisis we are all facing but so many wonderful makers have come together to share their love of slow stitching of all types on Instagram and it has been such an inspiring distraction from the world around us. I would like to thank everybody for their enthusiasm in taking part, it has been truly wonderful. There are currently over 730 posts on the hashtag which is amazing! 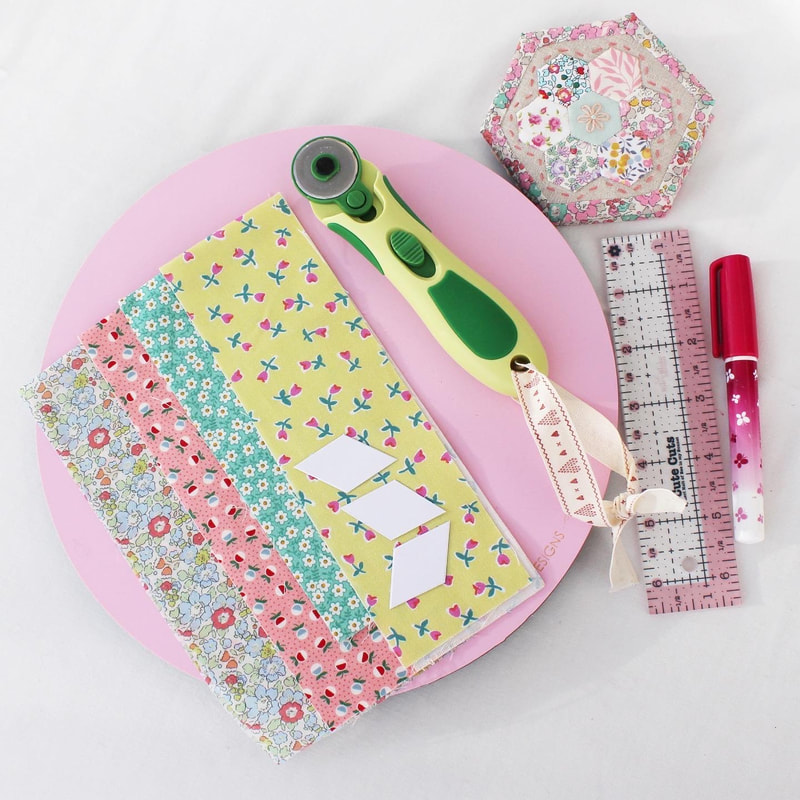 Zoe and I have decided to keep the hashtag going as we know how much slow stitching is helping everyone deal with difficulties we are facing, and it is helping us too. There's such a wonderful community there and we would love to continue that so if you'd like to carry on with us then share your slow stitch project at any time and tag us so we can see. I've also been doing a live virtual stitch group on Instagram at 9pm uk time on Friday evenings and it has been so much fun. I've decided to make this a regular thing so please join me if you can as it is a lovely way for us all to connect and share our passion for sewing. 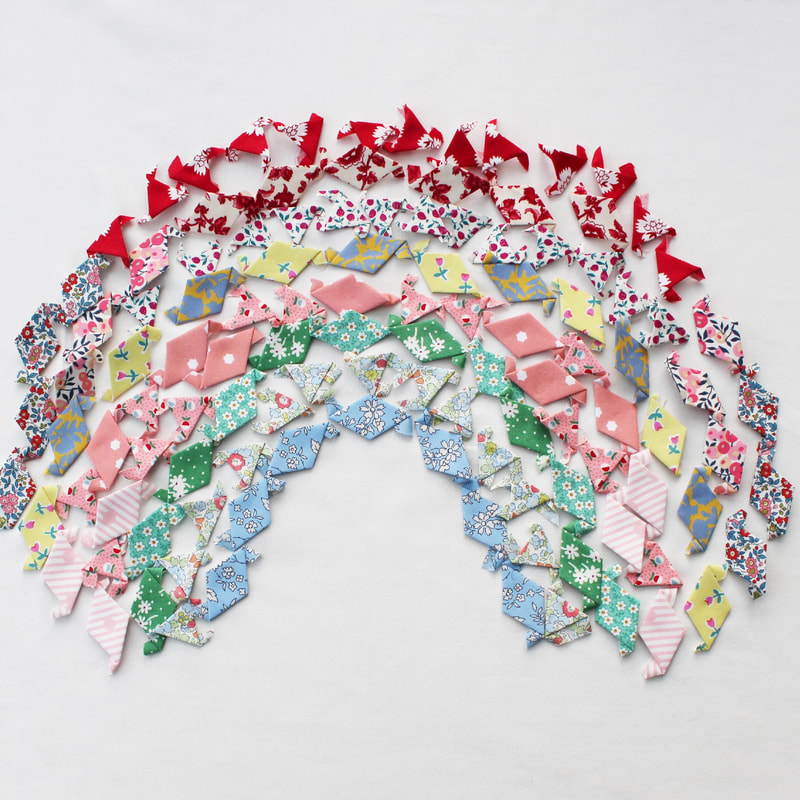 I didn't quite make as much progress as I wanted to on my quilt, but I have progressed and I am pleased that I am getting closer to completing it. I have one full row to do, another to finish off and a couple to appliqué to the backing fabric, so I am getting there. 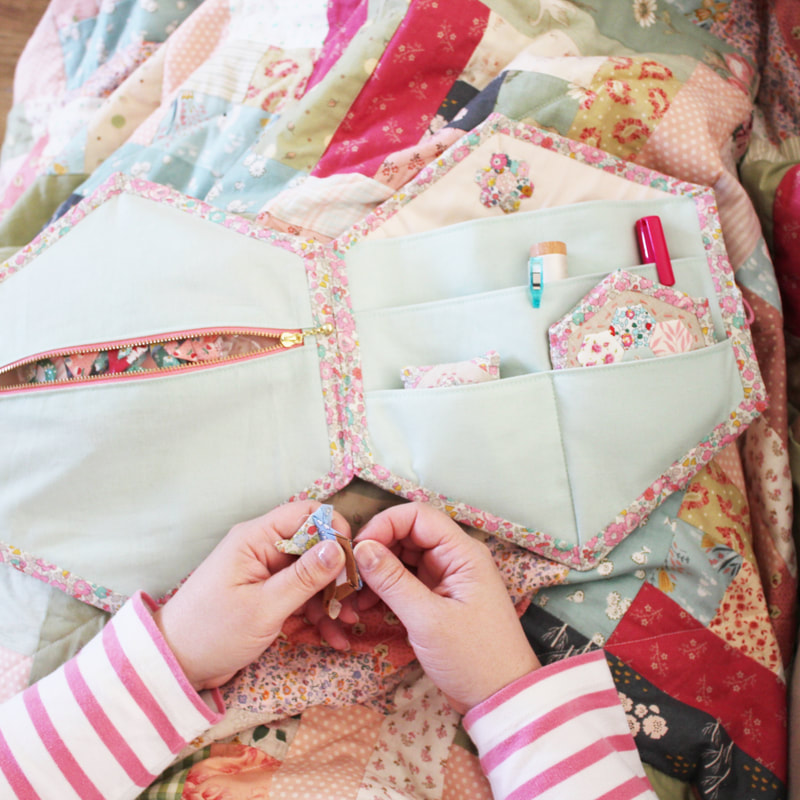 I'd just like to say thank you again for joining in with the slow stitch along and if you haven't been able to join remember that you can join in any time. If you aren't on Instagram, you can still view the posts on the hashtag.
0 Comments
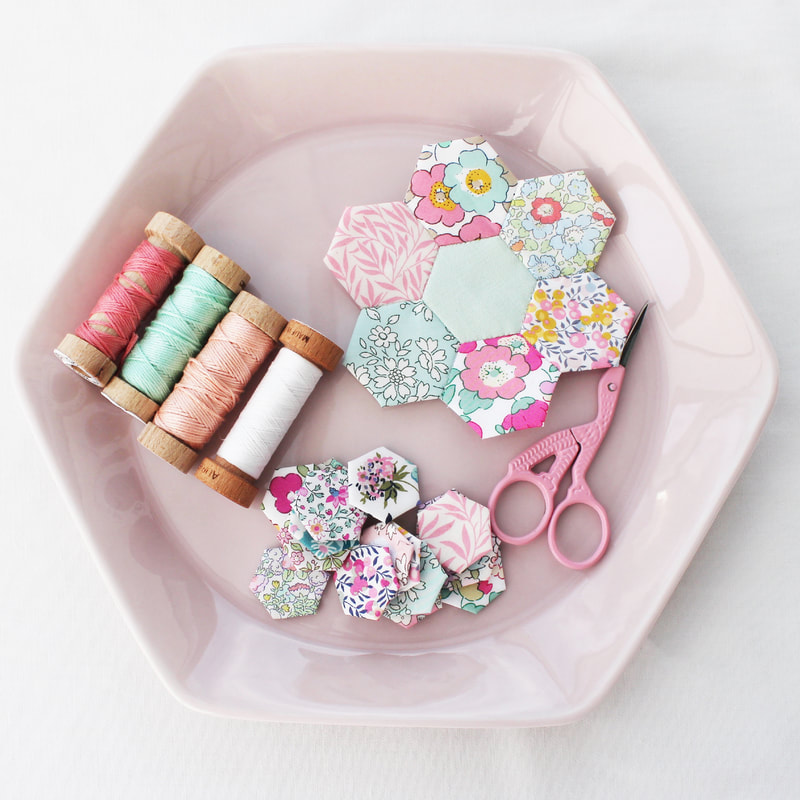 Hello lovely friends. It seems that the world has changed dramatically since my last blog post which was only a couple of weeks ago. So I thought I'd pop on here just to let you know what my plans are for my blog and little shop going forward. First of all, thank you to everyone who bought the Hexagon Sewing Case pattern or if you bought a kit. I was blown away by the response I had to this and I can't express in words how grateful I am for the support I've received. I know there were some people who wanted a kit but missed out and I'm so sorry about that. I was planning to make a few more but with the current situation as it is, I won't be going to the post office. So for now, just the PDF pattern will be available.  I have lots of plans for things I want to do such as free patterns and videos and maybe even going live on Instagram to sew together! I'm hoping the current situation we find ourselves in will allow me the time to create these. I very much want my blog, website and Instagram to be a positive place where we can escape into a world of sewing to relax and detach from the stressful situation around us. So that will be my primary focus going forward. The previous plans I had for this year in terms of in person workshops are unlikely to go ahead now. 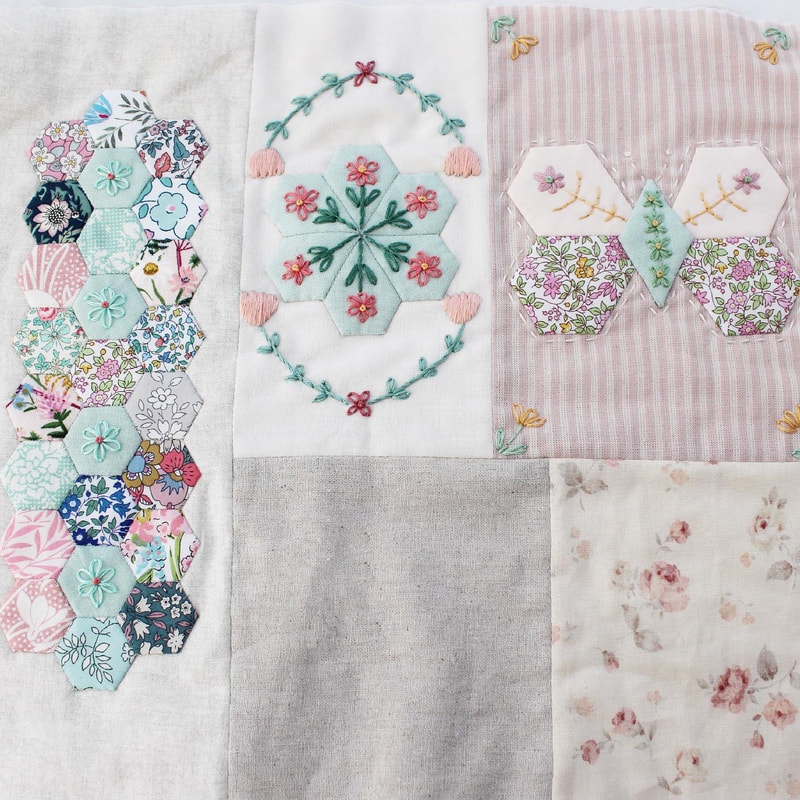 Since I started this website, I've always had a contact form on the website homepage just in case anybody would like to get in touch. Thank you to everyone who has used that and asked me to send them emails. I've had a big think and I've decided to create 'lovely letters' each month that will be delivered to your inbox. I'm excited to start this and I hope you all love them. If you'd like to sign up then please head to the homepage and leave your details. I'm hoping my first proper email will go out this week. 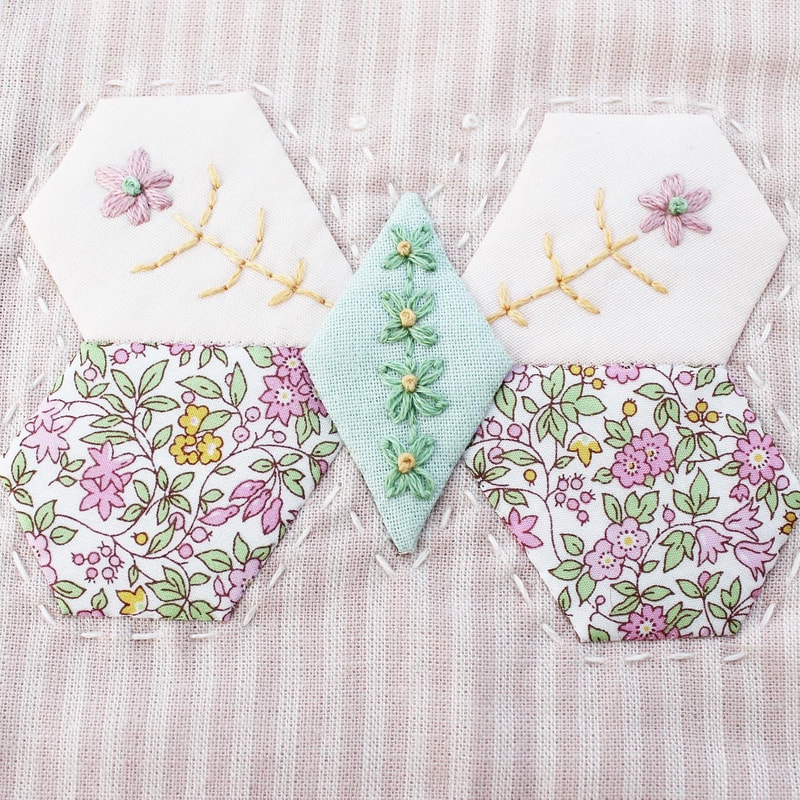 I must admit that I've felt frozen over the last two weeks and I haven't done much stitching at all. I know sewing helps me so much through times of anxiety but there are also those times when things feel so difficult everything grinds to a halt. I wish that wasn't happening to me now, particularly during the Slow Stitch Along. I'd like to say a massive thank you to everyone who has been keeping it going whilst I've felt like I've been absent from it (although I've read every single post). This is due to a series of things happening all at the same time which has completely thrown me. I'm hoping that once my little boy is better I will feel more focused to sew and share again and I am excited to work on the things I've mentioned above too.
Look after yourselves during this time and I hope that together we can support each other in this wonderful and creative online community. I'm so excited to tell you that the Hexagon Sewing Case PDF pattern is finally ready and in my shop! It's taken me a long time to get it ready because I wanted to make sure it was the absolute best it can be. Thank you so much to Zena @mycreativepottylife, Sarah @sarah.costello.10 and Jen @jenthepiecemaker for testing it for me. They are such wonderful makers and helped me so much. I am so grateful to you for giving up your precious time to help me with this, I honestly cannot thank you enough. 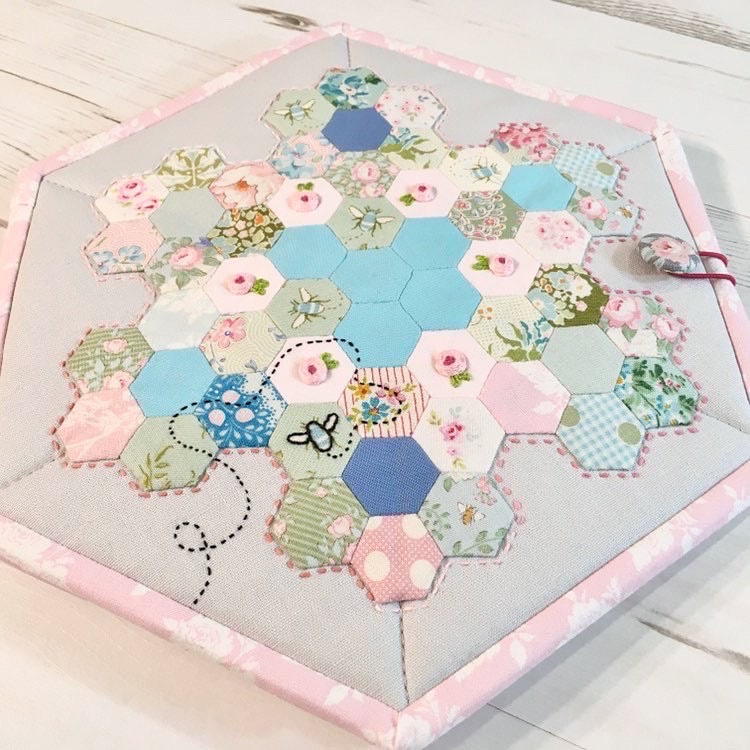 Made By Zena @mycreativepottylife 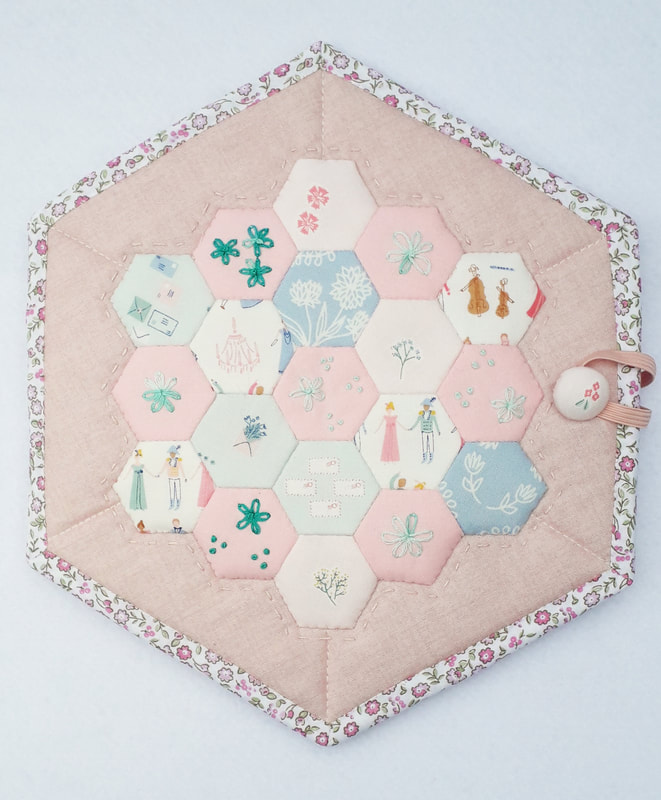 Made by Sarah @Sarah.costello.10 I'm also really excited to tell you I have teamed up with Ashmead Designs who produce the fantastic Hexiform shapes I love to use, and Rose Garden Patchwork who I buy wonderful zips from (she also sells amazing fabrics and notions) to create some supplies kits for the case. In these kits there will be:
The idea behind the kit is to make it easy for you to get started on your case and to have all of the supplies in one place, rather than having to source them from different places.
It also gives you an opportunity to try the wonderful hexiform EPP shapes from Ashmead Designs. Kits will be available to buy from Monday 2nd March 2020.
Thank you so much and have a great day!x 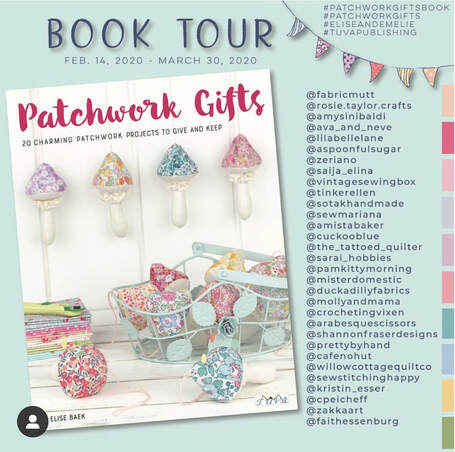 When Elise Baek asked me if I would like to be part of the book tour for her soon to be released Patchwork Gifts book, I was absolutely delighted! I've never been asked to be part of something like this before, what an honour! I've been following Elise for about a year on Instagram and her work is wonderful. Her designs are fresh and exciting, she uses beautiful fabrics and she is really inspiring, so I knew her book would be fabulous, and I was right! 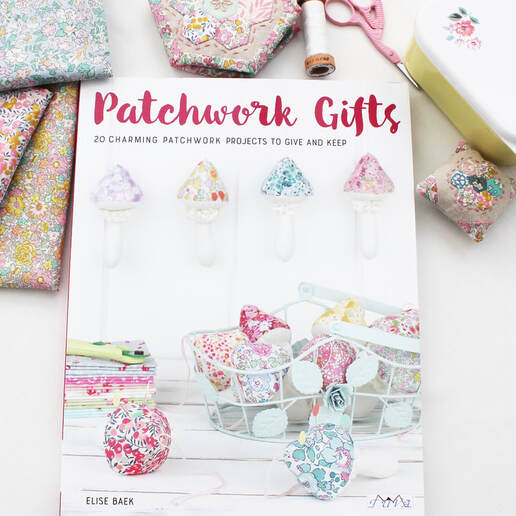 On receiving my copy of the book, I quickly opened it as I couldn't wait to see the projects inside. They are all wonderful and it was so hard to narrow it down to one. I love the Double Wedding Ring Table Topper as I've been wanting to make one for so long. But I decided on the Meadow Mini Quilt. I fell in love with this design as soon as I saw it because I knew it would be perfect for the many Liberty prints I have. Also, I want to give this as a gift to someone special and I knew that person would love this. It also speaks to my love of tiny EPP so it was clearly the right project for me!  I enjoyed every stitch of working on this project. I really took my time over it, doing a little bit each day. I think the finished result is joyful, bright, cheerful and makes me think of Spring. 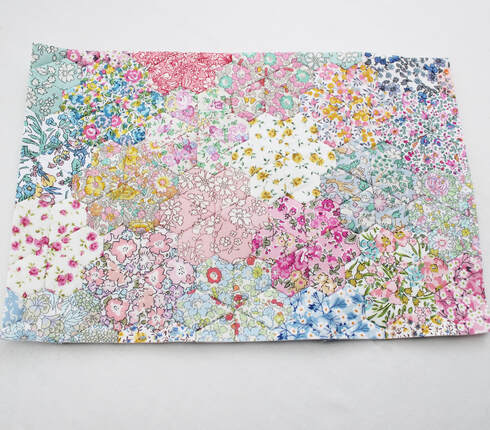 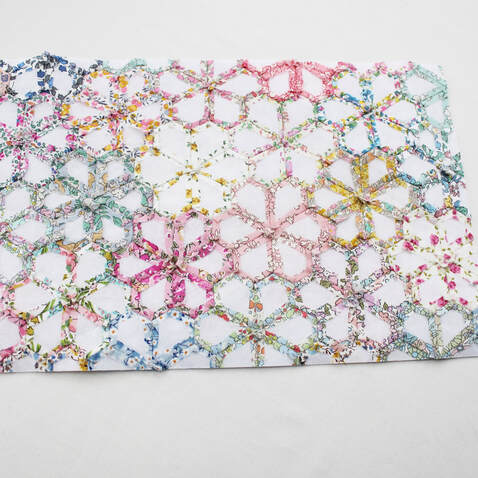 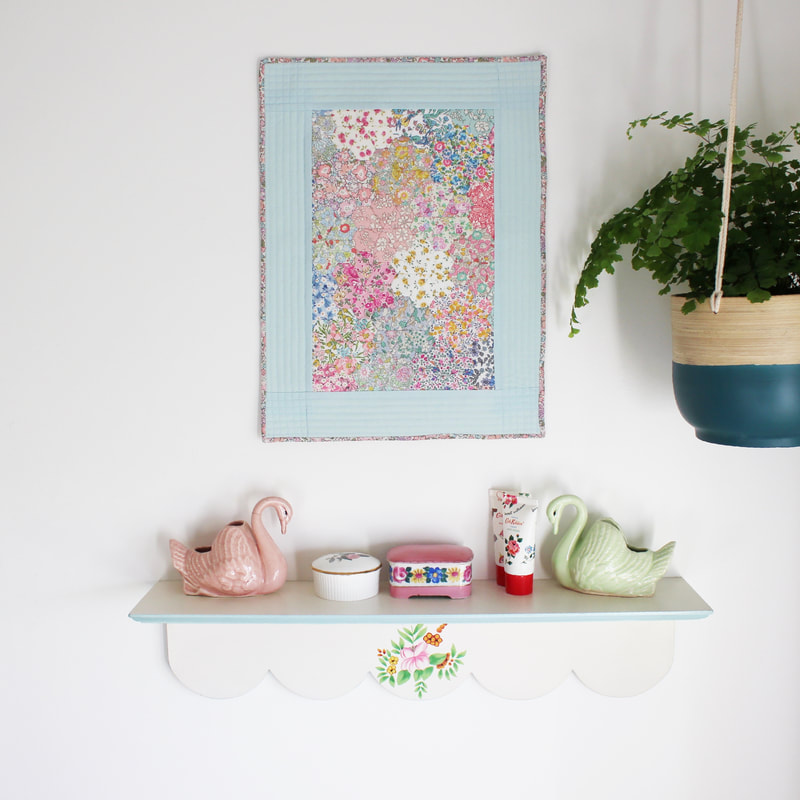 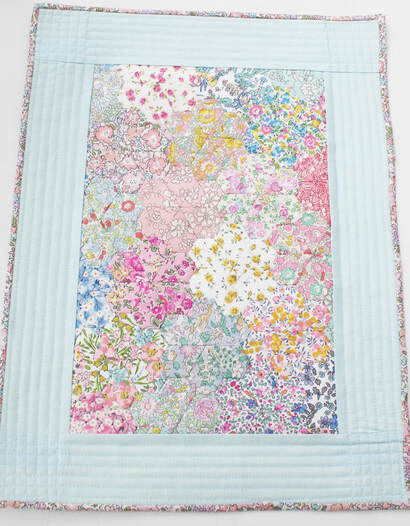 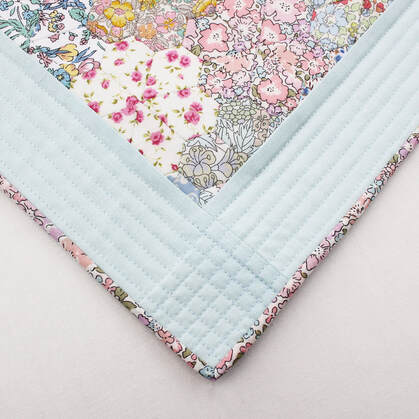 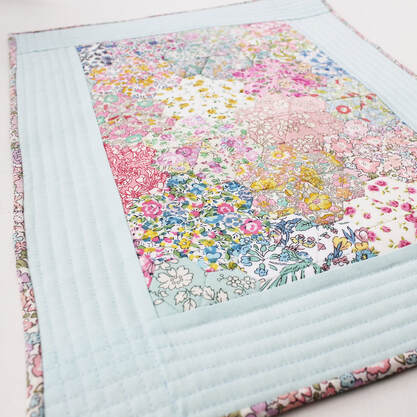 If you are thinking of buying this book, I really recommend it. The projects are so lovely and very well explained. I know this won't be the last thing I make from this book, as well as the double wedding, I have my eye on the toadstool pincushion and the kite lavender sachets. I hope my version of the Meadow mini quilt did justice to the original. Thank you to Elise for letting me be part of this book tour, it really has been an honour and the highlight of 2020 so far for me. Make sure you check out the rest of the people on the book tour, every single one is a fantastic maker and it is so inspiring to see what they make. Elise is also running a really fun bingo competition so head over to her Instagram and be sure to follow the hashtag #patchworkgiftsbook.
 Just sharing some photos of another needle book I made as a gift for a friend just before Christmas and I think this one might be my favourite so far! I love the blues and greens and the Betsy Ann print I used for the edge/inside is one of my favourite ever prints. 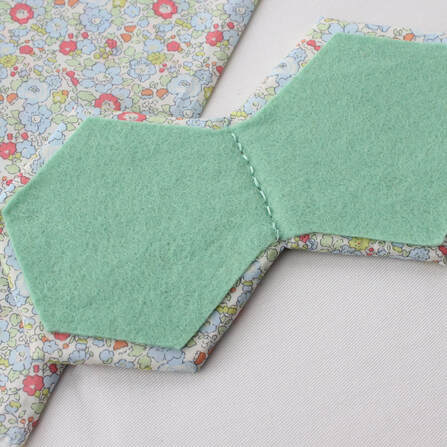 If you'd like to make one too, I have a tutorial that you can follow here. It's a lovely project as it is all made by hand and there's something really nice about that I think. 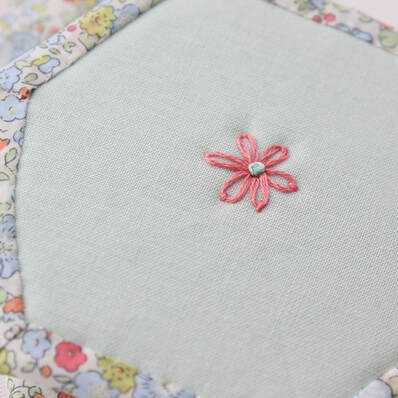 I love adding little embroidered details like this lazy daisy stitch, I think they are sweet and add a lovely touch. 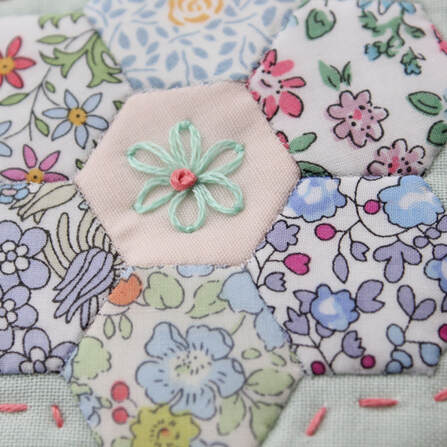 I've made myself two of these needle books and I wish I needed more as they are so enjoyable to make! Thank you to everyone who has tried my tutorial and made their own already! It really does make me so happy to see your versions. So if you make one too, please share it with me either here or on Instagram as I would love to see.
Happy sewing! 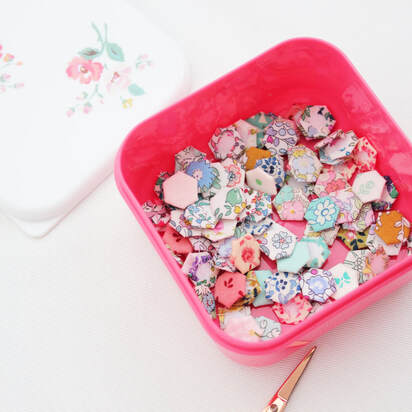 Happy New Year! I hope you all had a wonderful festive period and I wish you all health and happiness for the coming year ahead. What better way to start the year than with a new project! I've been thinking for a long time about making a quarter inch hexagon wall hanging and I decided over Christmas that it was now or never. If I don't start it this year, I never will. So I set to work gathering scraps and basting my tiny hexies ready to start. If you are anything like me, you like to know the details behind projects so I thought I'd share with you why I want to make this quilt, my inspiration and my method, just in case you'd like to join me with your own quarter inch hexie project. I know quarter inch hexies aren't for everyone but already one lovely person has asked to join me and I'd love it if more people would like to join in too. 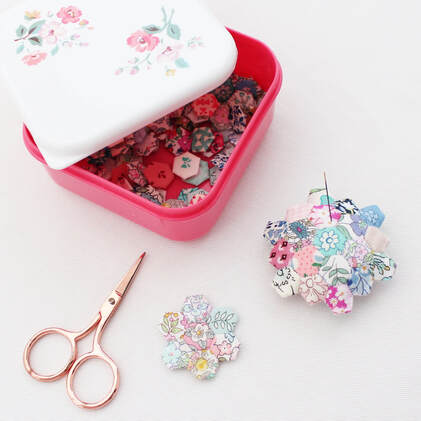 I've wanted to make a large piece from tiny quarter inch hexagons ever since I saw Miss Leela's Wedding Medallion Quilt. Please click the link and check it out as it is amazing! I've also compiled a Pinterest board with some ideas and inspiration from other quarter inch projects I've seen. I don't know the layout of my piece yet but I will use these designs as a guide to get me started. 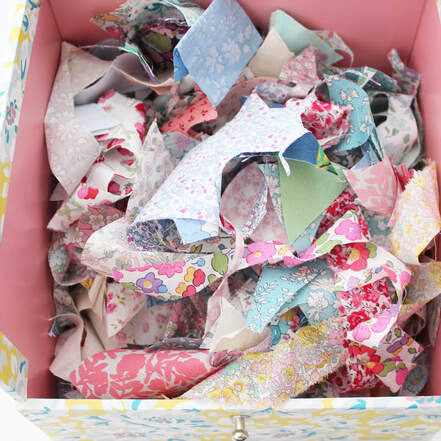 There's a little bit more to making this piece than just wanting to though. Firstly, it will be predominantly made from scrap fabric. I am conscious of the effect the textile industry has on the environment and I strongly believe in making sure the fabrics we do buy are carefully considered purchases and are not wasted in any way. So this project will use floral fabric scraps left over from my other sewing projects in addition to some solid coloured fabrics that I have purchased specifically for this piece. As I am making quarter inch hexagons, even the tiniest of pieces can be used so this is a great way to use up scraps. 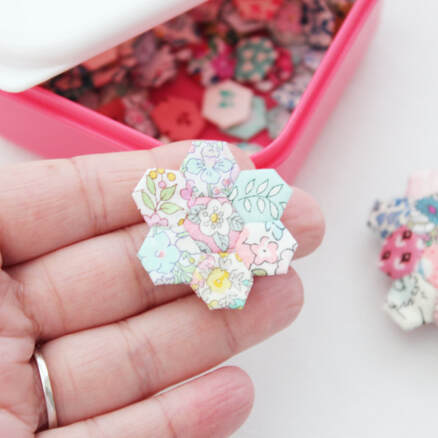 Sewing has always been a sort of therapy for me. It allows my mind to be calm and the rhythm of stitching helps me to relax and reduces my stress levels. I've recently struggled again with low mood and feelings of anxiety and worry. I want this project to be the one that I turn to to help me through those feelings and to provide relief from them. Nature has always had a positive effect on my well being and so I plan to fussy cut tiny flowers for many of the hexagons. I know that seeing these tiny blossoms will lift my spirits and will also remind me to focus on the small things in life that can bring us joy. I hope that by thinking in this way, I can feel better. Only time will tell but I will be sure to let you know how it goes and if it does work. 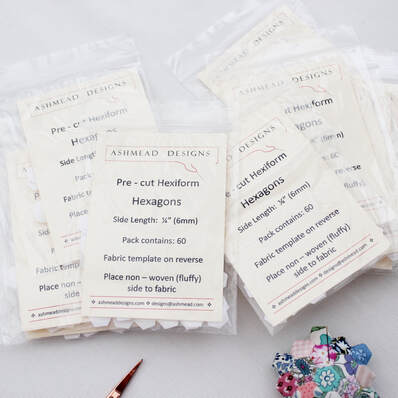 Staying true to myself, I will be making this quilt up as I go along, it seems to be the way I do everything these days! I will be using Hexiform shapes from Ashmead Designs and I'm buying them bit by bit as I think I will need 1000s! I love the Hexiform because you don't need to remove it at the end as you do with papers. It acts as a layer of wadding/batting and it gives a lovely structure to the piece. 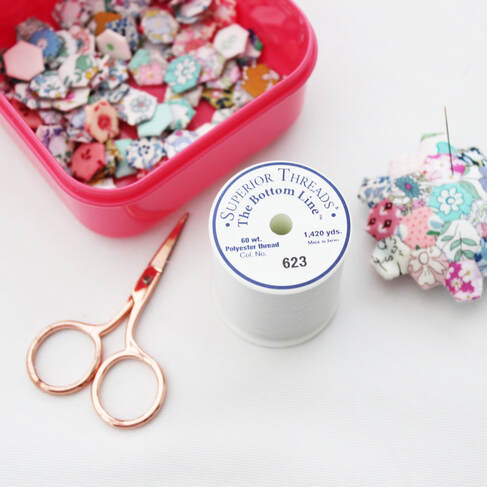 I'm using Superior Threads Bottom Line Thread in colour 623 because it blends really well with most colours of fabric. As it's polyester, it is really strong and I need to use a strong thread as I've decide to sew the hexagons together using a ladder stitch rather than the usual whip stitch. When working with such small hexagons, I was finding that my stitches looked really big when I whip stitched, no matter what thread or needle I used. Ladder stitch definitely takes me longer than whip stitching at the moment, and it feels like I'm learning from the beginning all over again. But hopefully I will find my rhythm with it and when I do, I will post some video tutorials on Instagram just in case there's anybody who would like to see. 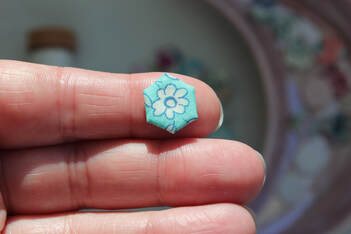 I don't really have a name for this project yet, but I'm sure one will come to me in time. For now I'm calling it the tiny hexie project! I'm hoping I can spend about 45 minutes a day on it most days and if you want to follow my progress, I will probably show where I'm up to once a week on Instagram.
If you fancy joining me with your own quarter inch hexie project or similar, let me know! It will be fun to stitch along together. Happy sewing! 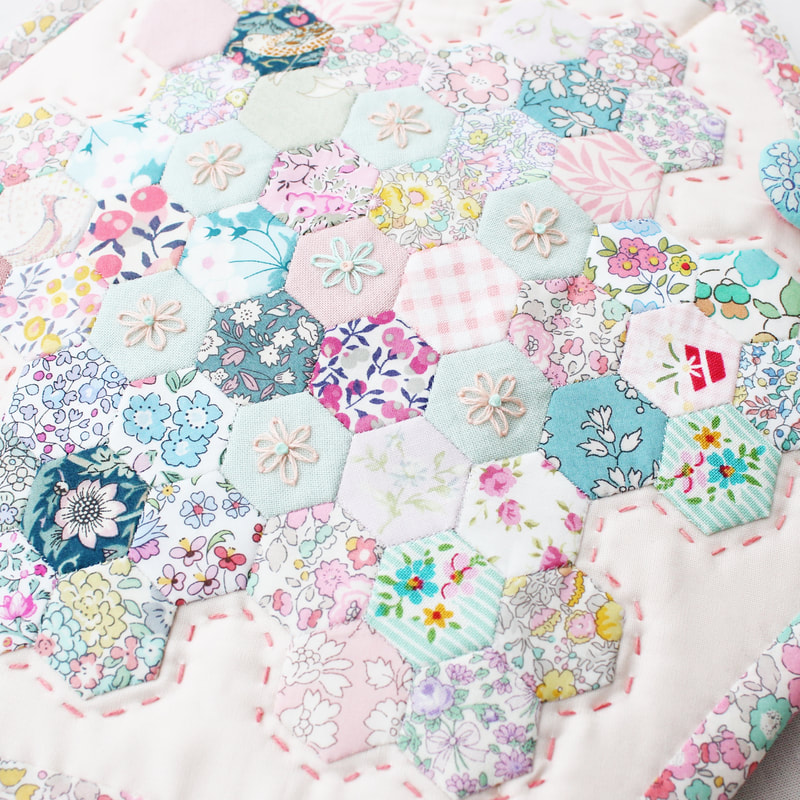 I thought it would be nice to look back over 2019 and tell you a little bit about my journey as it’s been quite an exciting year! At the end of February I decided to start consistently blogging here and to share what I was up to more regularly on Instagram. I’ve always wanted to share more online but I’ve always been afraid. This year I told myself to be braver and I have really pushed myself to do so.  I'm naturally a quiet person. I don’t like to make a fuss and I really am quite shy. I’ve been longing to share my passion with likeminded people and I knew the only way I could do that was to show up and speak out about my sewing so that’s what I did! I can honestly say it has changed my life. Through being more active online, I’ve met so many inspiring and creative people and a whole world of sewing and community has opened up to me. It’s such a joy to switch on my phone and see the incredible things that people are making and the wonderful friendships that are blossoming. Anybody who thinks social media is a negative thing only needs to look to the sewing and quilting community to see just how supportive it is. 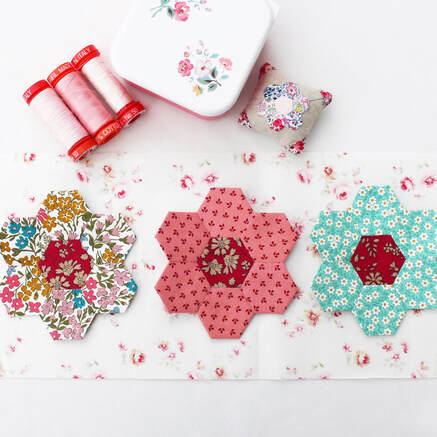 It’s in my nature to constantly doubt myself and to think I’m not good enough. I know that without the support of this community, I would have stopped sharing online a long time ago. I can’t really express just how grateful I am for the amazing comments I've received on this blog and on my Instagram page. If it wasn’t for all of you, cheering me on, I wouldn’t feel as positive as I do today. 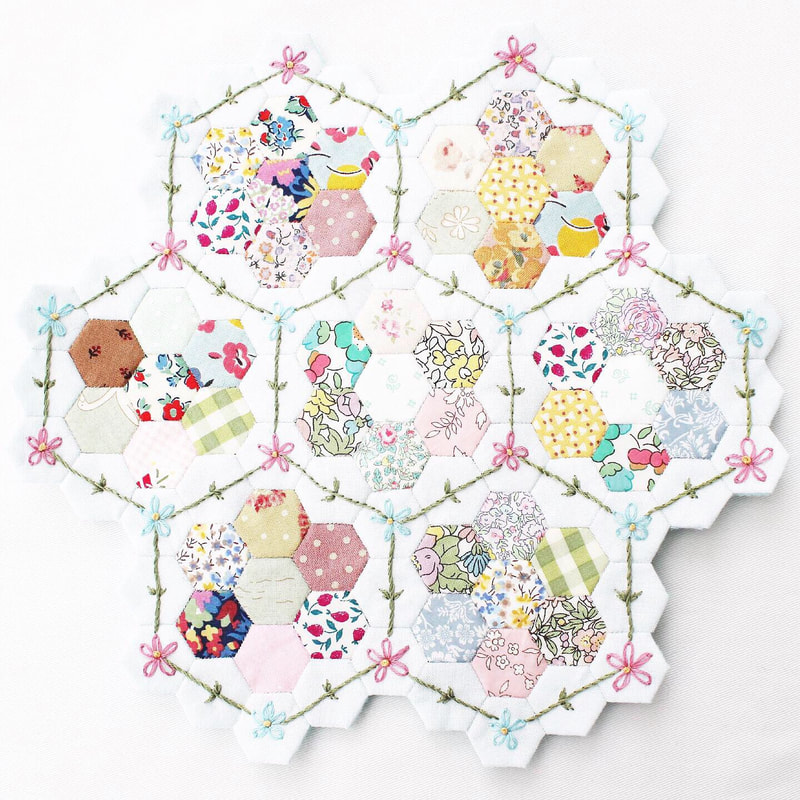 This year has seen my work featured by a blog that I’ve always loved and that really was a highlight for me, along with exhibiting my work in a local art gallery. But the friendships and community aspect of sharing online has really changed my life for the better. I wish there was a way I could give back to everyone who has supported me, as a way to show just how appreciated it is. I hope this blog post is a small gesture towards showing my gratitude.  In terms of my making, I can see a vast improvement in my sewing and this is definitely due to the increased volume of stitching I'm doing. I sew almost every day and next year I am really going to make sure stitching is part of my daily routine as it is beneficial for my wellbeing. My aim for this year was to finish my Sew and Quilt Row by Row block of the month quilt and to finish my log cabin quilt, neither of which have been completed! I think the log cabin quilt can be completed in a few hours and my Row by Row quilt has a lot of work left to do on it but that's great because I absolutely love working on it. Hopefully it will be completed next year. 2019 has been the year of EPP for me and I have days where I cannot stop dreaming up ideas for designs and patterns that I want to create. I have managed to create some free patterns for my website and it has been so exciting to see other people make their own versions of my patterns. I cannot tell you how happy I am when somebody posts something they've made from my tutorial or pattern on Instagram, it really is the best thing ever. I hope to design more patterns next year. Looking forward, I have some exciting plans for next year. First of all, I am planning to record good quality video tutorials explaining and showing my process when it comes to English Paper Piecing, in great detail. This is something that has been requested many times and I hope it will be another way I can give back. I also plan to release a full sewing pattern for my hexagon sewing case which I’m super excited about! This will of course depend on being able to find somebody to test the pattern first but watch this space! I’m currently collaborating with an Instagram friend on some exciting plans we have for a stitch along. When all of the details are finalised I will be sure to let you know all about it. I also have lots of fun ideas for projects I want to make next year, none of which are finalised yet but I think there will be lots more tiny stitching to come from me. 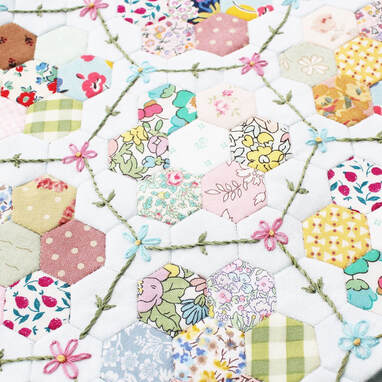 The final thing I have in the works for next year is quite exciting but also nerve wracking for me too! I am in the process of setting up an in person, in real life, EPP workshop! I am super passionate about EPP as you know, and there are lots of people out there who I know would love to learn. I want to spread the joy of EPP and hopefully show others just how beneficial it is to mental health and wellbeing as well as being so fun. I have a lovely location for us to work in and a very pretty project planned. I'm just waiting for dates to be finalised and then I can reveal all of the details. I'm really excited about the prospect of meeting people in real life, stitching together and sharing the joy of EPP. So if you are in northern England and think this would be something you'd like to do, keep your eye on my Instagram page and my blog and soon enough I will be able to tell you all of the details.
I'd like to thank every single one of your again for the support you've given me, it really does mean so so much to me. Wishing you a very happy rest of 2019 however you celebrate it and I will be back here soon to tell you about the Stitchalong we have planned! 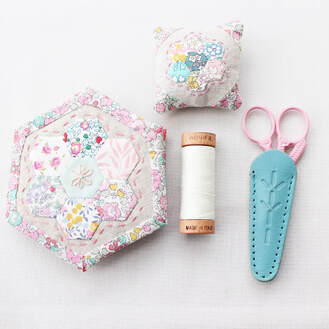 These little needle books are so lovely to make. I made mine completely by hand but you could use a sewing machine for some aspects of it if you wanted to. I'd been wanting to make a hexagon shaped needle book/sewing case for a long time but couldn't find a way to make it that I liked. When I saw Naglaa's tutorial on her Instagram page for quilt as you go hexies, I suddenly thought about using it to make needle books. So please check out her tutorial as it will help you in making your needle book.
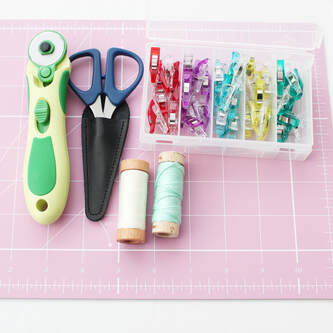
To make a needle book you will need:
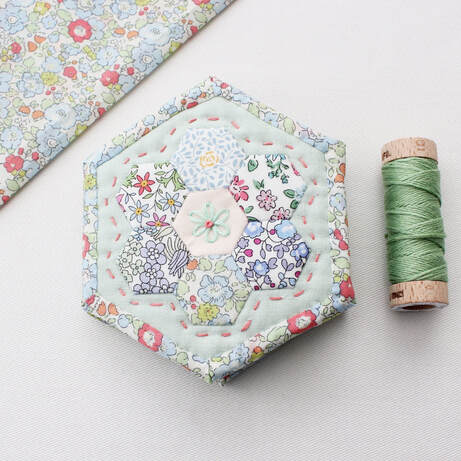
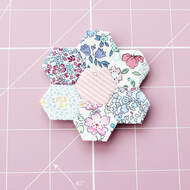 Half inch hexagon flower
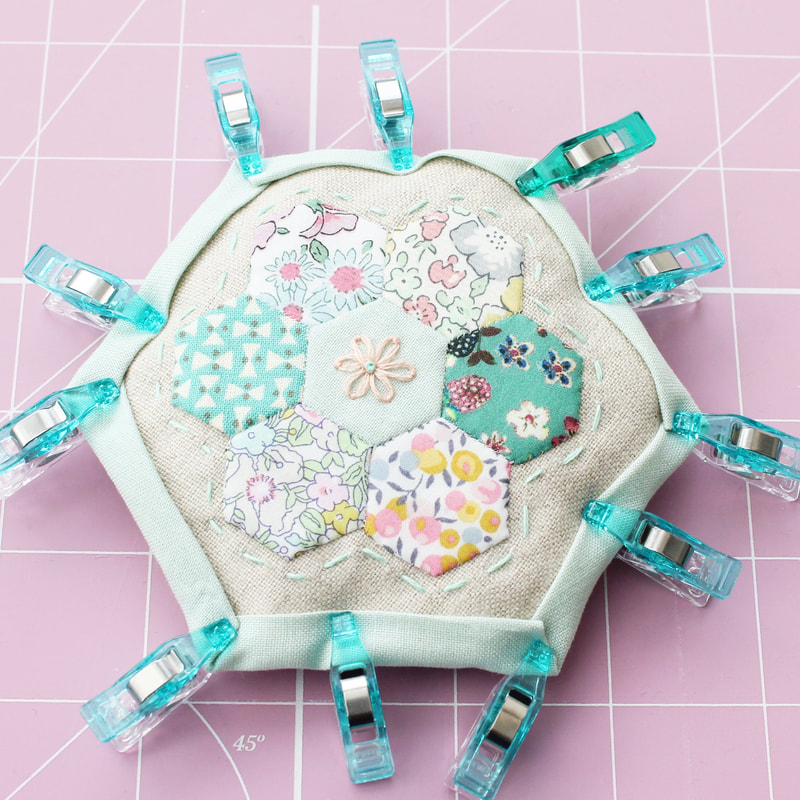
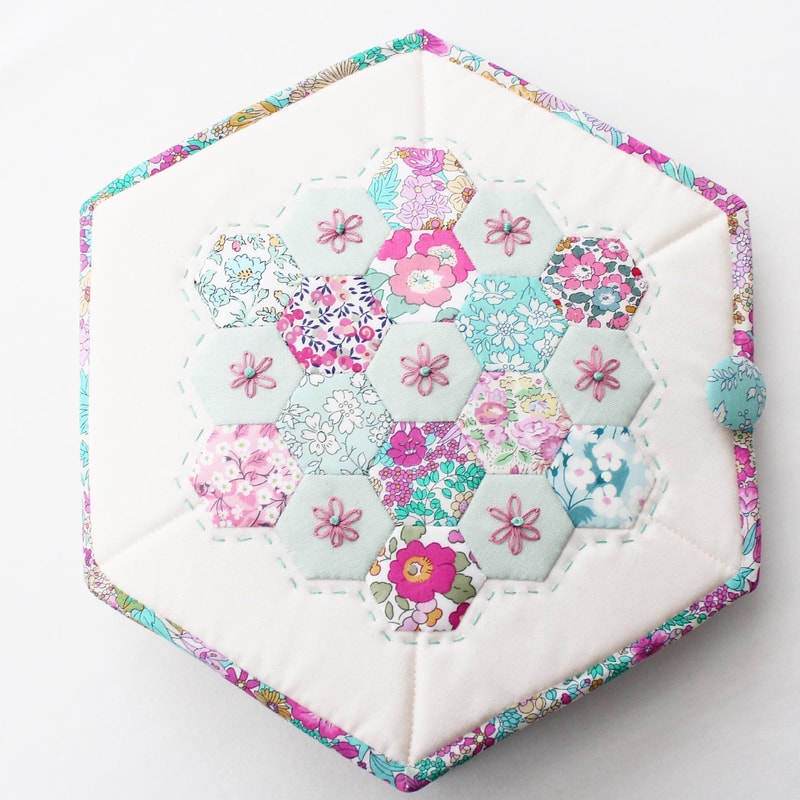
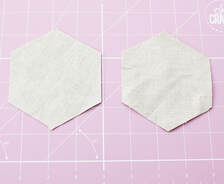
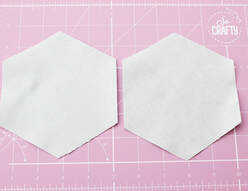
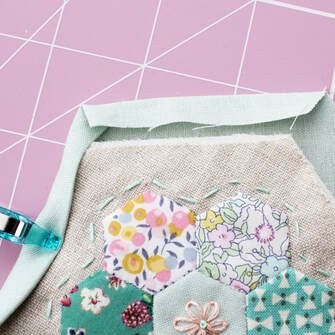
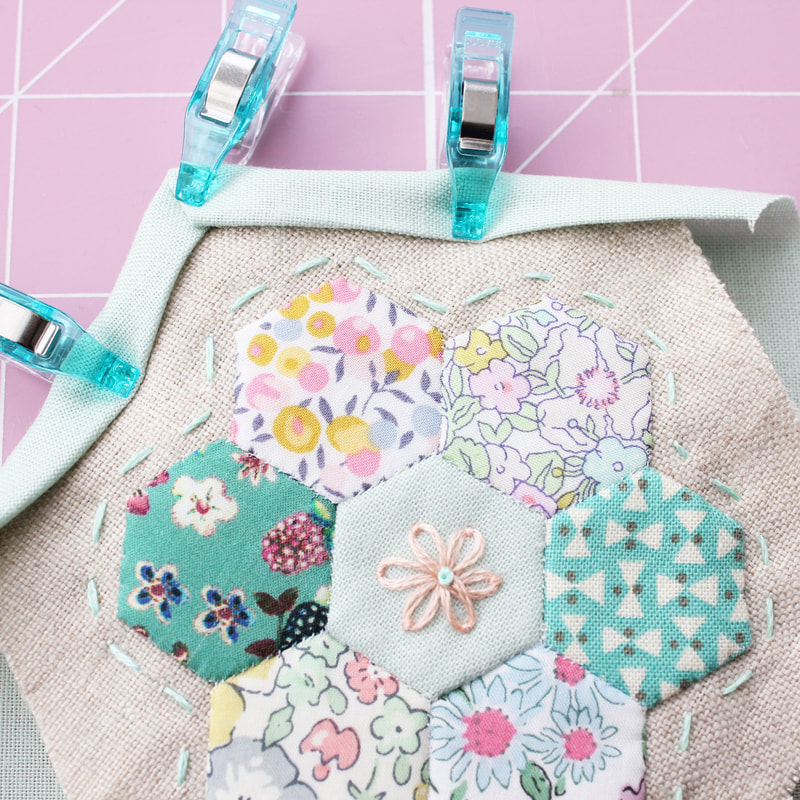
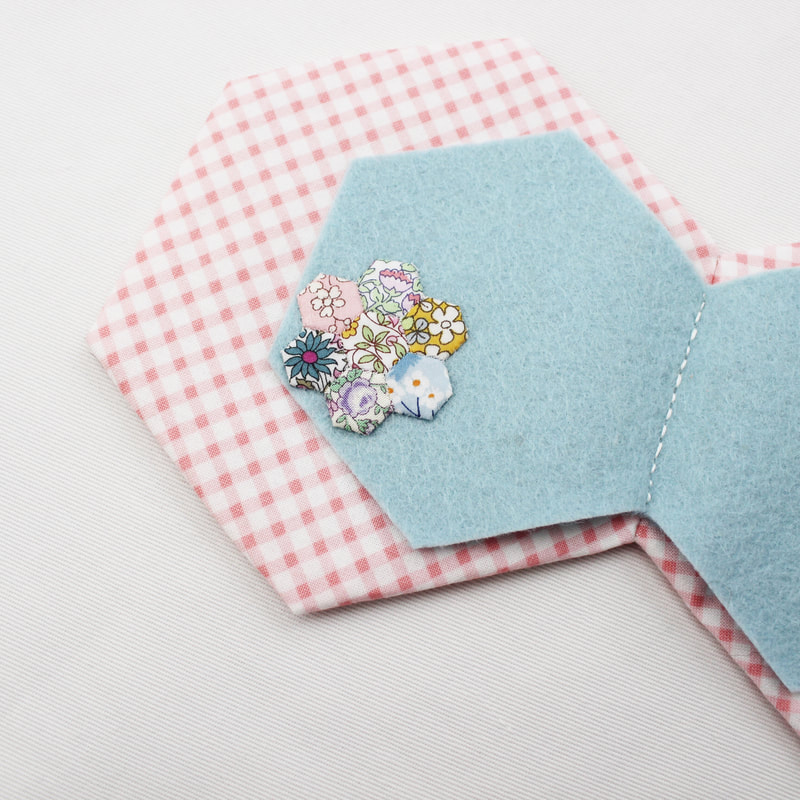
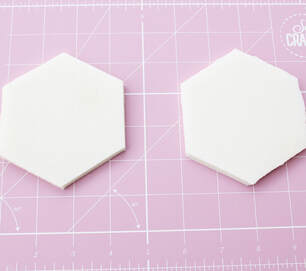 2 inch hexagons in flex foam/ wadding 1. Make a hexagon flower using your preferred epp technique. Take a piece of your linen, fold in half and half again to find the centre. Place your hexagon flower in the centre and appliqué in place. Take care to have your hexagon with a point at the top and line the hexagon flower up with this point. 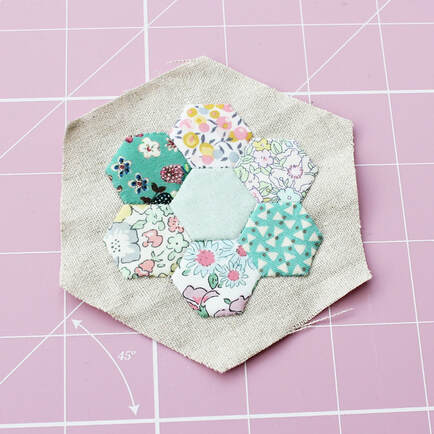 2. Add a running stitch around the edge to frame the flower and embroider a little flower in the centre if you wish, using a lazy daisy stitch and a French knot. 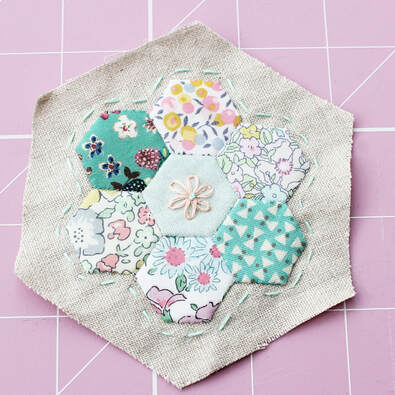 3. Create a quilt sandwich. Place your large, 2.75 inch cotton hexagon right side down and put the hexagon made from wadding or flex foam on top in the centre. Place your linen hexagon on top and ensure it is central. 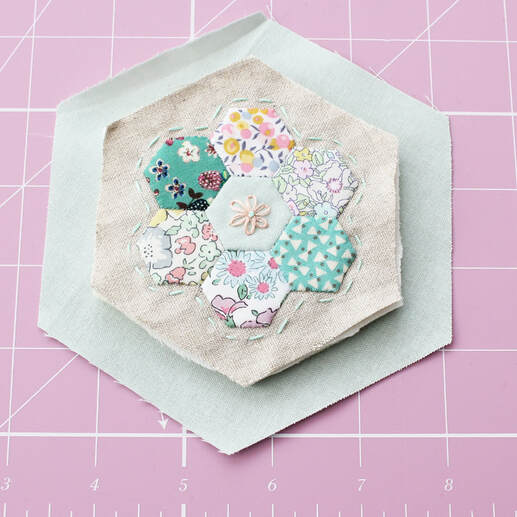 4. Fold one edge of the larger hexagon inwards by about a quarter inch and press.  5. Fold it over again to overlap the linen and use a pin or a wonder clip to hold it in place. 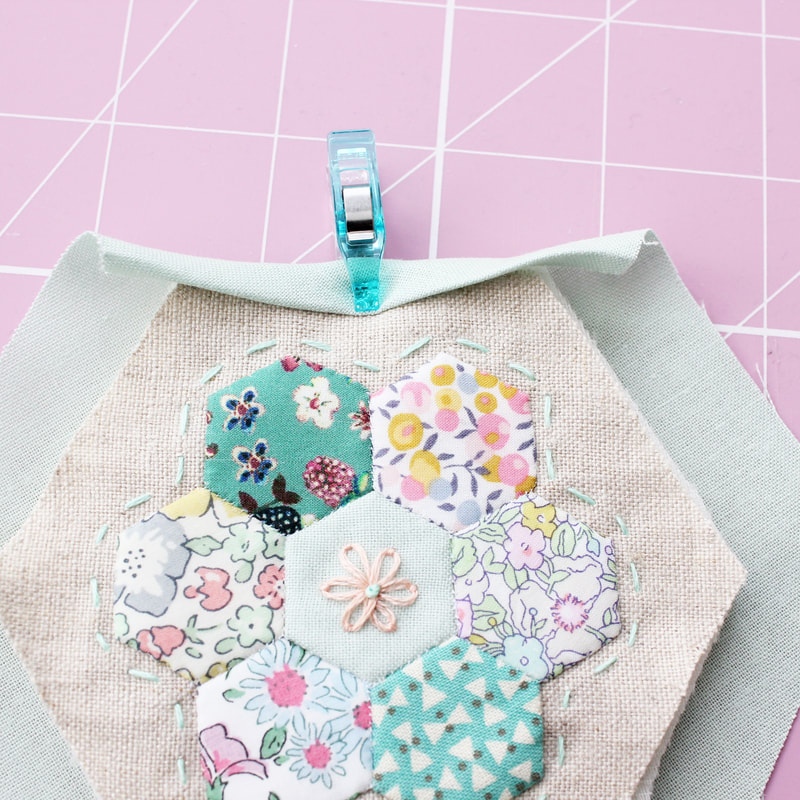 6. Repeat for the other five sides of the hexagon, taking care to line up the corners to mitre them.
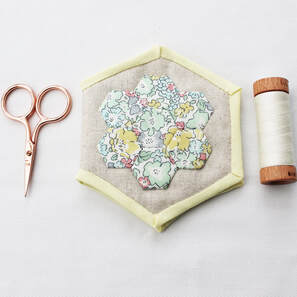
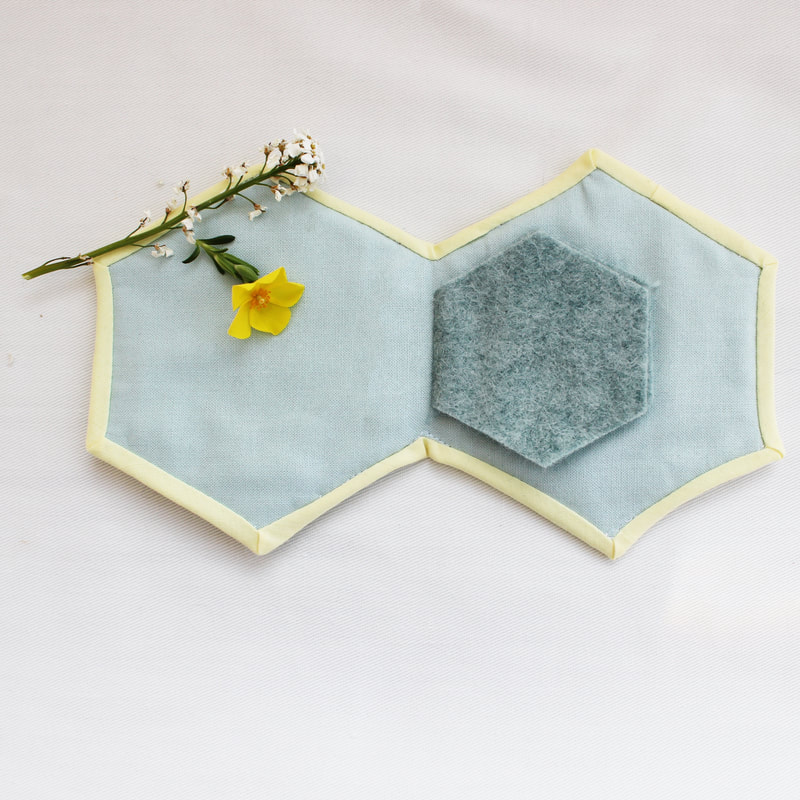
 7. Use a blind hem stitch to sew it in place. 8. Now the front cover of the book is complete, layer up the remaining pieces of linen, wadding and cotton into a sandwich and repeat steps 4,5,6 and 7 to make the back cover. You can of course add a little embroidery detail to the back piece of linen first if you wish. 9. Now the front and back covers are done, put them together with the insides facing each other and join them together along the spine with a ladder stitch. 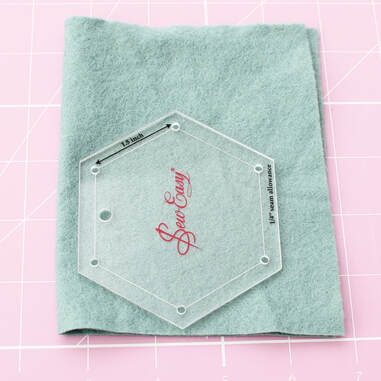 10. Fold your felt in half and place your 1.75 inch hexagon template, half an inch from the folded edge as in the photo above. Cut around the template. 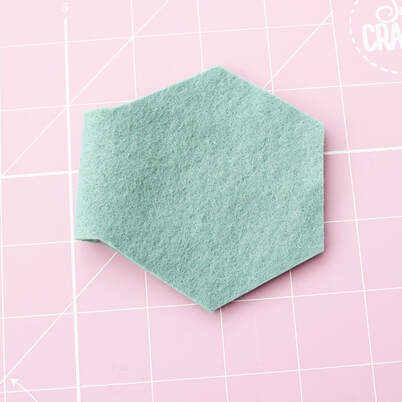 Unfold and you will have two "pages" joined in the centre. 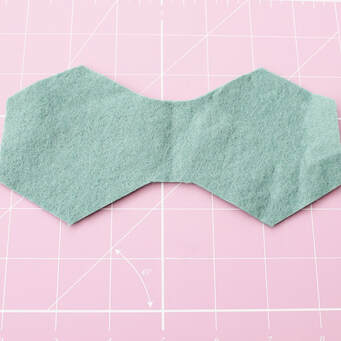 11. Place it inside your needle book, lining up the points of the hexagons so they match, and stitch in place down the centre taking care just to catch the fabric from the needle book and not to stitch all of the way through. 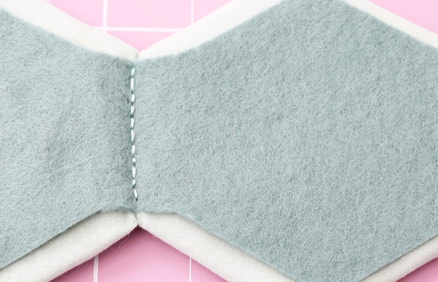 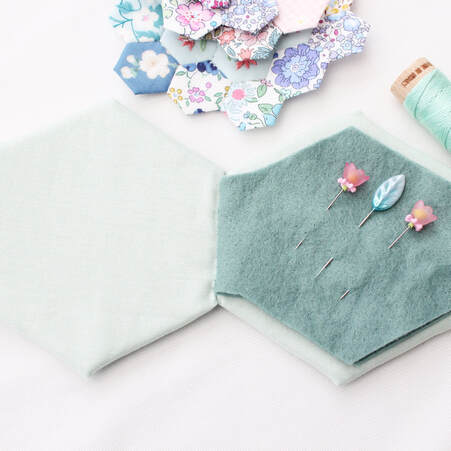 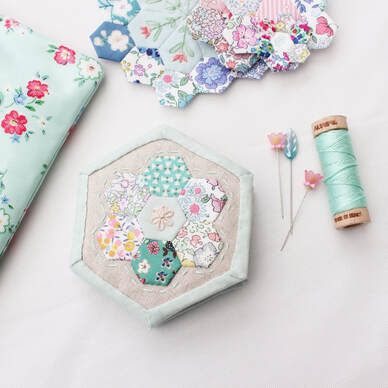 Your needle book is complete! The finished size is approximately 3.75 inches in diameter and 4.25 inches tall. Fill it with needles and pins to keep them safe. I hope you like this tutorial. If you make one and share it on Instagram, please tag me so I can see it! If you need any support in making one or have any questions please get in touch via instagram or using the contact form on the home page of this website. Happy sewing.
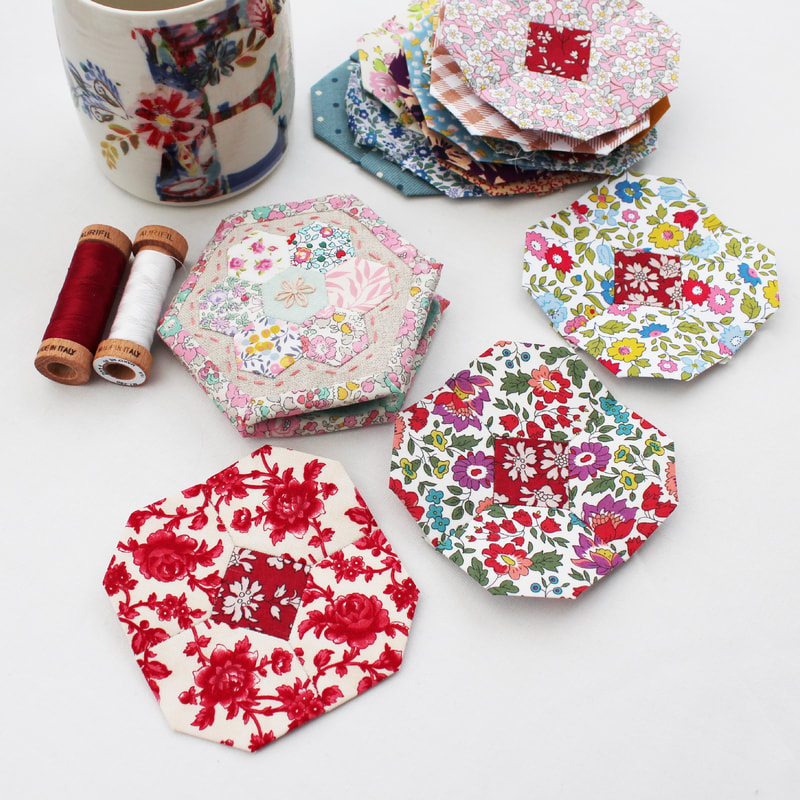
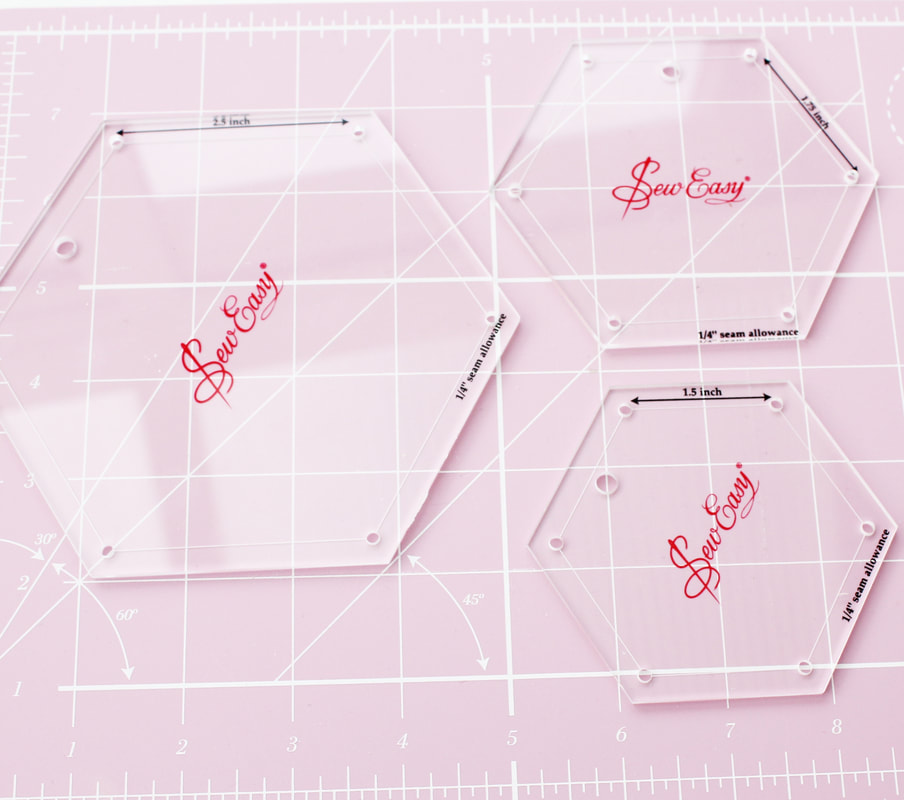
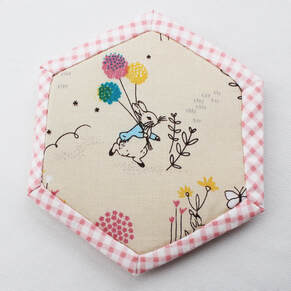
 I'm going to tell you a little bit about my latest creation, a hexagon sewing set (for want of a better name!). Way back in April of this year, when I began to get really obsessed with hexagons and epp, I wanted to make a little hexagon needle book to keep my epp needles safe and seperate from other types of sewing needles. I couldn't find a pattern for a hexagon shaped case anywhere so I decided to make one up. I used my acrylic templates to cut two hexagons joined together to be the basic shape, but the finished result was disappointing. It didn't look accurate enough and the way I bound it with bias binding let it down. So I shelved the idea for a couple of months.
Then I saw Naglaa's tutorial for quilt as you go hexagons on Instagram and a lightbulb went on, I could make a needle book using this technique! So I did and it worked. For the Beatrix Potter swap I made one for my partner and subsequently I made a few more.
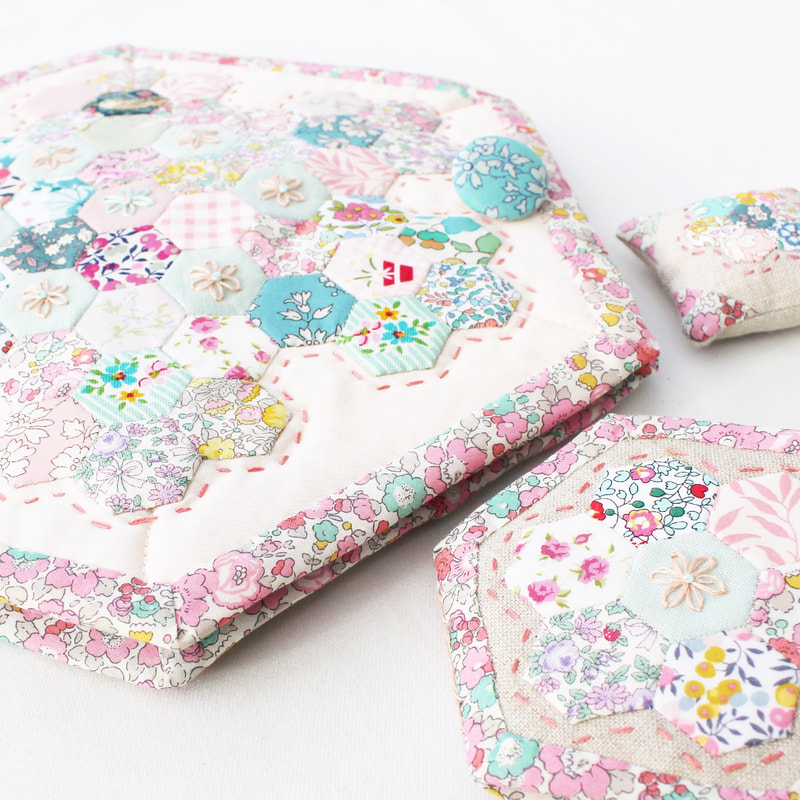
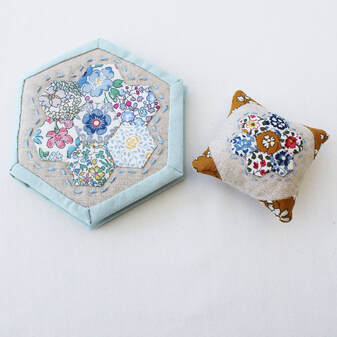 For those needle books I used interfacing and wadding inside and the result was really nice. The entire thing was stitched by hand and I really liked that, it felt like a nice little thing to make. But my mind had already starting wandering...could I make a sewing case too? A hexagonal one? So I gave it a go and I did it! 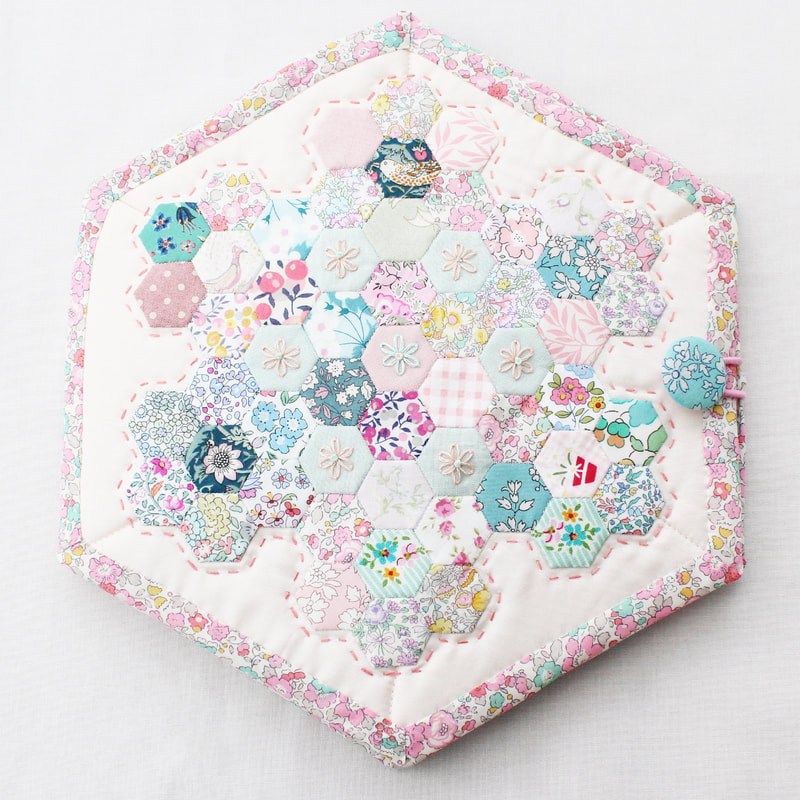 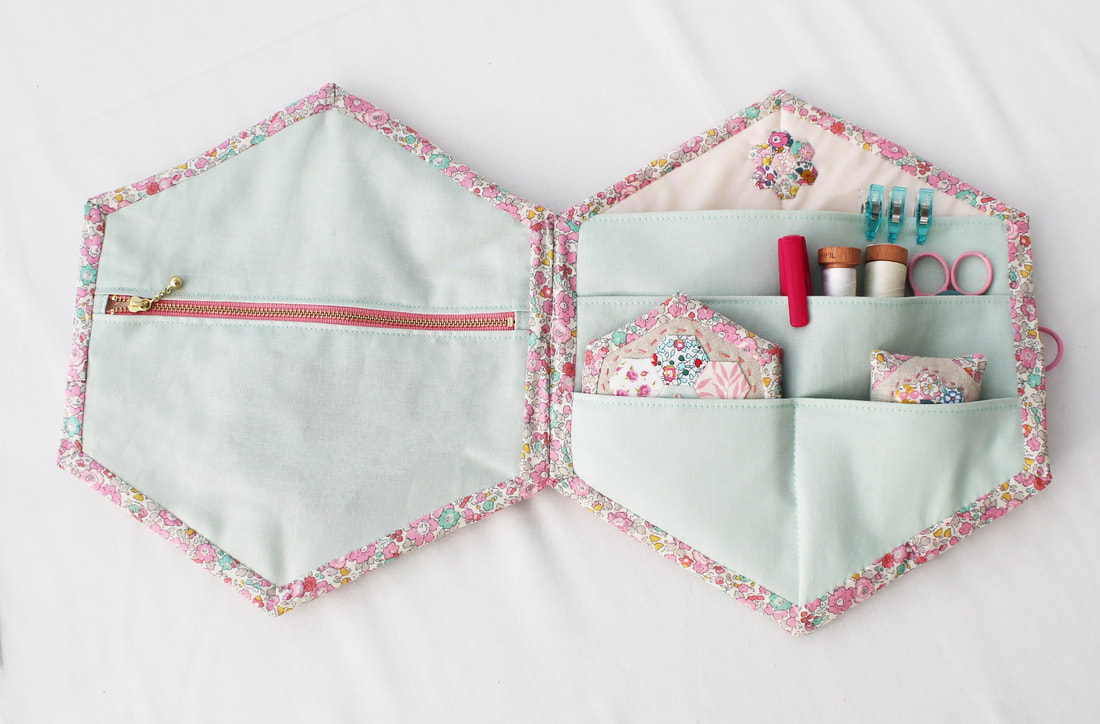 I'm really pleased with how it turned out, even if it did take four attempts to sew the binding on! I ended up using a very unconventional method to attach it but it works and retains its shape which was very important. Instead of wadding, I used Pellon Flex-Foam inside and it is brilliant. It holds the hexagon shape perfectly and gives the case stability. I then went on the make a needle book to match and I used the foam here too and I'm really happy with the results.  So this case is effectively a prototype. There are a few tiny tweaks to make but other than that I think I've cracked it. I love that the zipped pocket is big enough to store large hexie flowers and the other compartments fit the needle book, my matching pincushion and other tools and notions. 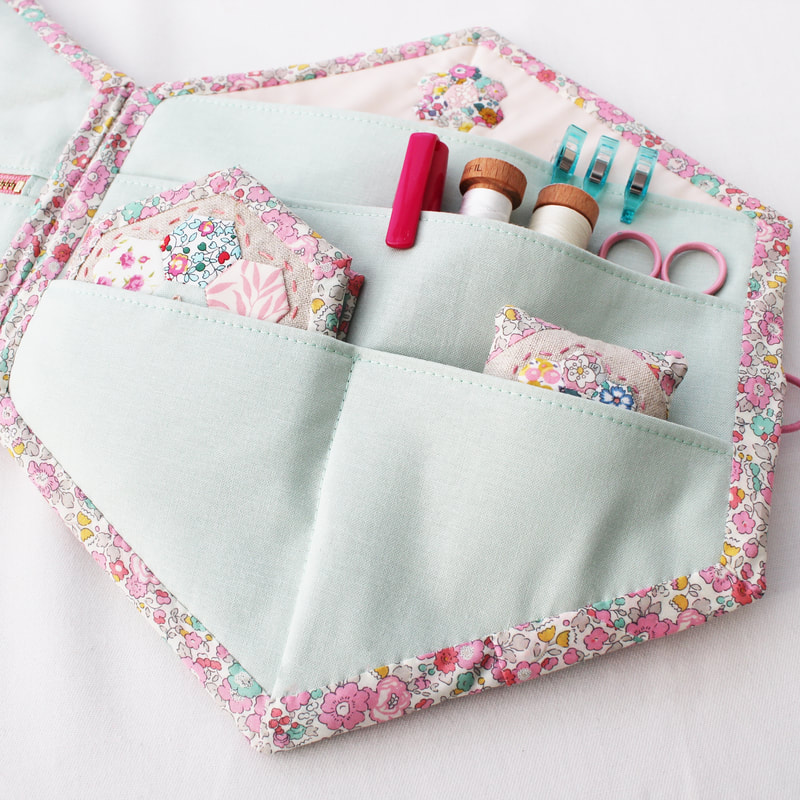 I made pattern pieces for the sewing case as I went along just in case I wanted to make another one or maybe even turn it into a proper pattern one day. I think it is a customisable piece because instead of the half inch hexies I've put on the front, you could just put one larger hexie flower or even leave it plain to showcase your favourite fabric. Of course I had to add a little detail to the back too, and a really tiny hexie flower on the inside of course. 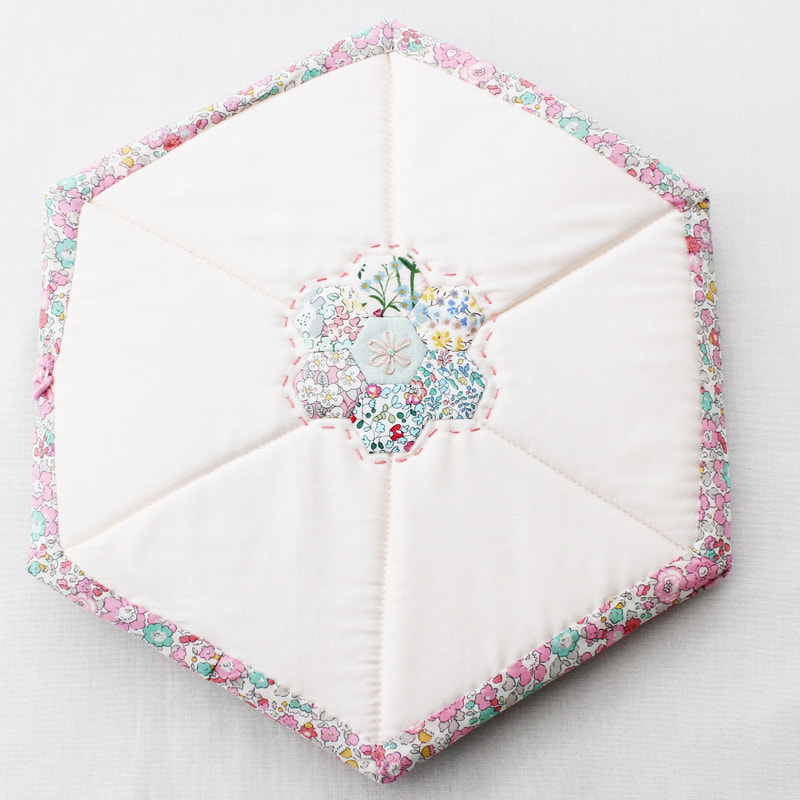  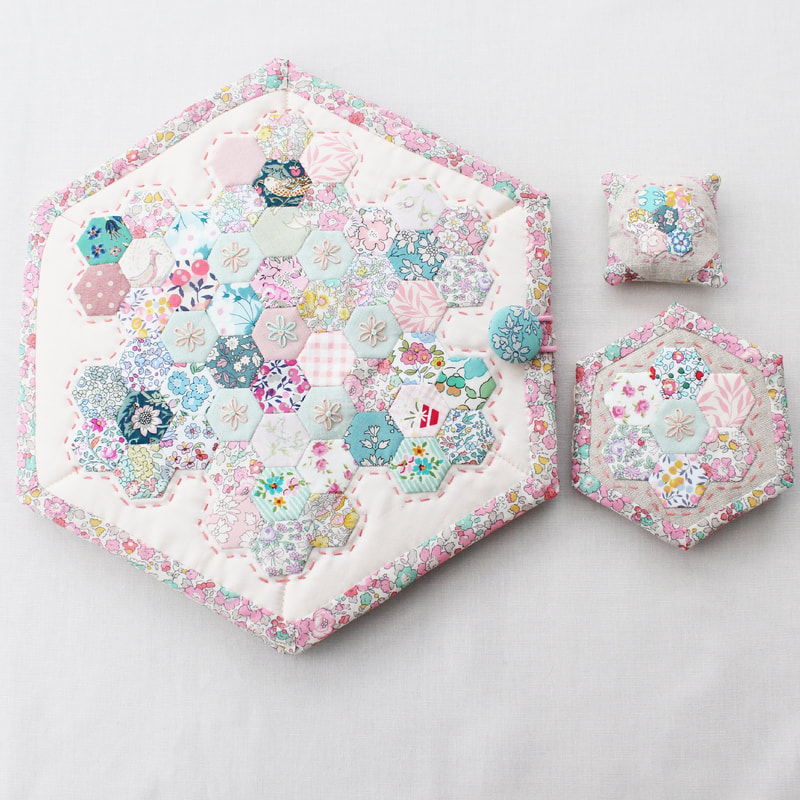 So what do you think? Do you like my sewing case and the set of three pieces? I hope you do, please let me know in the comments.
 After numerous requests, I've finally managed to create a little pattern/step by step guide to creating your own version of my mini quilt pictured above. As I created this a long time after actually making the original, it isn't as detailed a tutorial as I would normally create. I didn't have as many step by step photos as I would have liked to have included, but I hope that if you would like to, it will help you make your own version.
It has completely amazed me just how much people have loved this little mini quilt, my Gran would have been so happy if she could have seen it. I know there are a lot of people out there who would like to give this a go but were unsure as to whether it would be ok but you now have my permission to have fun and make this lovely design. A lovely lady called Marianne has already made her own version and it is beautiful. Thank you so so much again to everyone who has supported me in the epp journey I have been on this year. I hope this little free guide to making Mabel's Garden goes a little way to show just how grateful I am for all of you who read my blog and Instagram posts, you are all wonderful. I made the original using Hexiform shapes, but I've included a separate set of instructions for using paper templates instead. You can find the patterns here. And if you would like to read more about the original piece and the story behind it, you can find my original blog post here. Happy sewing! |
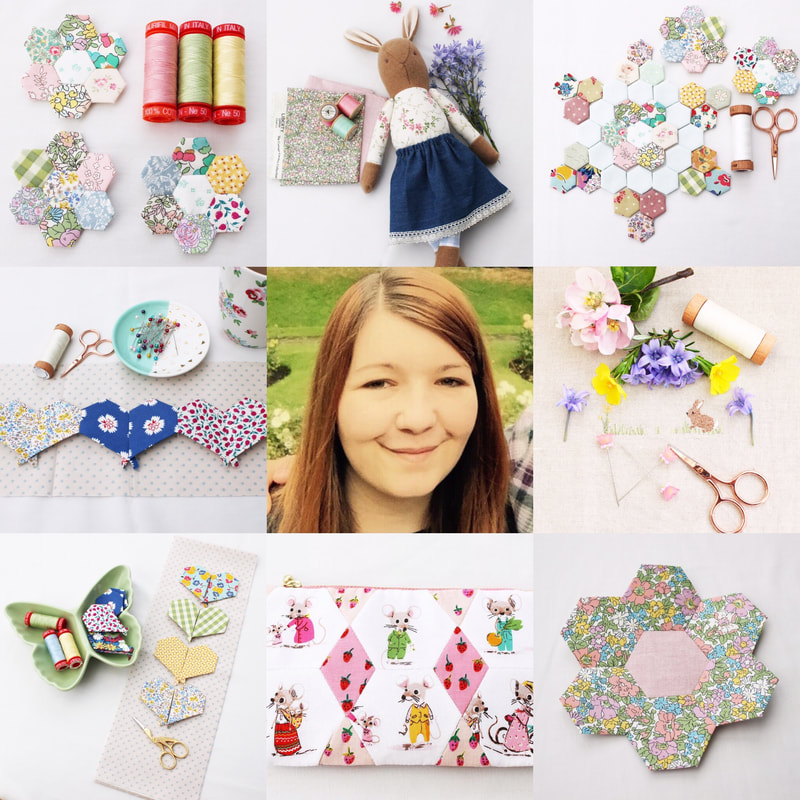
Follow me on InstagramAbout the Author
My name is Emma and I love all things sewing, especially EPP. My little blog is the place where I document what I'm making. I hope you enjoy reading what I'm up to! All opinions are my own and I only share things that I think you will love. Thank you for taking the time to stop by. Archives
September 2023
Categories
All
|
 RSS Feed
|
Copyright Vintage Sewing Box 2024
|
| ||||||