|
I'm lucky enough to be going on holiday tomorrow and I'm really looking forward to it. I'm holidaying in the UK so I won't be going on a plane, in fact, we are just travelling in the car and it will be about a 5 hour journey without stops. I've been thinking about which sewing projects to take with me for months! For me, more thought goes into that than it does into what clothes to take, but if you are reading this then I'm guessing you put lots of thought into your travel sewing projects too! I usually pack too many sewing projects, for fear of running out - which never happens! As I like to switch between projects often, I need to make sure I have a variety with me because otherwise I run the risk of losing interest and doing nothing. It's a family holiday so I anticipate many an evening spent playing board games together so I want to take projects that are easy to pick up and put down. Whilst I'd love to take embroidery with me, I know that any stitching time will be in the evenings and I just can't see well enough without a daylight lamp, so I think the conclusion is to take EPP projects with me! 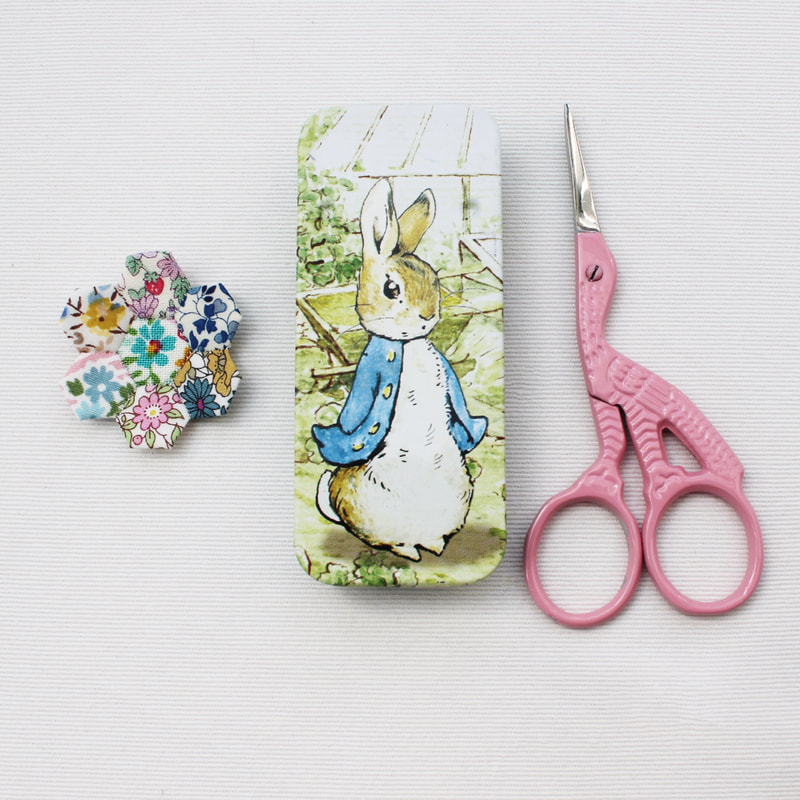 First up, I'm going to take my current two scrappy projects - quarter inch hexies and three quarter inch diamonds. I don't yet have a concrete plan for these projects, I'm just making it up as I go along, but taking some pretty scraps, sharp scissors and glue pens will be all I need in addition to the paper templates, thread and a needle. The ultimate portable project! 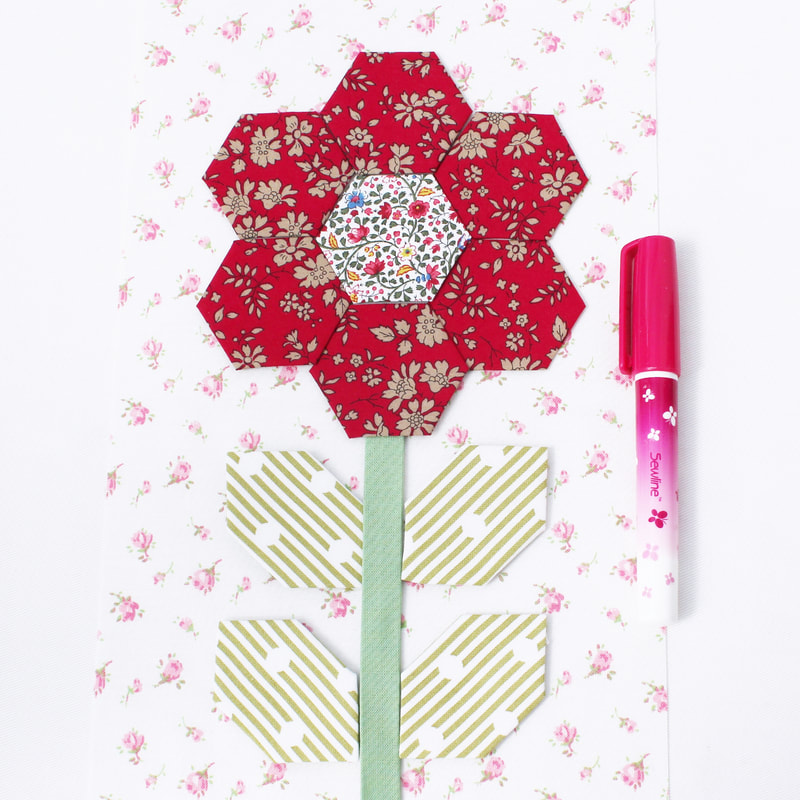 I'm also going to take my current Sew and Quilt blocks of the month. I am loving this quilt so much that I know I will be thinking about it whilst I am on holiday and I will end up desperate to work on it! So I've been glue basting as many shapes as I can like mad to make sure that I can just pick it up and stitch. 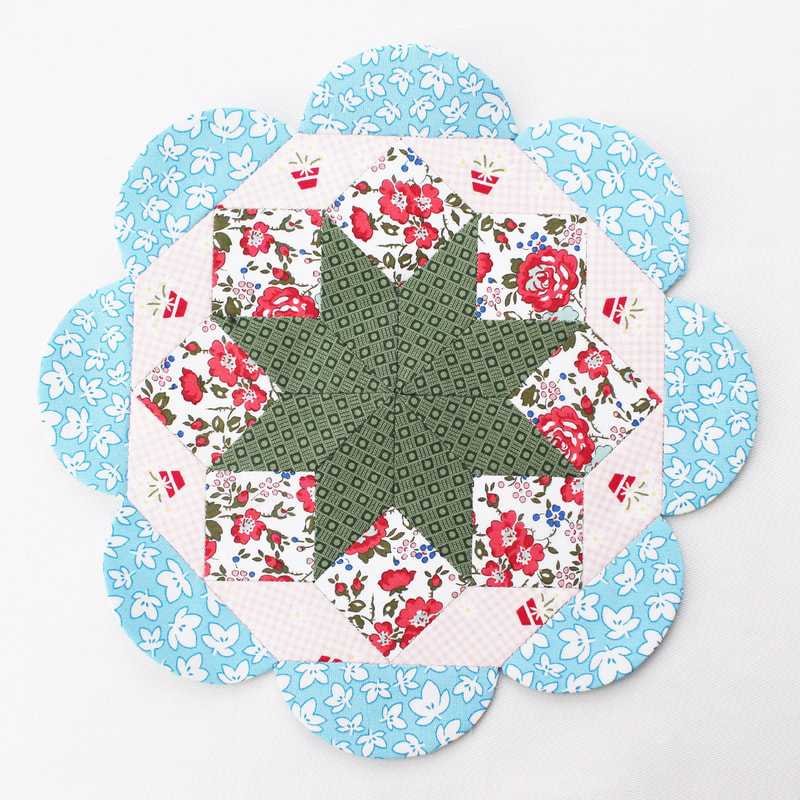 I will pack my projects in small pouches like this one pictured below. I also purchased a Clover Needle Dome as I thought this might be useful for keeping needles safe and threaded ready to sew. So far I really like it and it works perfectly. I also purchased some needles in little cases, again hoping that this would be a safe way to store them whilst travelling. Crucially, I stocked up on Sewline glue pen refills! I'm pretty certain I won't need this many but running out on holiday would be a disaster! 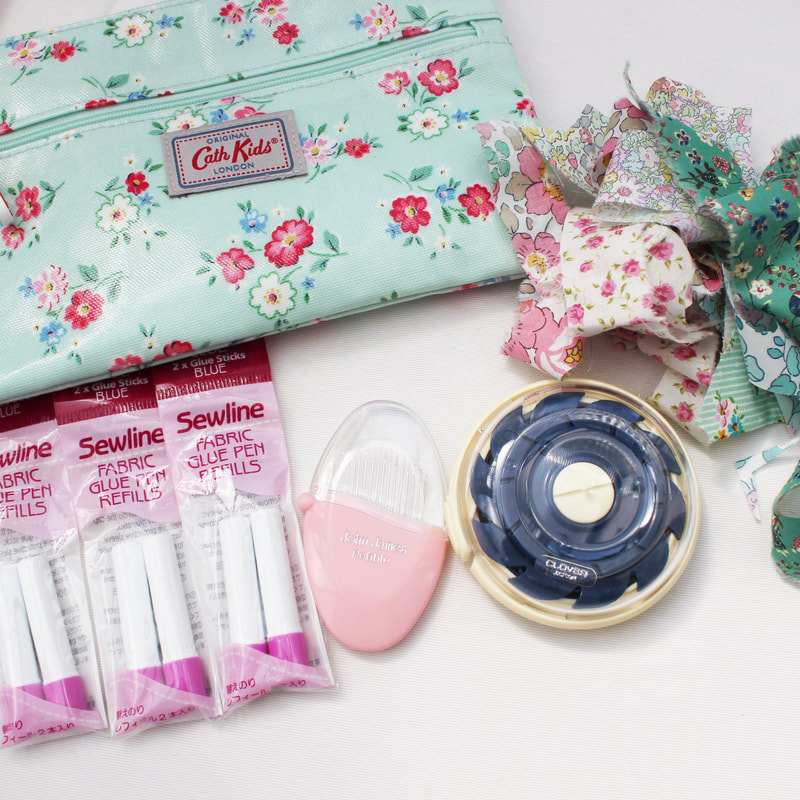 Do you take your sewing projects on holiday? Have you ever taken your sewing machine on holiday?! I'd love to hear all about it so please leave me a comment here or over on Instagram.
Happy sewing!
4 Comments
Every year that I've been to the Festival of Quilts, I've gone without a plan. This has led me to walk around a little bit aimlessly, not knowing where to look or what to buy because there is so much to see and so much choice. So this year I went with a shopping list and I did manage to get some items from the list, but then I went off piste and bought more floral fabric. In fact, my list said no kits (as I have so many!) and it also said solid fabric and linens. As you'll see, I didn't stick to that either! Before you see what I bought, I just want to say that I had been saving up for the Festival of Quilts for a long time. This is the one occasion each year where I buy quite a lot of things at once. For the rest of the year I will buy very little. 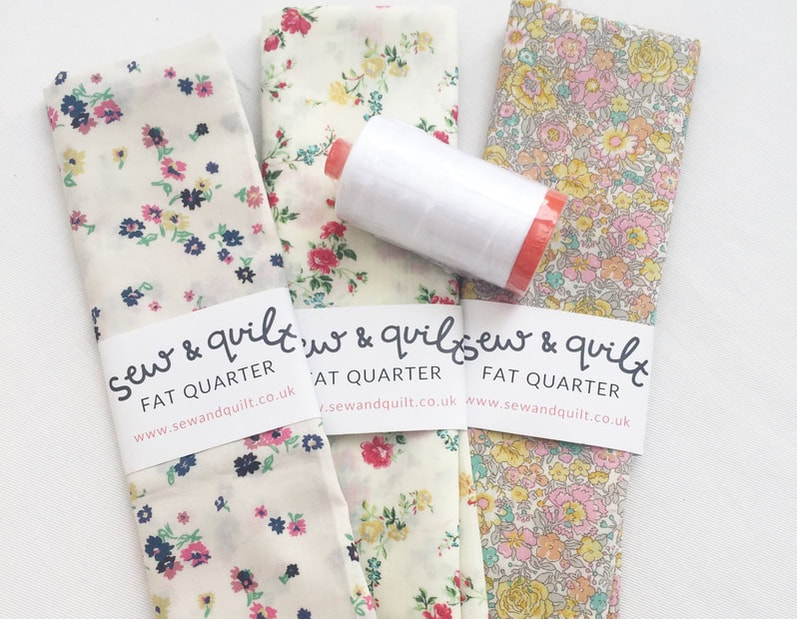 My first stop was one of my favourite shops, Sew and Quilt. I got to meet the very lovely Jessie and Robin and chat to them about the show. I've admired Jessie's work for so long. In fact, I wouldn't have even tried EPP if it wasn't for her. I'd never considered doing EPP even though I'd seen it and admired it. I was put off by the thought of making my own papers because I was short on time and just wanted to do the sewing part. I was also put off by the idea of thread basting. But one day I thought maybe I should try it and I was googling EPP papers and stumbled across her shop and the rest is history and I'm so glad! Through her I discovered glue basting and pre-cut papers, both of which make EPP a breeze. From Sew and Quilt, I bought three Liberty fat quarters and some Aurifil thread for my machine. 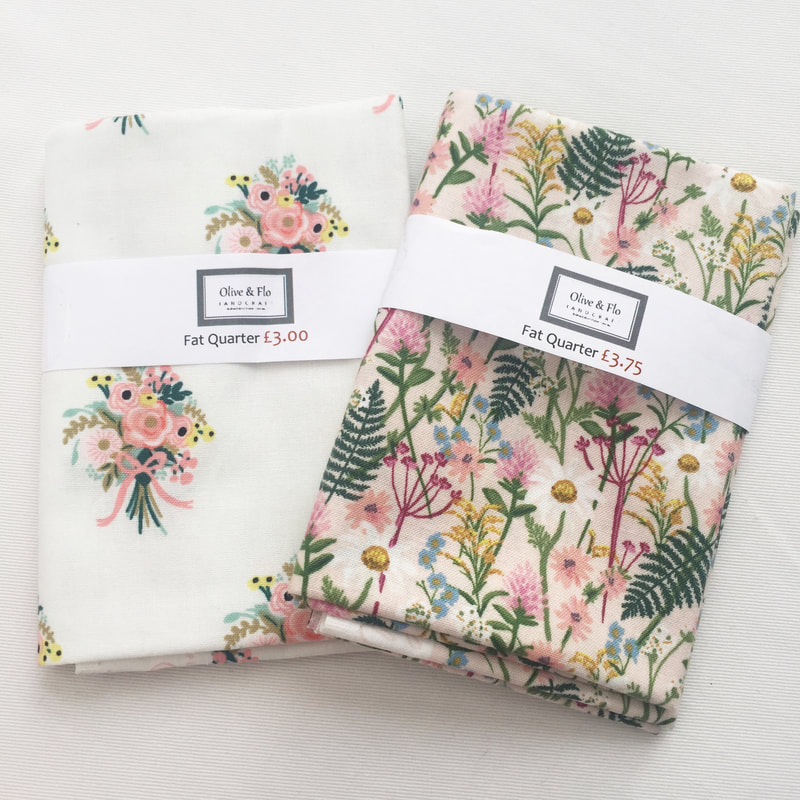 Next I went to Olive and Flo Handcraft and bought these beautiful Cotton and Steel fabrics. Olive and Flo Handcraft is such a lovely shop with a fantastic selection of modern fabrics. 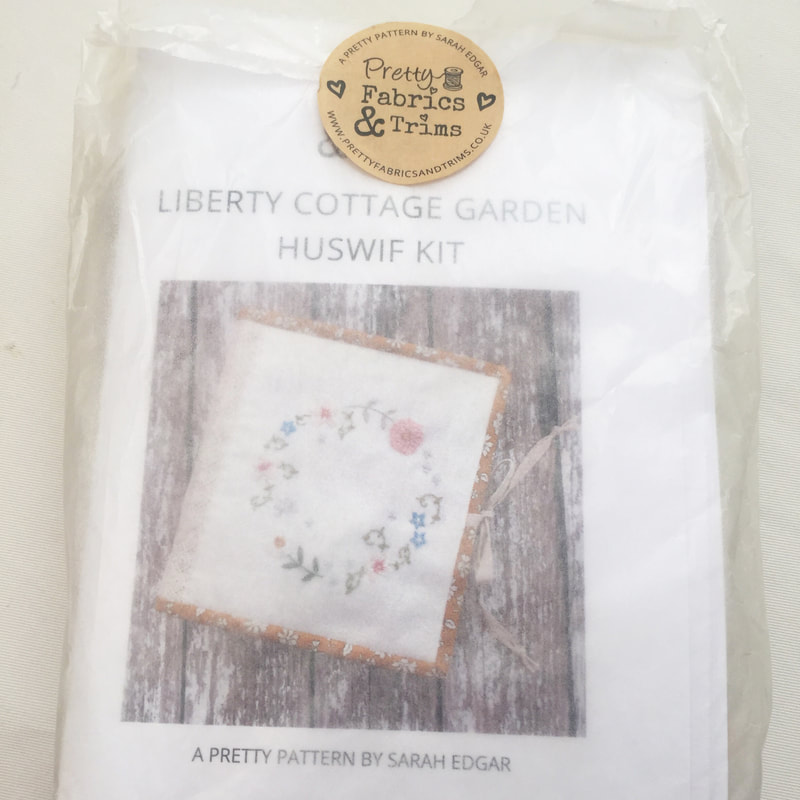 I then went on to Pretty Fabrics and Trims and met the lovely Sarah and Penny and bought this beautiful kit which I've been admiring for so long. I had told myself not to buy any more kits but I just had to go against that to buy this and I know I will really enjoy making it.  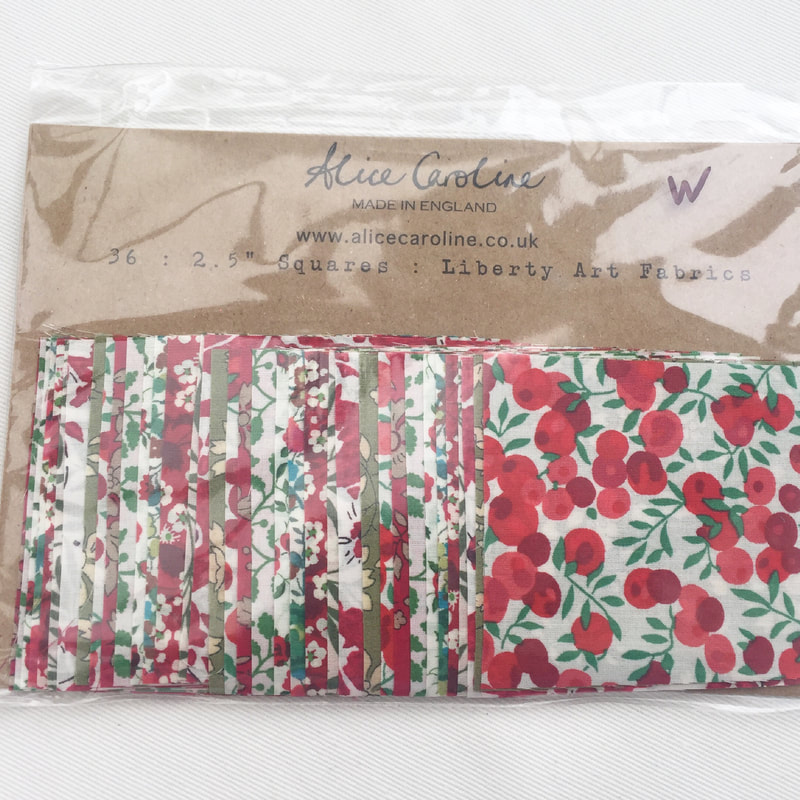 Next up was Alice Caroline where I allowed myself to buy a few too many Liberty fabrics. They were all so lovely I had a difficult time choosing. I am planning something Christmasy with the red and green squares and I'm really excited about that. 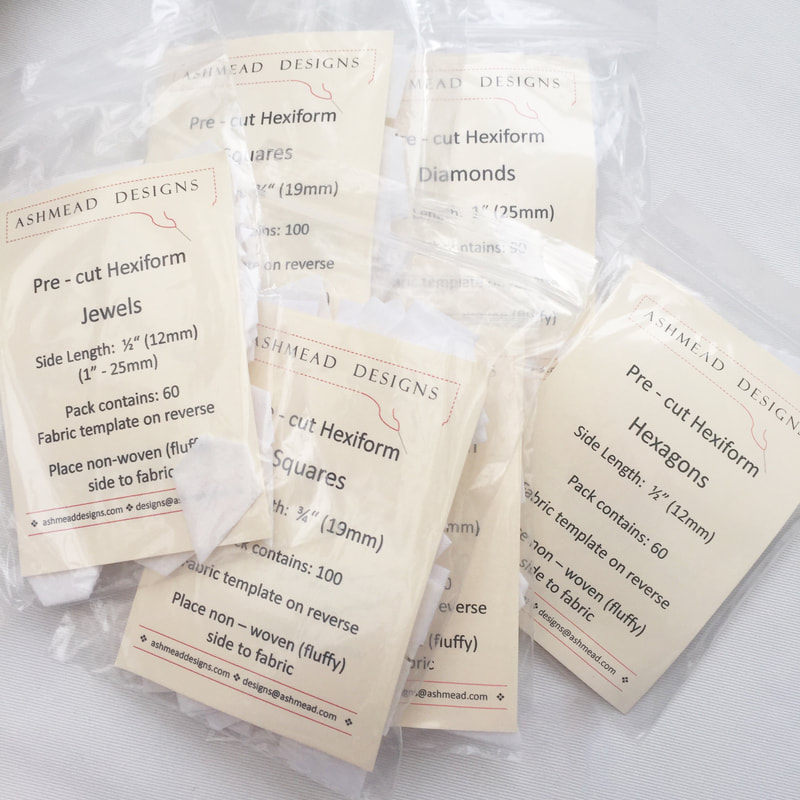 Finally, I bought some more hexiform shapes from Ashmead Designs as I use them quite often and I thought it was a good opportunity to stock up.
There are so many fantastic stalls at the festival, it can be quite overwhelming! But I really enjoyed it and I will hopefully be back next year. If you have never been before, I highly recommend it. My two blog posts about the festival are only a glimpse into what it is like there, there is so much more to see. Have you been? What did you buy? I'd love to know in the comments below. Happy sewing! 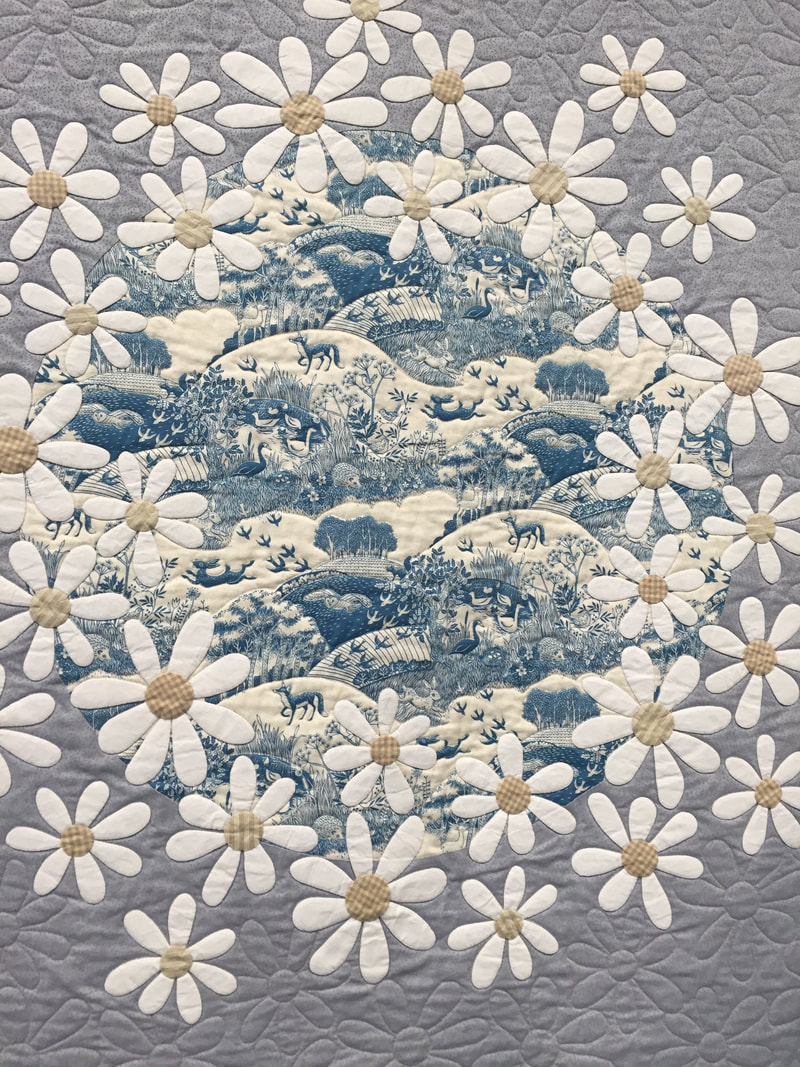 On Sunday 4th August I visited The Festival of Quilts at the NEC in Birmingham. It's about a two and a half hour drive from where I live but luckily my husband's family live in Birmingham, meaning we were able to visit them and have a lovely time seeing everyone and also meaning they were able to look after our little one whilst we visited the festival. We've been at least three times before, maybe even four, I've lost count! We always enjoy seeing the quilts, it's like visiting a huge art gallery, the standard is so impressive and it is always so inspiring. So when we arrived, our first stop was to see all of the quilts, we always do this before the shopping, it makes sense because then you aren't carrying your purchases around all day. Of course the first category we looked at was the mini quilts. I used my phone to take these pics, they aren't very good as I took them quickly not to get in people's way. Also, I apologise that not all makers are credited, I left my show guide behind by mistake. Here are a few of my favourites. 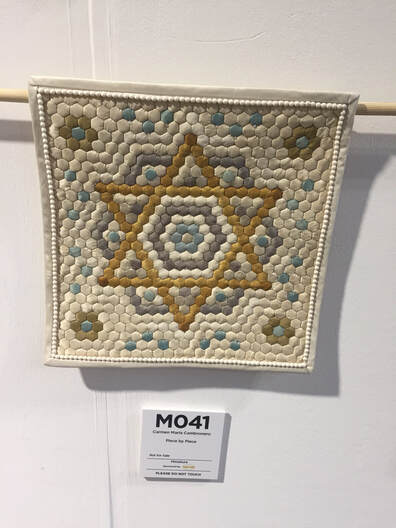 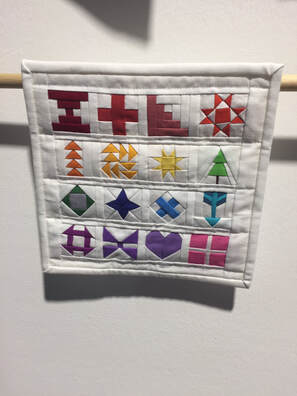 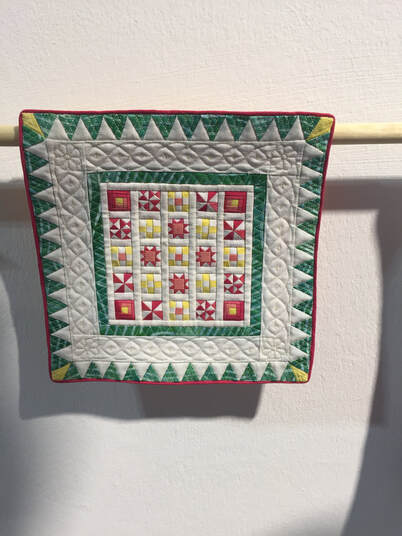 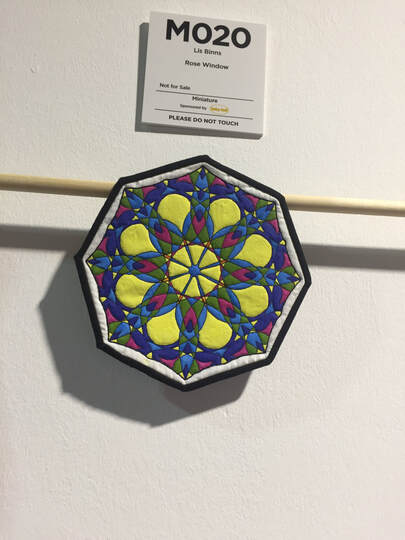 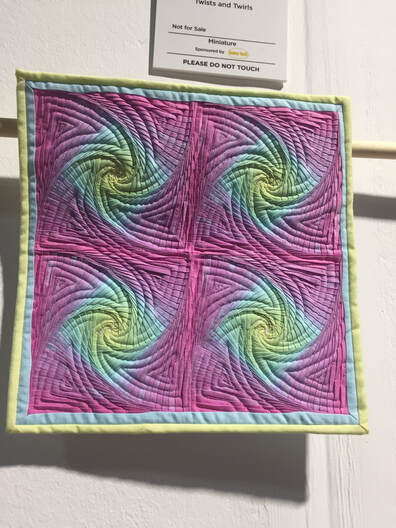 After the mini quilts we went on to view the larger quilts. The quilt that caught our eye the most was this one below called Endangered. I had to video it to show you because it was so so clever! As you walked past it, you could see three animals appear and disappear, a rhino, a leopard and a zebra. We thought it was so clever in the way it was constructed and how the images appeared like magic, but also this highlighted the quilt's important message about endangered species perfectly. My video isn't the best but hopefully you can see the animals. As we walked around the rest of the quilts on display, I had a think about which categories I was drawn to the most. Turns out I really like traditional and contemporary quilts. However, I can really appreciate the art quilts and the modern quilting category too. Even though I don't make abstract or really modern designs, I really love seeing all of the different styles on display and I find it so interesting. 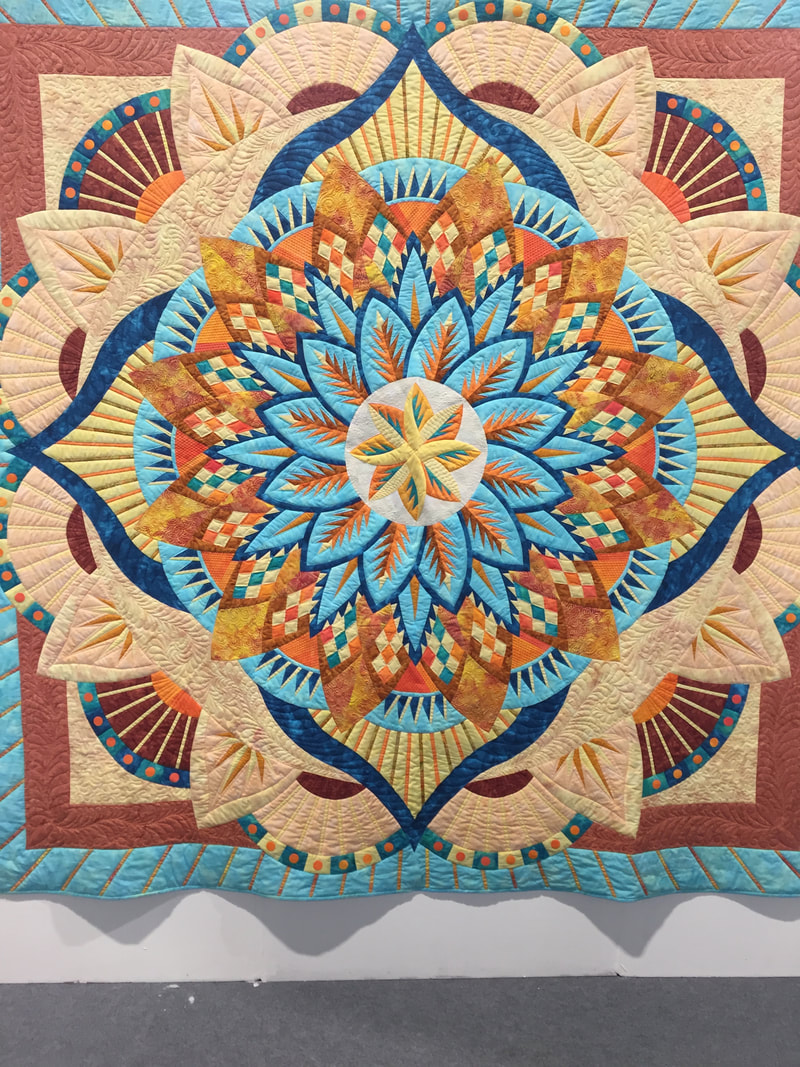 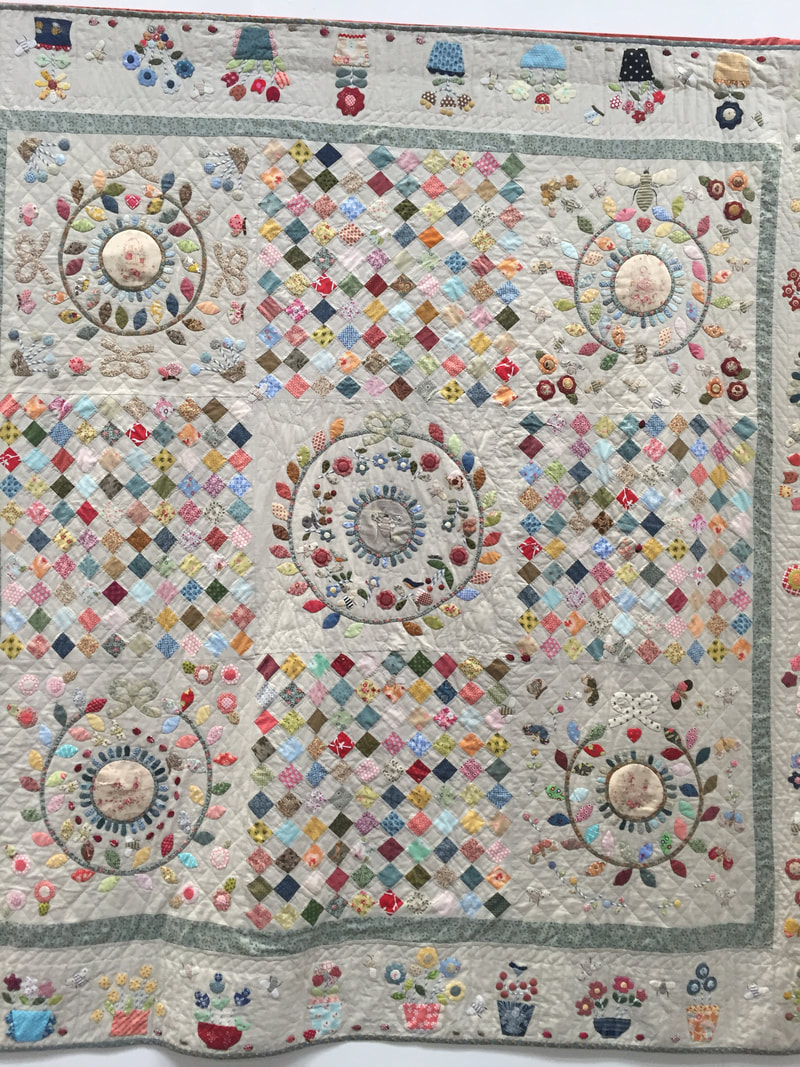 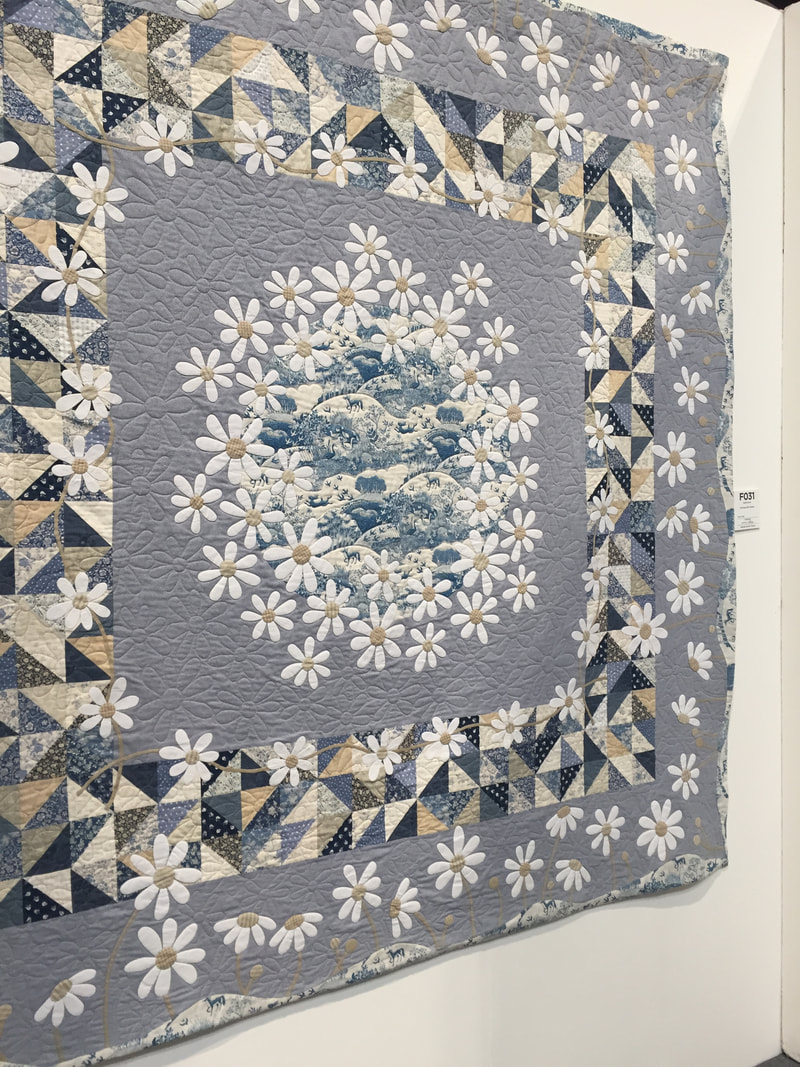 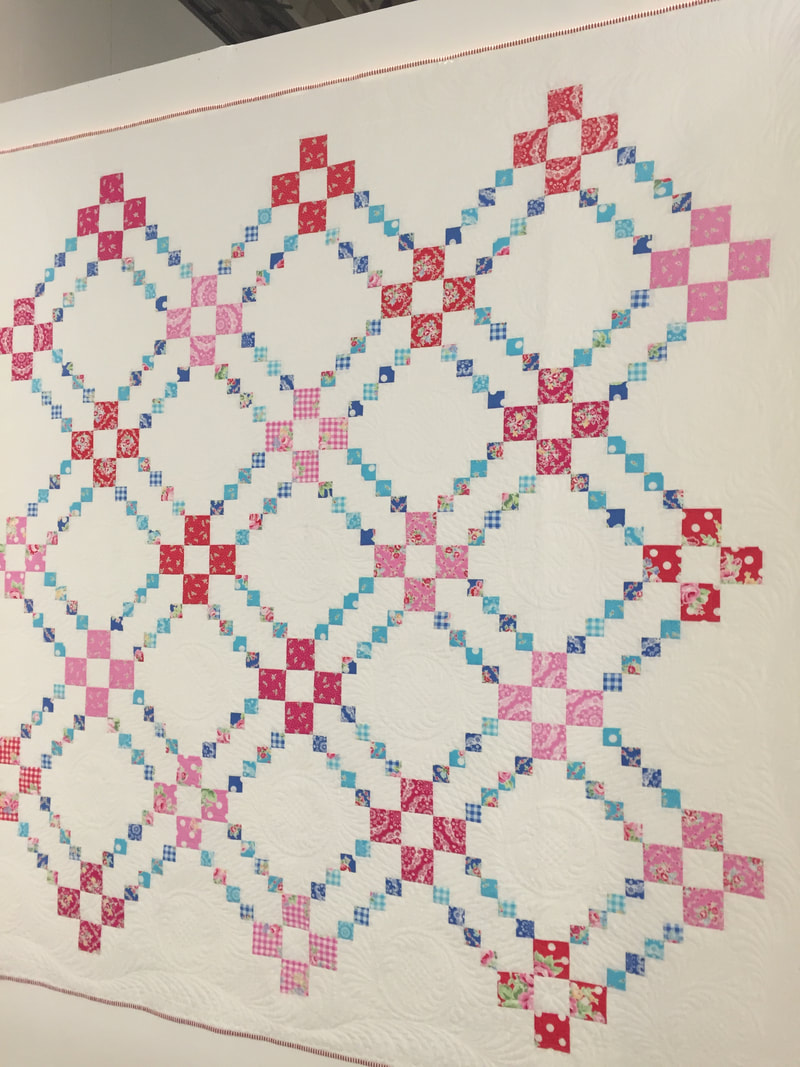 Above - Trudi Wood 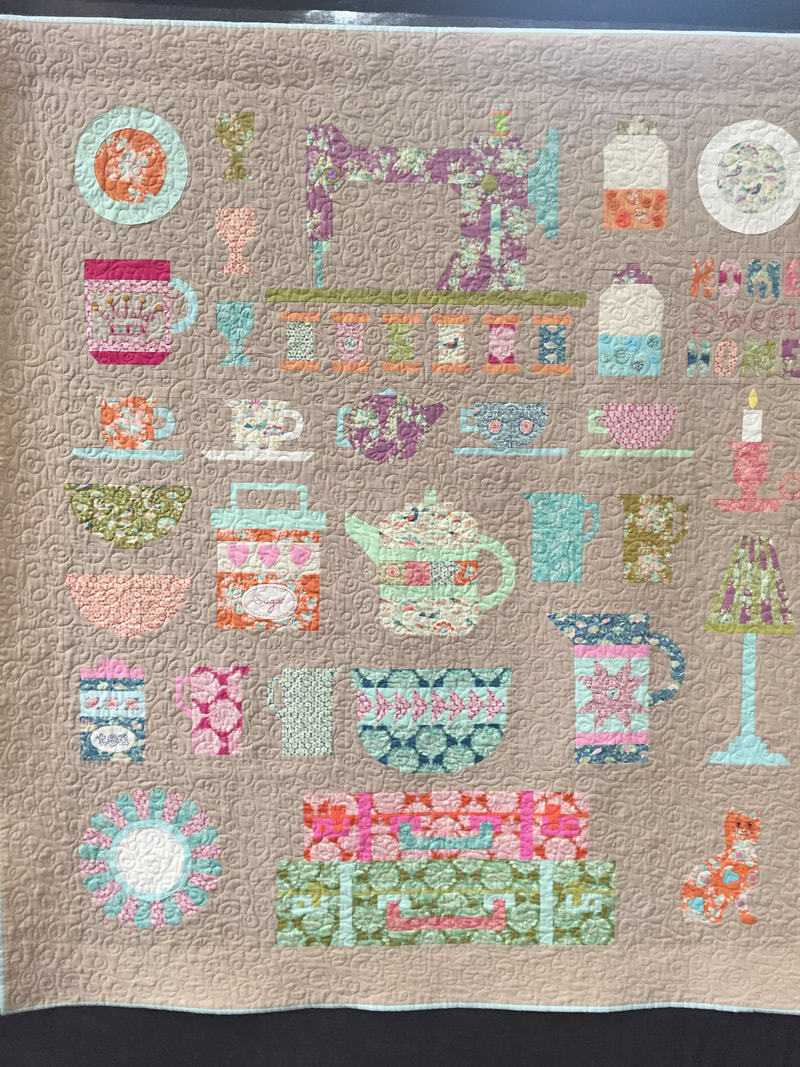 Above - Jo Avery 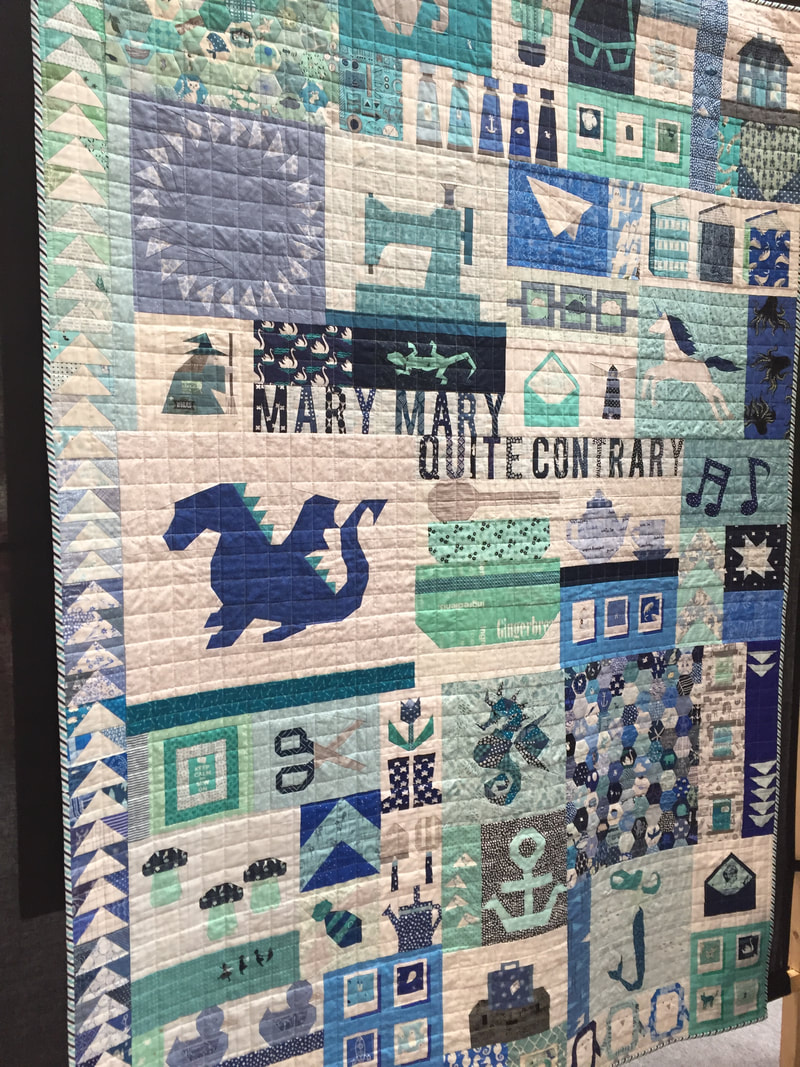 Above - Cloudtori 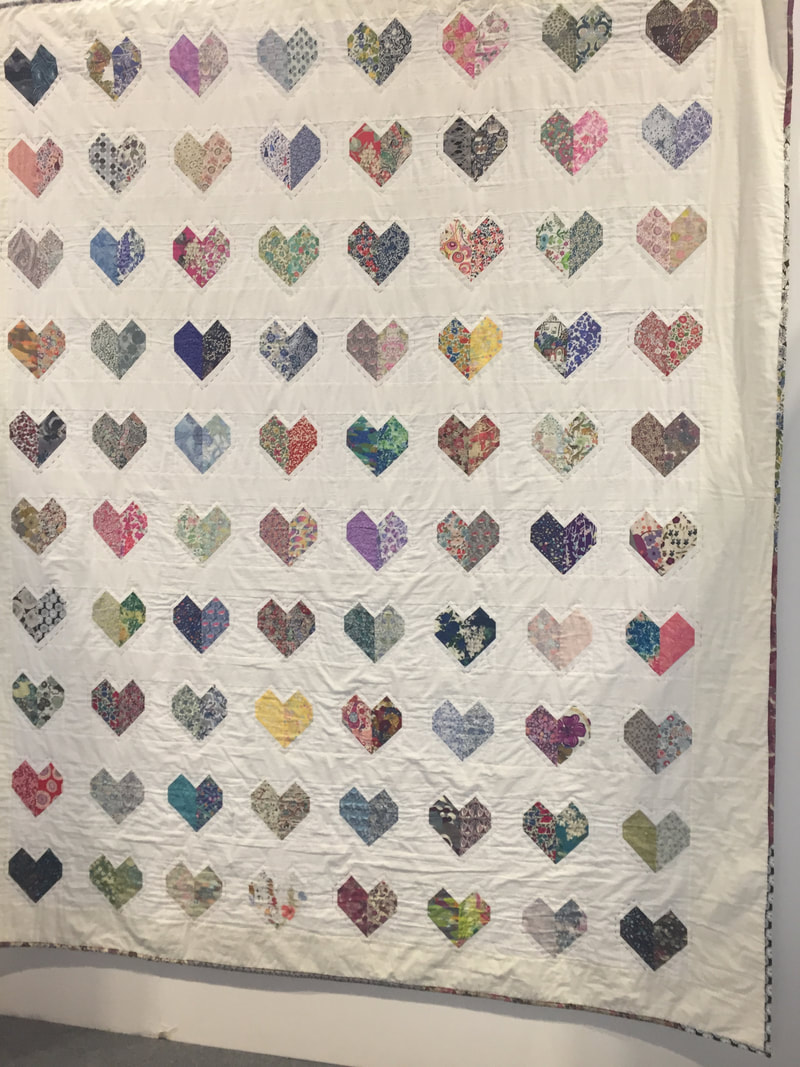 Above - Caroline One of my absolute favourites was Sweet Sunday in Somerset by Helen of henhouse homemade I loved everything about this quilt, the colours, the mix of vintage linen and liberty fabric, the fact it's English Paper Piecing and hand quilted, it's truly spectacular. It's absolutely full of amazing detail and I love it. 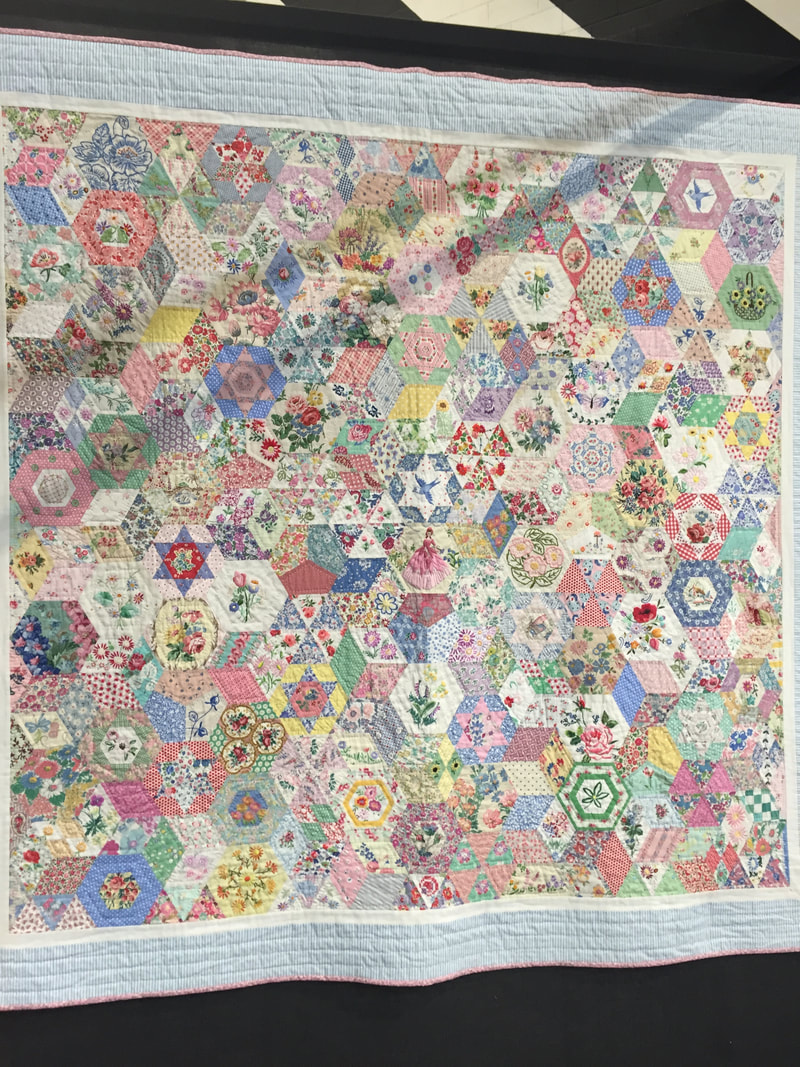  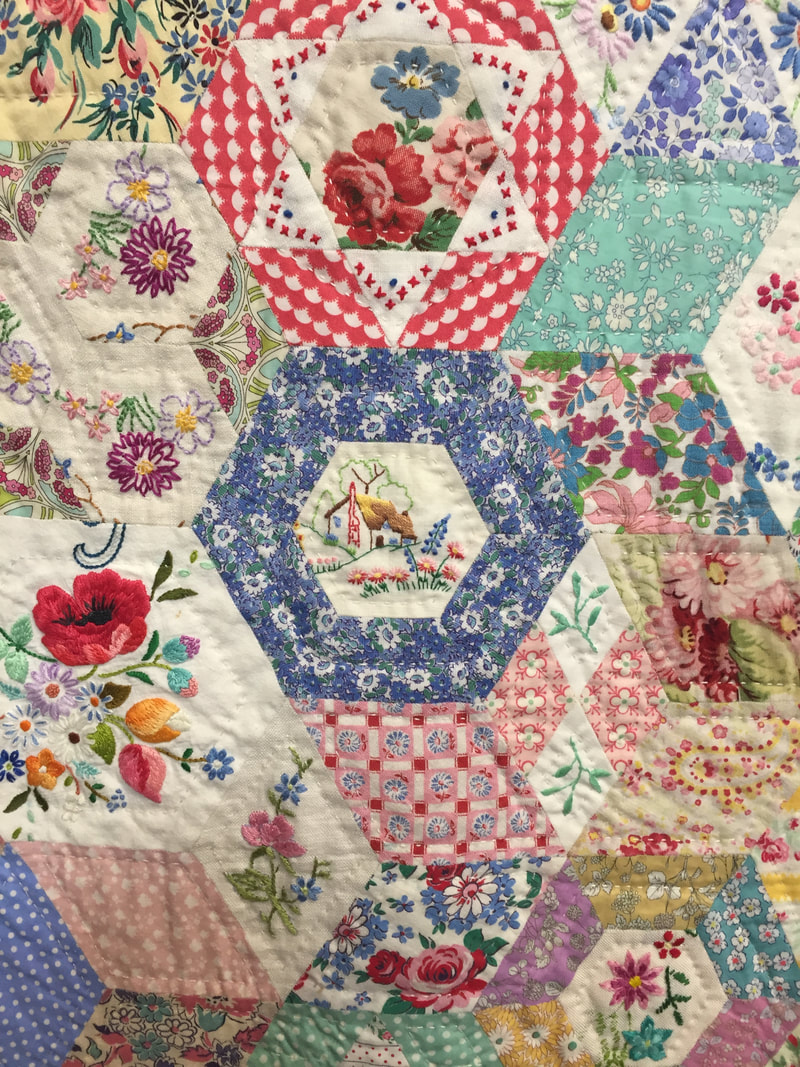 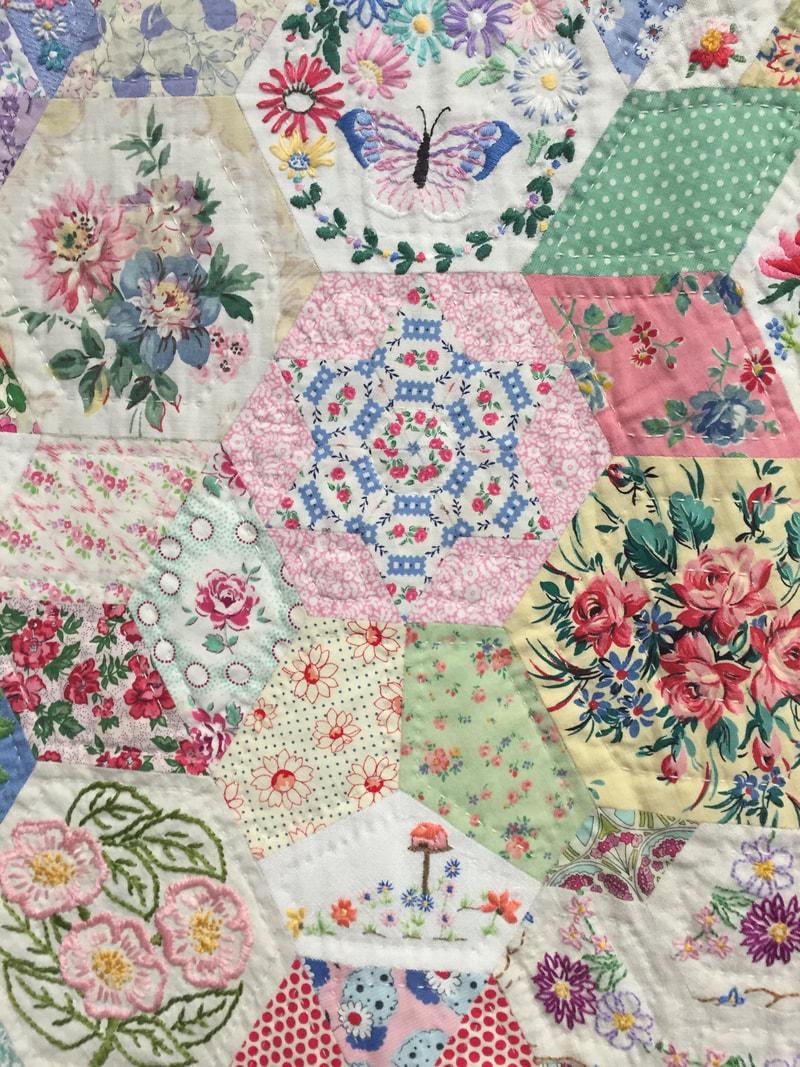 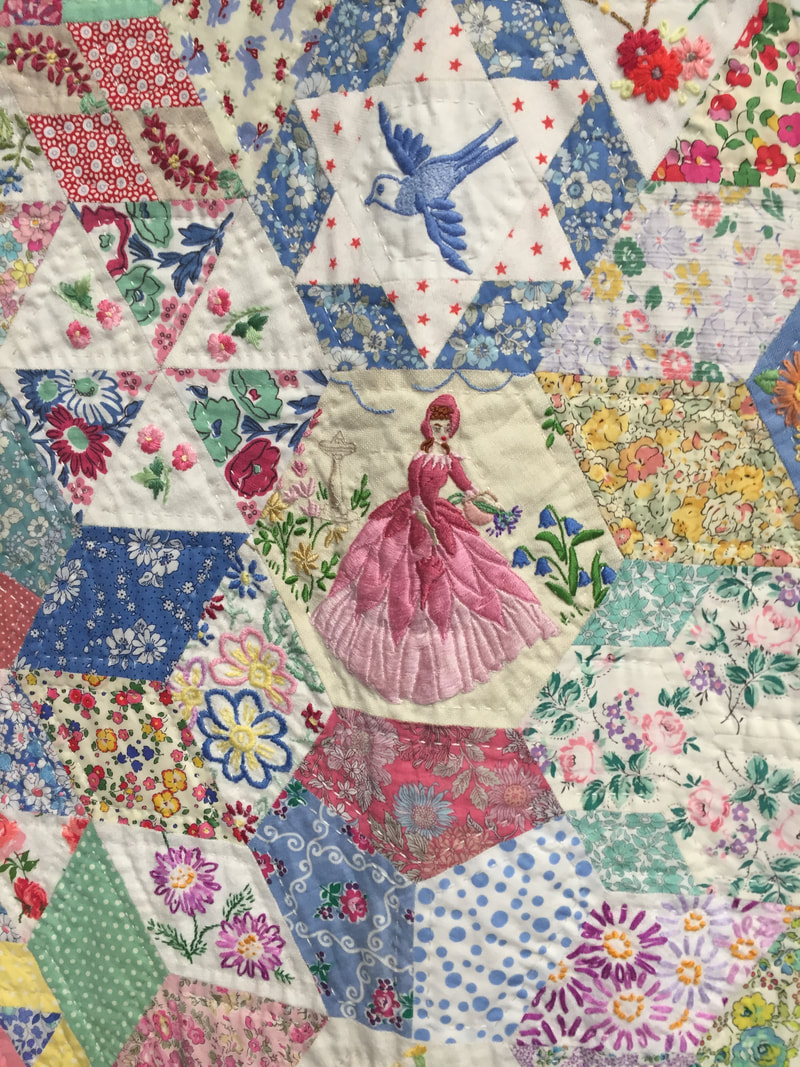 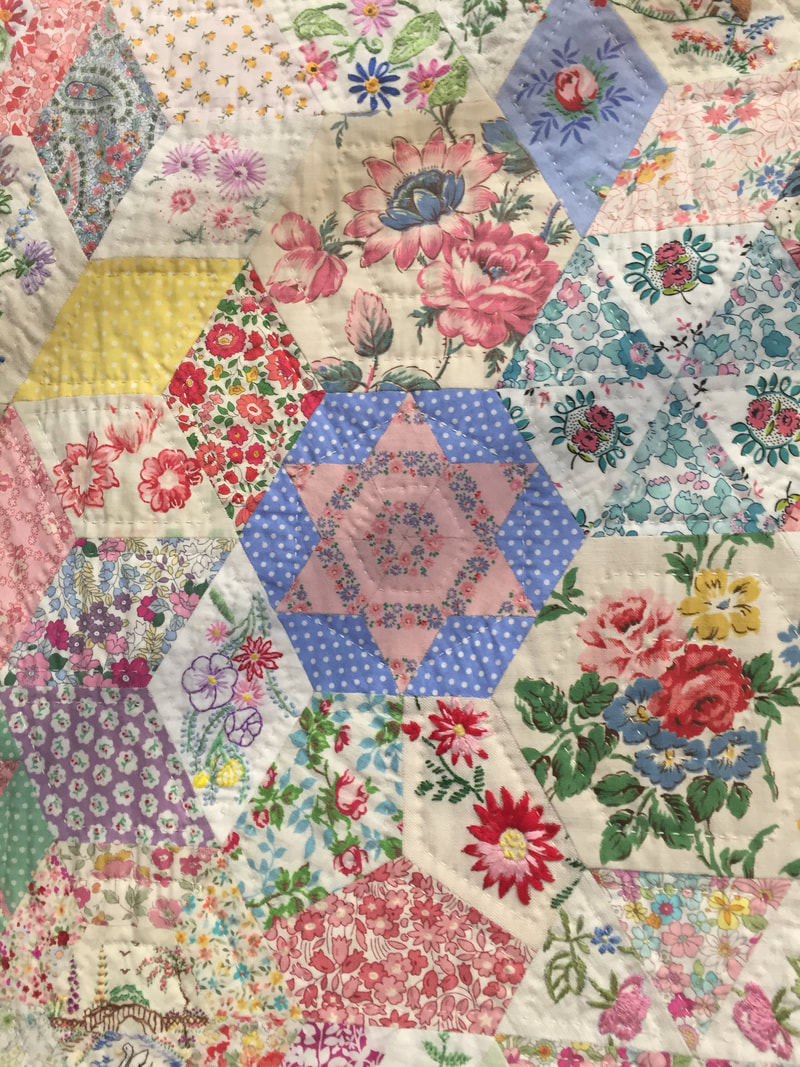 There is so much I could share about Festival of Quilts as there is so much to see, I've only really scratched the surface here. If you've never been before I highly recommend it as there really is something for everyone and it is such an exciting place to be. Well this became a rather long blog post, so stay tuned for part 2 in which I will share what I bought. I hope you've enjoyed seeing what I loved about the festival of quilts. Did you go? What were your highlights? Please let me know in the comments.
Happy sewing!  I'm going to tell you the little story about how and why I entered my mini quilt into a local art gallery competition. If you are like me and have never entered a competition or shown a quilt before, I hope that after reading this you will feel inspired to give it a go too! There is no doubt in my mind that patchwork is art. You only have to see the incredible quilts on display at the Festival of Quilts to appreciate just how talented quilters are. From choosing colour palettes to complex patterns, accurate cutting, matching seams and points, intricate piecing, quilting designs, the list goes on and on! Despite this I've had a hard time seeing my work as artistic, which is a reflection of my own lack of self-confidence. When my Dad saw my half inch hexie mini quilt, he said it was artistic, and that is a big compliment coming from him! I was eventually talked into entering it into the Lancashire Open Art Exhibition at Chapel Gallery and I was completely surprised when it was accepted! 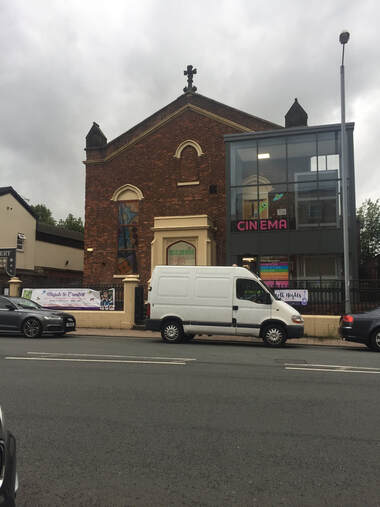 When it comes to art and art competitions, textiles is underrated and under represented. It is seen by some as less skilled than drawing or using paint and often viewed as more of a homemade crafts/hobby type thing. So I was really pleased that my piece was chosen and I was also glad to see a few other textile pieces in the exhibition. I find it difficult to promote myself and put myself out there in terms of my work, but thinking of it as a way of promoting textiles really helped me push past this. The more of us who show our work in these sorts of events, the better it is for the quilting industry and the more likely it is that quilting, embroidery and textiles in general, will be seen as artistic forms by more people. Maybe some people don't think of quilting as art because they haven't seen the amazing quilts that are out there? I know when I mentioned I was going to the Festival of Quilts to my brother he said, is that about duvets?! 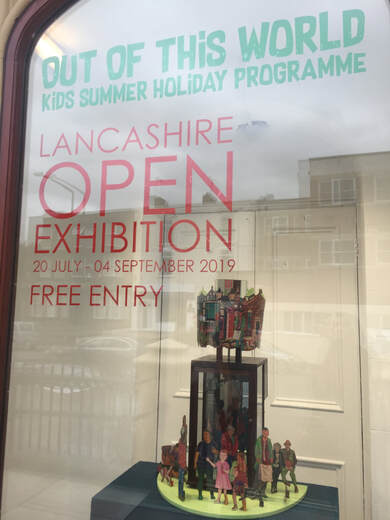 Now I've never entered a quilt into a quilt show, so I can't speak about what that is like, but I can tell you a bit about my experience of entering it into an art gallery and give you some tips for if you are going to do this one day. Tip 1 - Frame your work. Mine is a mini quilt so this was easy to do. I turned up to submit my piece with it unmounted and was told that it couldn't be accepted like this because it could be taken easily off the wall. (I had put two felt loops on the back with a dowel running through so it could hang off a nail!) It needs to be in a frame or mounted on a board which can be fixed to the wall with mirror plate fixings. Tip 2 - Don't frame it yourself unless you know what you are doing - unlike me! I bought an inexpensive frame from a shop, put my piece inside and then proceeded to struggle for half an hour to attach the mirror plate fixings to the back of the frame, resulting in splitting the wood. Keep in mind that I was rushing to do this as I knew there was a deadline to submit it. In the end I went to a local framers and explained my frame emergency and they sorted it out for me, and even gave me an 'artist's discount'! I am so glad I got it framed in the end because next to the other pieces of work it looked right. Unmounted would have looked wrong, so this was a good decision. Tip 3 - When you submit your piece to the gallery and they ask 'What's the title?" they mean what is the piece called, not what is your title (i.e. Mrs or Mr), yes, I made this rookie artist mistake!! Tip 4 - If you want to sell your piece, you will have to put a price on it. I had no idea what to sell it for so I put it not for sale. I've had some interest in it and somebody I know asked to buy it! But this is a sentimental piece so I'm leaving it not for sale. It's really hard to put a price on your work, especially if you are like me and are just starting out, but whatever you do, be sure not to undervalue your skills. Tip 5 - Enjoy the process! I felt nervous about the whole thing and now I look back, there was really no need. It's really fun that my piece is hanging in the gallery for the entire summer. 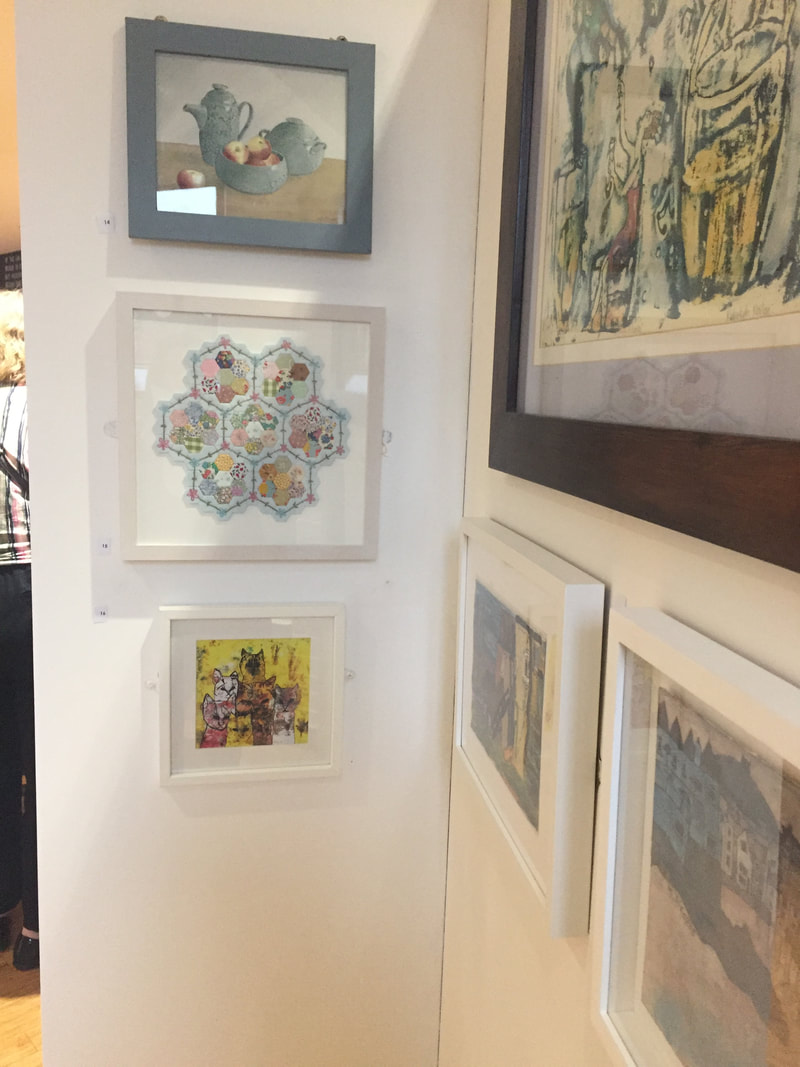 I named my piece Mabel's Garden. Mabel was my Gran who I sadly lost this year. She was a massive inspiration to me as she took a keen interest in my sewing and was a fantastic embroiderer, knitter and crocheter herself. She regularly used to visit Chapel Gallery to view the art and have a latte in the cafe. I think she would have been so happy to see my work in there. When we were little her garden was lots of different flowerbeds with paths in between so this mini quilt reflects that (the blue hexagons are the paths). My quilt is based on a traditional quilting pattern called Grandmother's Flower Garden so I thought this would be a fitting tribute to my Gran. 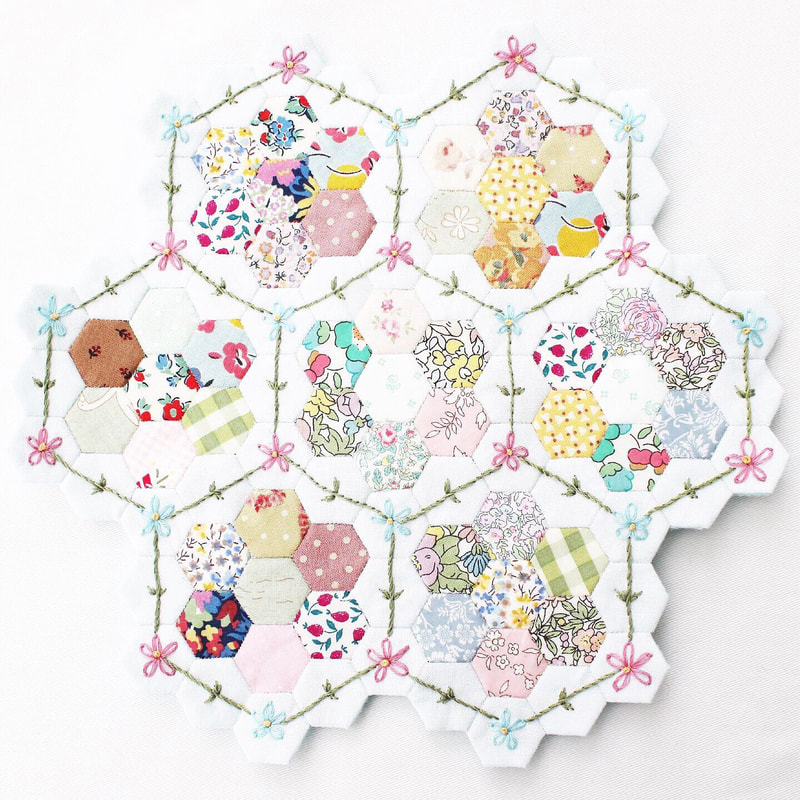 Have you ever shown your work in a show, gallery or competition? I'd love to hear your experience in the comments below.
Happy sewing!  Do you use Pinterest? I've been really getting into Pinterest lately and I'm finding it such an inspiring place. I have a lot of different boards over there, ranging from quilt inspiration to home decor, English Paper Piecing to making things for children. I fill my boards with images that I love, as well as images of things I've created. I'd love it if you would like to check out my boards, you can find me here. I spoke in my last post about how I think my style is vintage with a modern twist so here are some images that I think really sum that up. 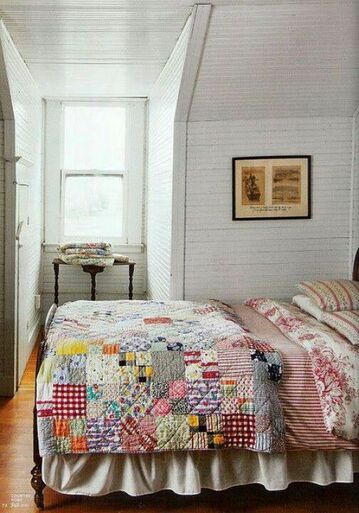 I love brightly coloured patchwork quilts against a neutral backdrop. I think it's the white walls that give this image a modern twist. 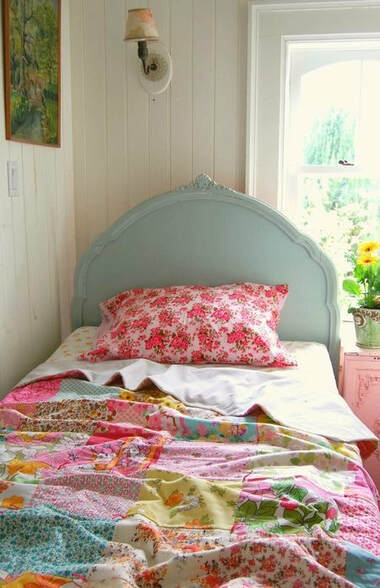 The room below looks so cosy. 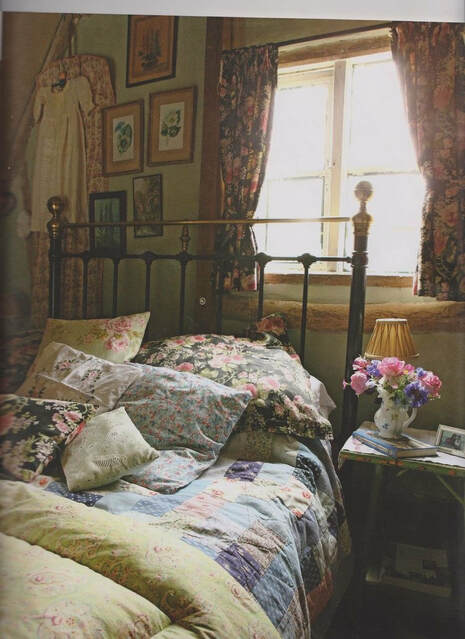 I love vintage china too! 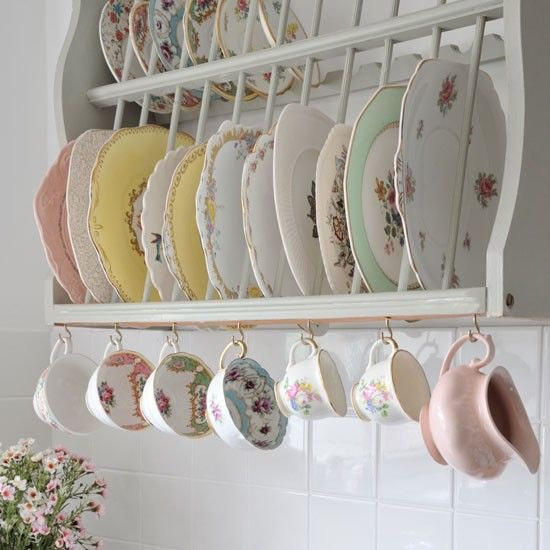 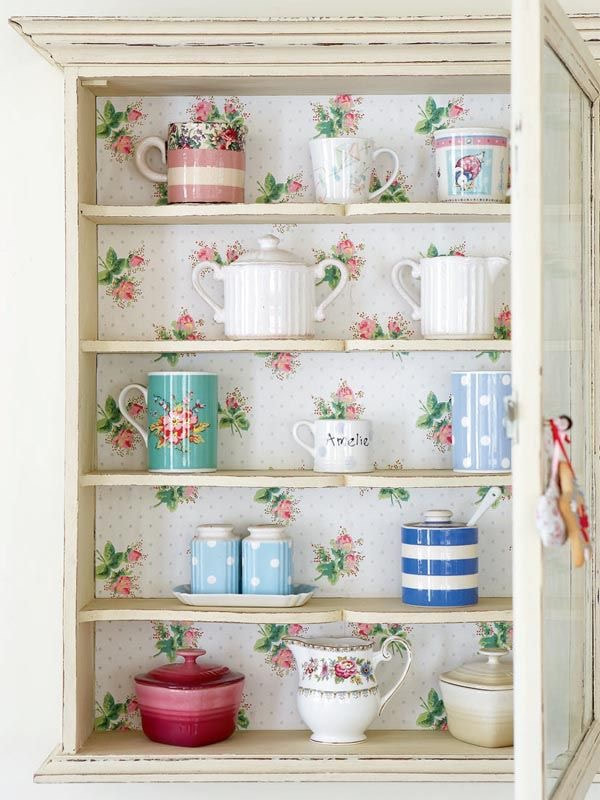 Do you have a Pinterest account? Let me know in the comments and I will be sure to check yours out too.
Happy pinning! 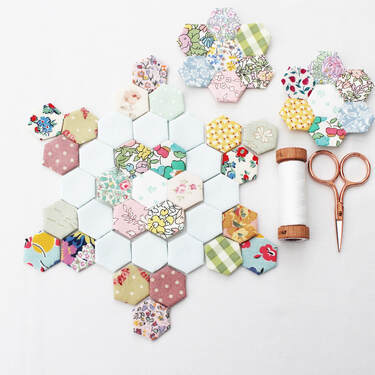 I've changed the name of my website from Rose Petal Patterns to Vintage Sewing Box and I just wanted to take a little moment to explain why. When I started Rose Petal Patterns, I set up a separate Instagram account and kept my personal one (vintage sewing box) going at the same time. The idea was that I would just show my own patterns, designs and tutorials on Rose Petal Patterns and save Vintage Sewing Box for other makes not designed by me. It soon became difficult for me to keep up with posting to two accounts regularly and something had to give. So I stopped posting to Rose Petal Patterns and decided to just show everything on my personal account. Recently there's been a bit of confusion about my two names, so I made the difficult decision to change my website. This also led me to rethink what I want to do with my website. I've decided I want to continue writing my blog as I really enjoy it. I also want to continue with tutorials because I love creating those. I want to develop more video tutorials as well as written/photographic ones and I definitely want to develop more free patterns. 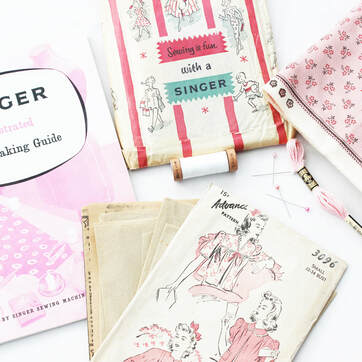 It feels scary changing my name here, I've worked hard on my website and I could see that I was getting lots of regular visitors which is so lovely. Even though my name has changed, not much else will actually change! So I hope you will all still pop over here to see what is going on! Vintage Sewing Box is a name that describes me really. I have a love of old, vintage, sewing treasures and I love how sewing connects me to the past. However, I am also really passionate about giving vintage style a modern twist to bring sewing into the 21st century and to get the younger generations into it. I think it's such a great hobby, I really want to inspire everybody to pick up a needle and thread! So moving forward, I think you will see more of me and my style over here, and I hope you enjoy what I make. Thank you for reading this, it really does mean a lot to me. Happy sewing! 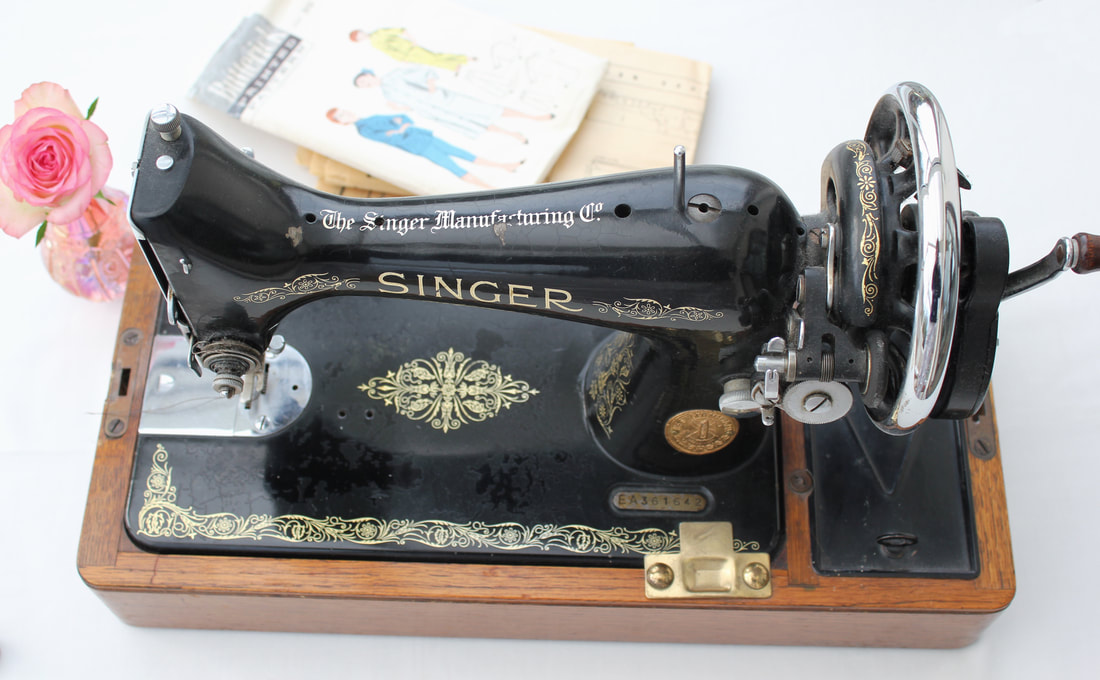 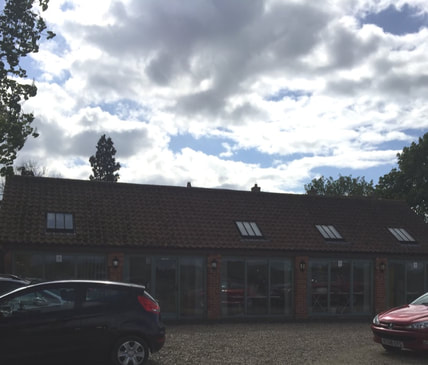 On Saturday 4th May I was lucky enough to be able to attend a workshop at Needle and Thread Workshops called An Introduction to Doll Making, taught by Katy Livings. I'm guessing that if you are reading this, you are familiar with Katy's work. She makes the most exquisite heirloom dolls and rabbits. Her attention to detail is perfection. I've followed Katy for many years and it really was a dream come true to be able to take part in the workshop and learn from her.  I've also followed Needle and Thread Workshops for a long time and I've longed to attend a class there. They run the most interesting array of workshops, all of which appeal to me. They are located in Lincoln which is three hours away from me, so I've never been able to go before. However my husband realised his childhood friend lives 15 minutes away from there so it was the perfect opportunity for him to take our son to visit friends whilst I did some sewing! 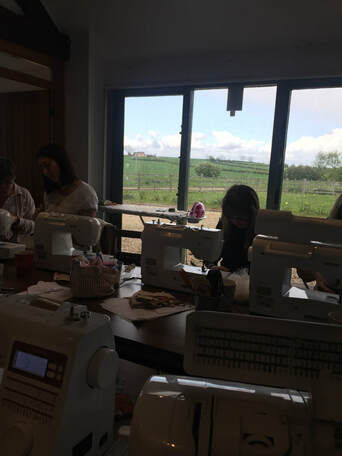 The location of Needle and Thread Workshops is stunning, a converted barn in the countryside, the perfect setting. When I arrived I was given a warm welcome and really taken care of with cups of coffee, slices of cake and a delicious, healthy lunch. If you ever have the opportunity to take a class there I highly recommend it. They have lovely sewing machines for you to use and if you need any help they are only too happy to support you. 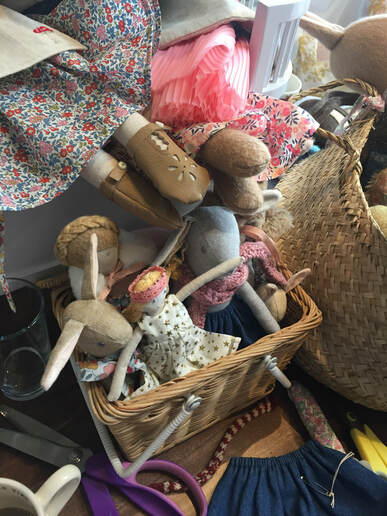 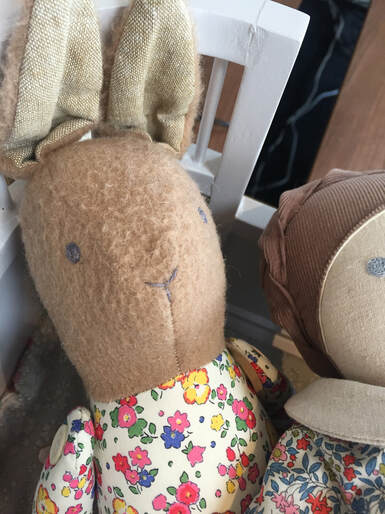 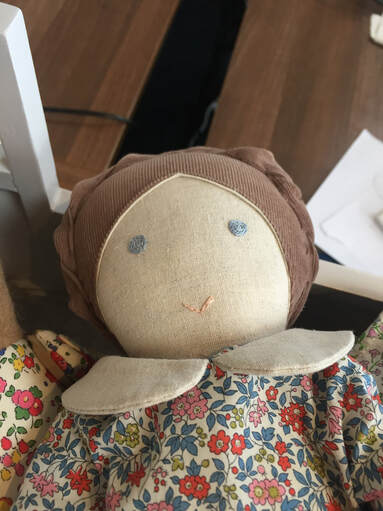 The first thing we did was look at the examples of Katy's work. Her dolls and bunny's are so beautifully made. It takes her four days to make one and you can really see how much love she puts into each and every single thing she does. She talked about her career and how it has lead her into doll making and it was really interesting to learn more about her. 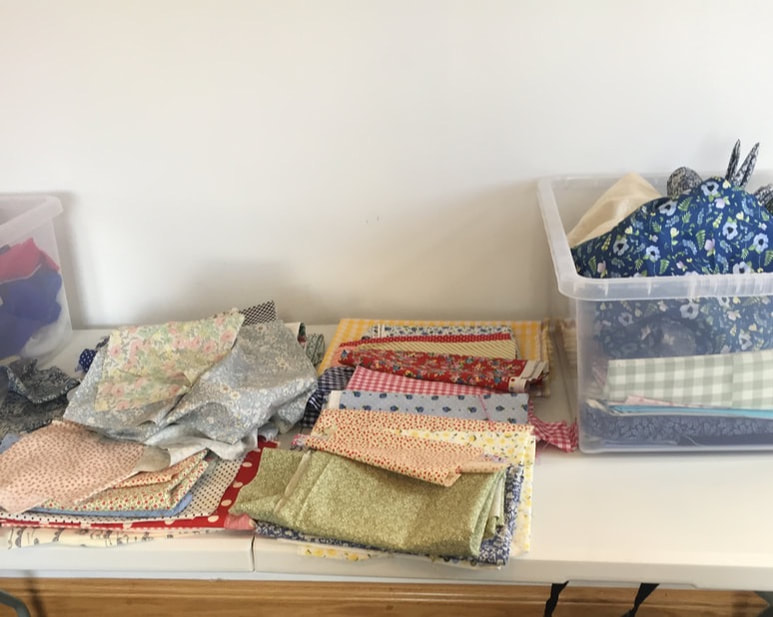 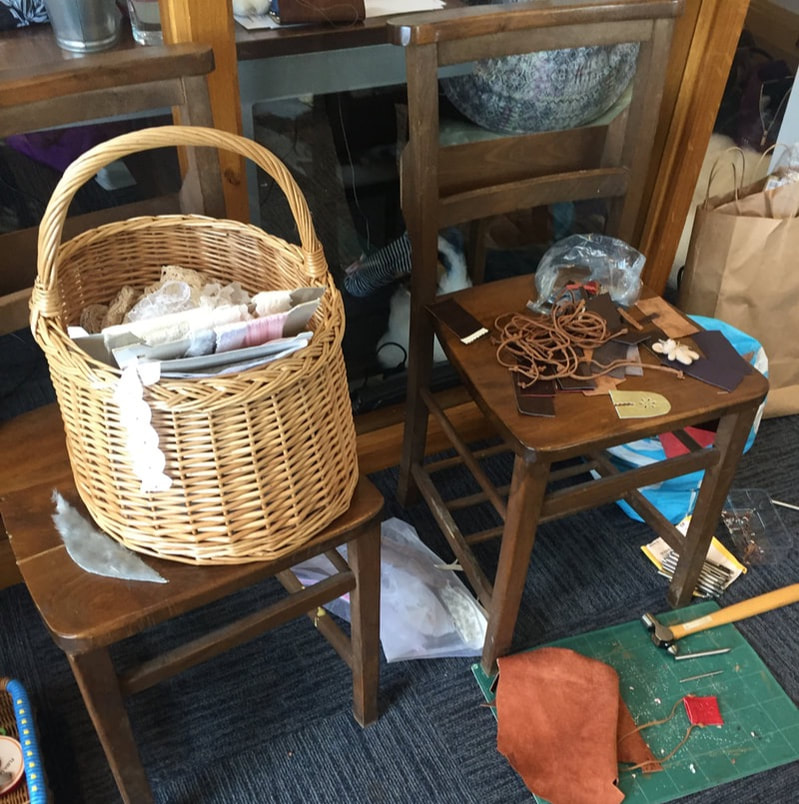 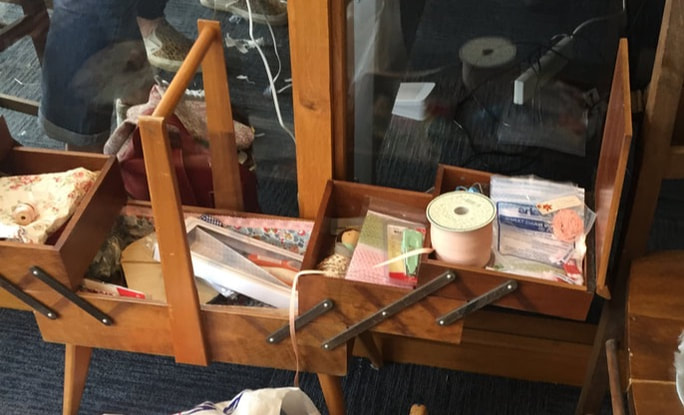 Katy then gave us patterns and we cut out what we needed. Then we could choose which fabrics we wanted to use and there was such an exciting selection, it was heaven! I chose to make a brown bunny out of cashmere wool and I'm so happy I did. It is so soft and luxurious and really makes my bunny feel special. I also chose to make the legs from gingham fabric and I picked denim for the skirt. For the body, I used vintage fabric that I had brought with me. It belonged to my Gran and I wanted to incorporate some of her things into my bunny as a way of remembering her. Katy showed me how to line the fabric I brought with calico as it was a fine fabric and this gave it much more structure. I also added a vintage trim to the skirt I made and this belonged to my Gran too. Katy is such a brilliant teacher. She is very generous with sharing her knowledge and I feel like I've learnt so much from her. She shares tips and techniques for every step of making the bunnies and dolls, it really is a masterclass. I loved the step by step examples she had brought of each stage of the making process. I'm a visual learner so being able to refer back to these throughout the day really helped me to understand the process and now I feel equipped with the knowledge to make more bunnies! 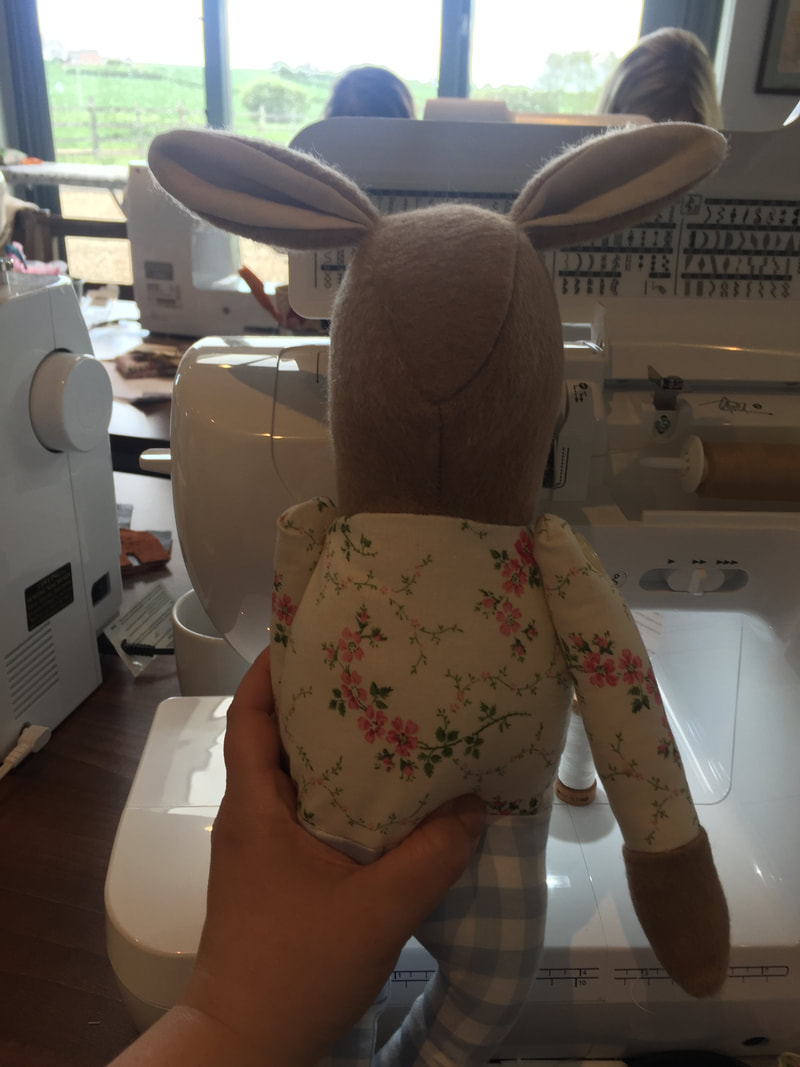 I had so much fun taking part in this class. It's so lovely to be in a room of likeminded people and to learn from other sewists around you. I didn't quite finish my bunny on the day but that's ok! I was excited to get home and finish her off and I'm really happy with how she turned out. I think now she needs an apron, a cape, a bag, some shoes, a quilt... 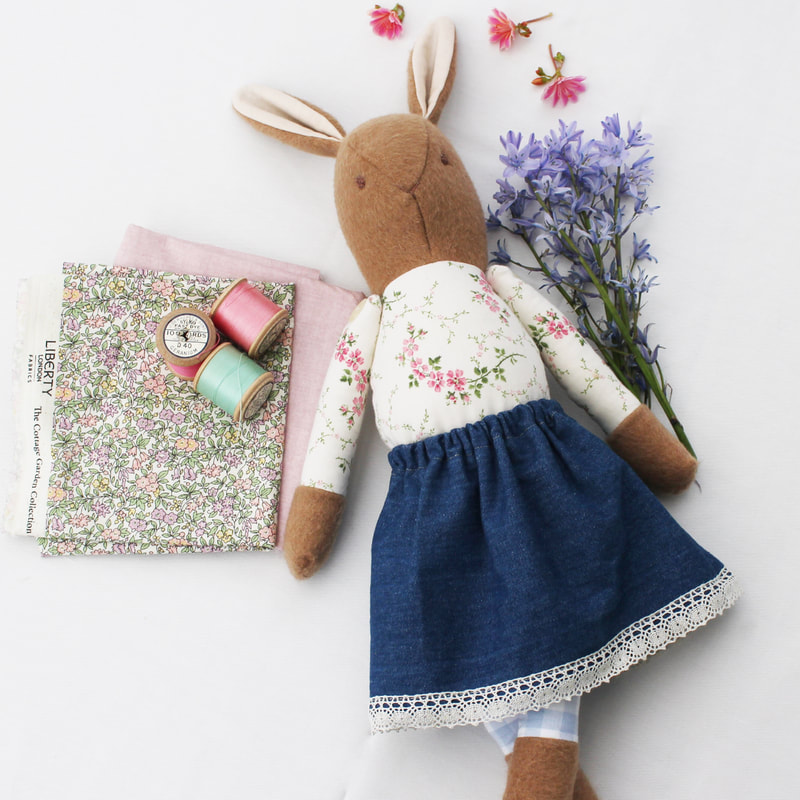 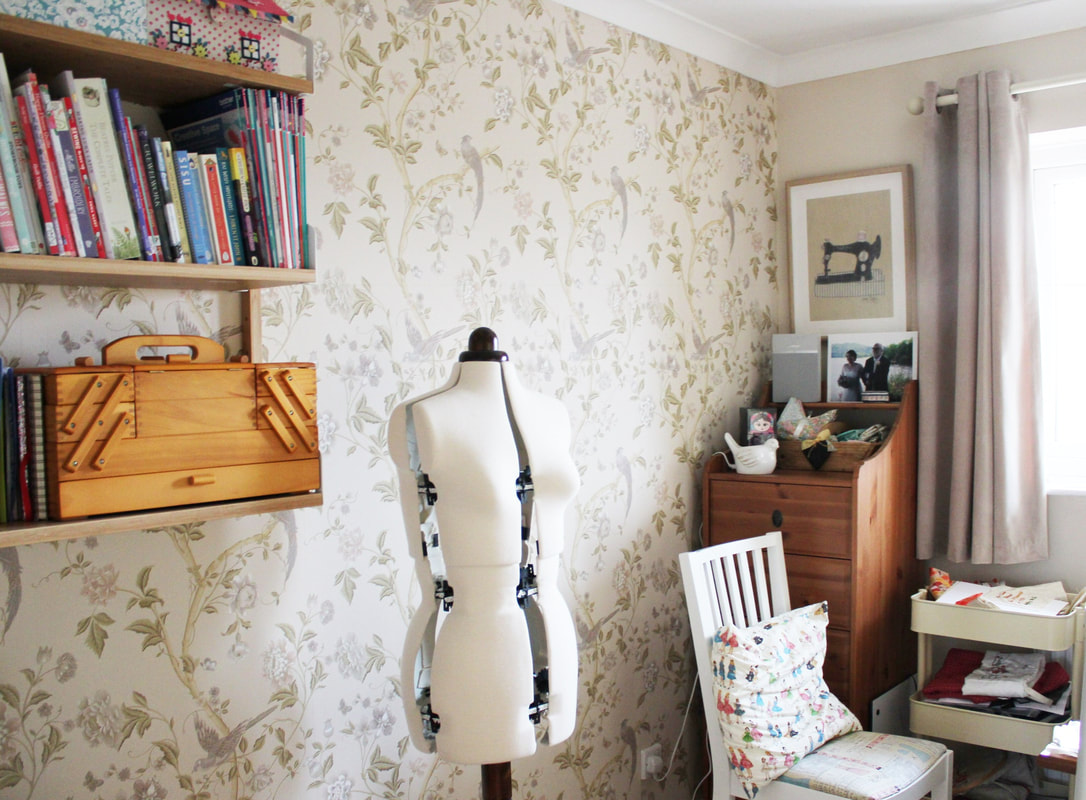 To start the new year off in the right way, I've had a bit of a reorganising session in my sewing room and I thought I would share it with you. First of all, I know I am incredibly lucky to have a designated craft room/sewing room. I really appreciate having this little corner of our house just for me. It allows me to leave a project halfway through and come back to it later without having to pack everything away. It's also good to have all the sharp pins and needles in one safe place as I have a toddler running around all day! But most importantly, it's a little sanctuary for me to relax and create and I surround myself with things that make me happy such as photos of loved ones and other lovely items that 'Spark Joy' for me. 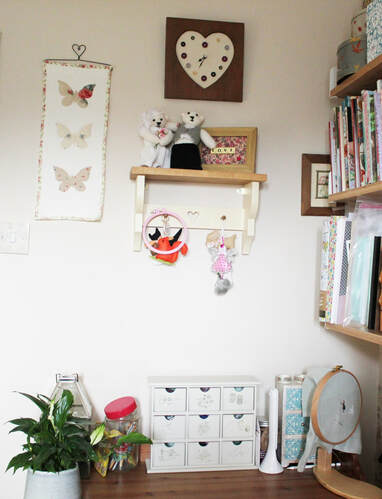 If you are thinking of creating a little sewing space in your house or if you are just starting out with sewing and are wondering what you will need, here are a few ideas that won't cost the earth but will make your sewing life a bit easier. 1. A decent table. This could be your dining room table or an additional table. I have this one and it is big enough to fit my sewing machine and overlocker. If I need to do some cutting out, I can use our dining room table downstairs but for years and years I did all of my large cutting out on the floor and even now, if I am basting a quilt I do it on the floor. 2. Lighting. You will see I have three lamps! Two of them are daylight lamps from The Daylight Company. My sewing room can be quite dark as the window is small but the main reason I need so many lamps is I do most of my sewing at night. Now I'm not suggesting you need three lamps! But I think one daylight lamp is essential, particularly for hand sewing. You can find them in Hobbycraft but also on Amazon for a reasonable price. 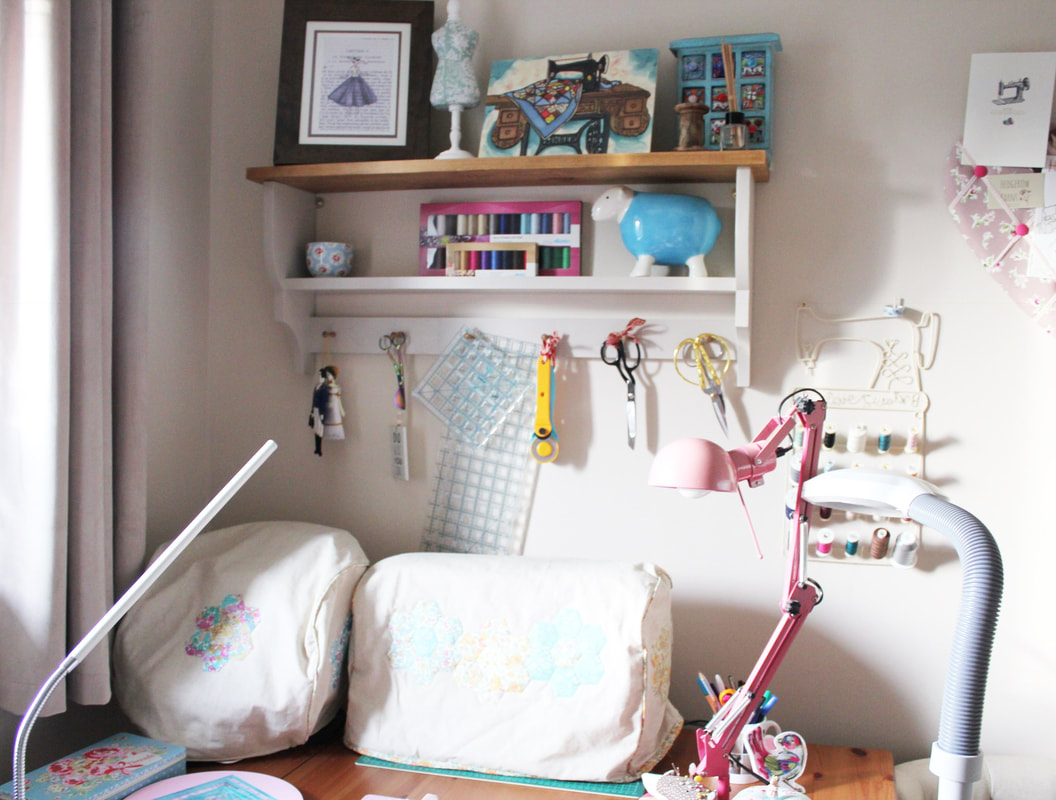 3. Shelves and storage. No doubt that if the sewing bug gets hold of you, you will begin to amass a significant amount of 'stuff'. In my case that's a large fabric stash, plenty of reels of cotton, skeins of embroidery thread, sewing books... the list goes on! You will definitely need a decent organising system for all of your things so you can find them easily. I could talk about organisation all day, so perhaps I will save that for another post! But as you can see, I have a mixture of shelves and drawers and I also use little storage and sewing boxes to store individual projects. 4. Make use of wall space. My sewing room is small so I like to have reels of cotton and the tools I use often to hand by storing them on racks and pegs on the walls. This is a good space saving tip if your area is small and I think it looks pretty too! 5. A comfy chair. If you do a lot of hand sewing, a comfy chair is important. I only just bought mine and previous to getting it I had been sitting on the upright chair I use to sit at my machine. I was finding that sitting this way to do hand sewing was giving me backache and some chest pain so I invested in a comfy chair to alleviate this. If you don't have a comfy chair for hand sewing, sit on your couch or on your bed and make sure your back is supported. Most importantly, take breaks! It is crucial you get up and move around frequently to avoid repetitive strain injuries, cramps and other aches and pains. 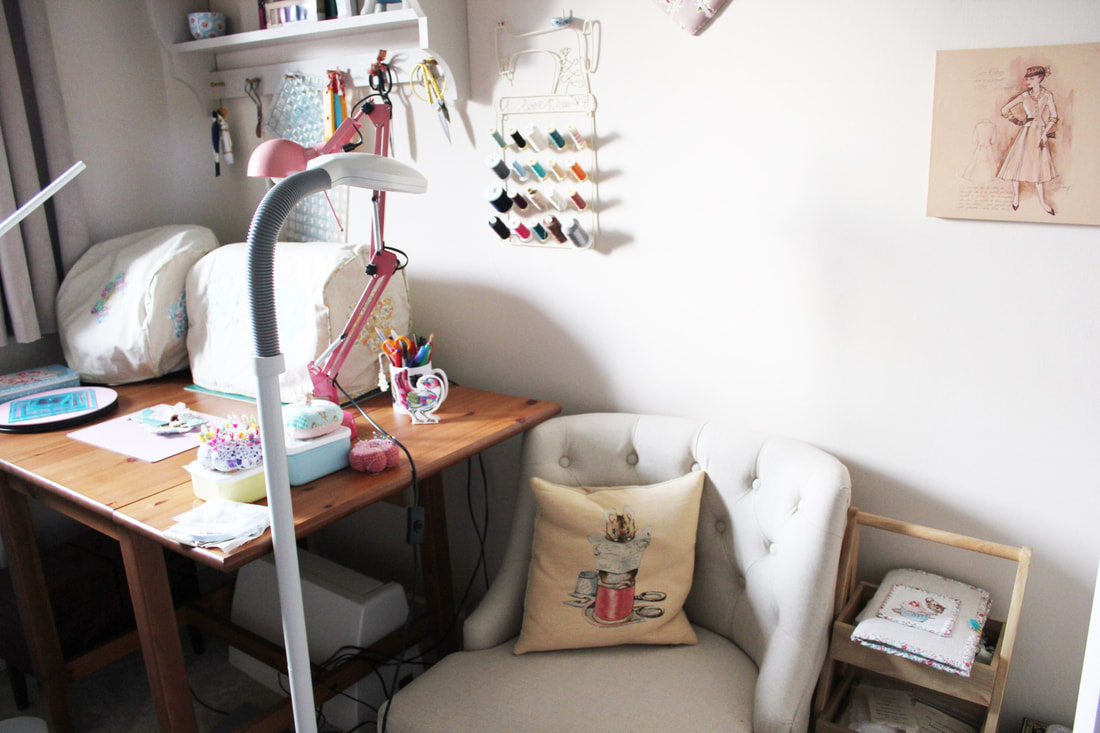 If you are just at the very beginning of your sewing journey, you really don't need many things to begin. If you want to start with embroidery then all you need is some fabric, a needle, embroidery threads and a pair of scissors. It really is that simple and inexpensive. If you want to begin with English Paper Piecing, all you need is some fabric scraps, a needle, thread, scissors and some paper templates which you can print off for free here. I hope you liked looking around my sewing space, what does yours look like?
Happy Sewing! |
Follow me on InstagramAbout the Author
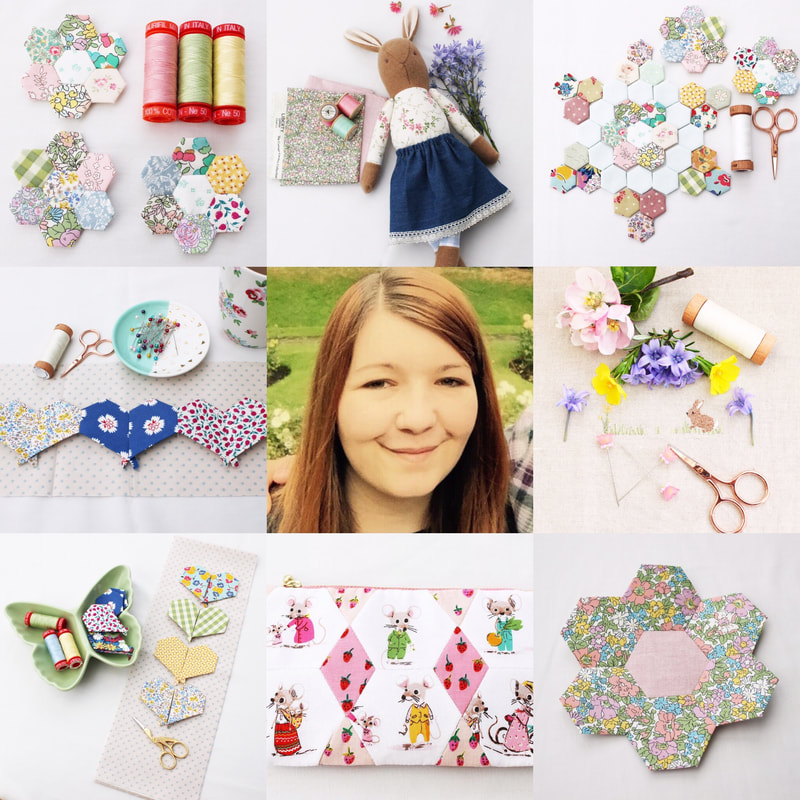
My name is Emma and I love all things sewing, especially EPP. My little blog is the place where I document what I'm making. I hope you enjoy reading what I'm up to! All opinions are my own and I only share things that I think you will love. Thank you for taking the time to stop by. Archives
September 2023
Categories
All
|
 RSS Feed
|
Copyright Vintage Sewing Box 2024
|
| ||||||