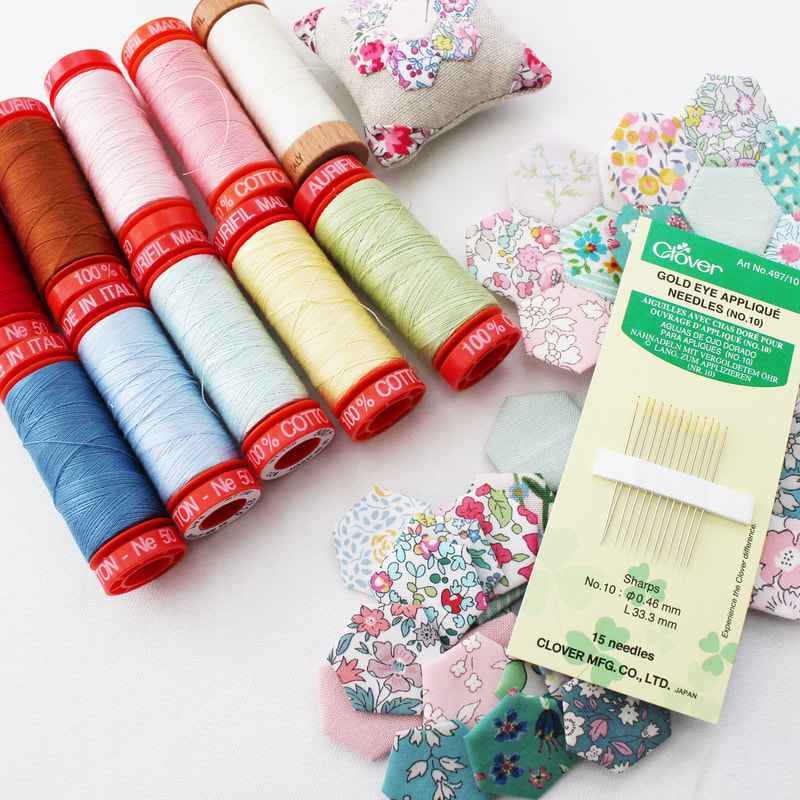
 For a while now, I've been on a search for my favourite needle and thread for epp. I often get asked what I like best, and I haven't been able to give a proper answer because I've been undecided. I've tried a lot of needles over the last six months and I've finally settled on these Clover Gold Eye Appliqué No 10 sharps needles. Needles are such a personal preference. I remember getting a few comments on Instagram from people saying my needles were too big and looked like tree trunks! But I find tiny needles cause me to grip tighter and give me hand and wrist pain. I also didn't like long thin needles as they can be too flexible and bend. So I've been looking for a needle that isn't too long or too short, is sharp and thin but not too flexible and I think I've found it. I do a lot of appliqué so these needles are great for that but they are brilliant for epp too. You might like these needles but again, it is personal preference and what feels comfortable to you. These needles are relatively inexpensive and a packet of 15 is around £1.65. I also really love the John James brand of needles and I use them for embroidery and general sewing. 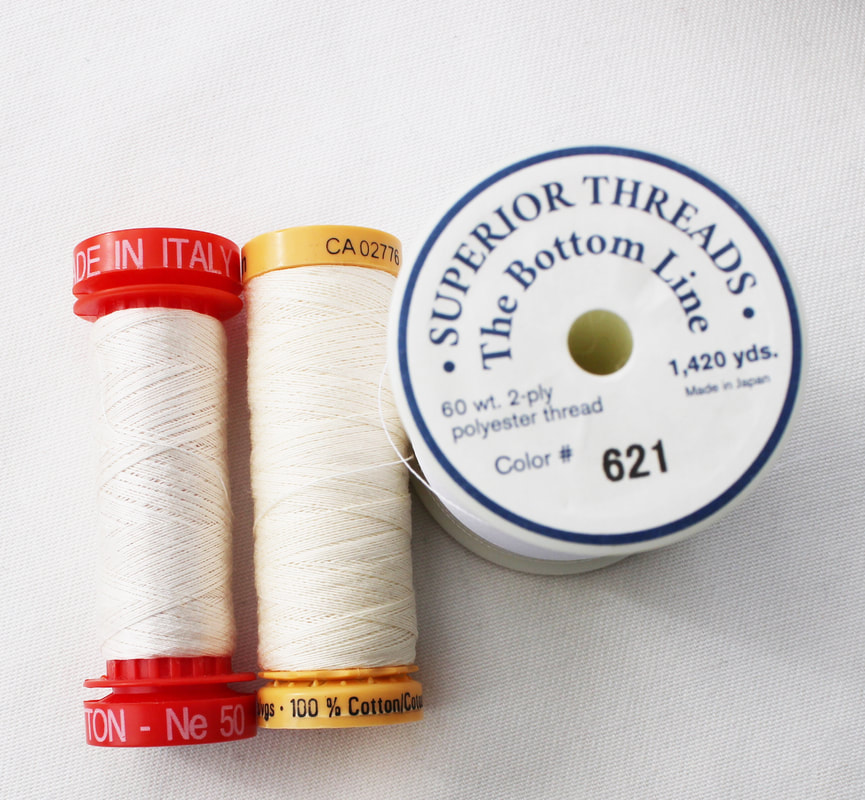 I've also been testing threads over the last few months so I thought I would share what I've found here. Again, it's all about personal preference and the result you are after. I mostly use Aurifil 50wt or 80wt. I love the Aurifil colours but the one I use the most is 2311 muslin. Aurifil is strong, fine and glides through the fabric. The 80wt thread is finer but can snap so I tend to use 50wt the most these days. I was having lots of thread breakage problems a while back and discovered that it wasn't the fault of the thread, but it was my needle. The eye of that particular needle was so sharp is was breaking the thread and stabbing my fingers. So I'm really happy I've found the Clover ones. Pictured below is the results of stitching two half inch hexies with Aurifil 50wt. The stitches are hardly visible. Aurifil 50wt is around £3.50 for a 200 metre spool. 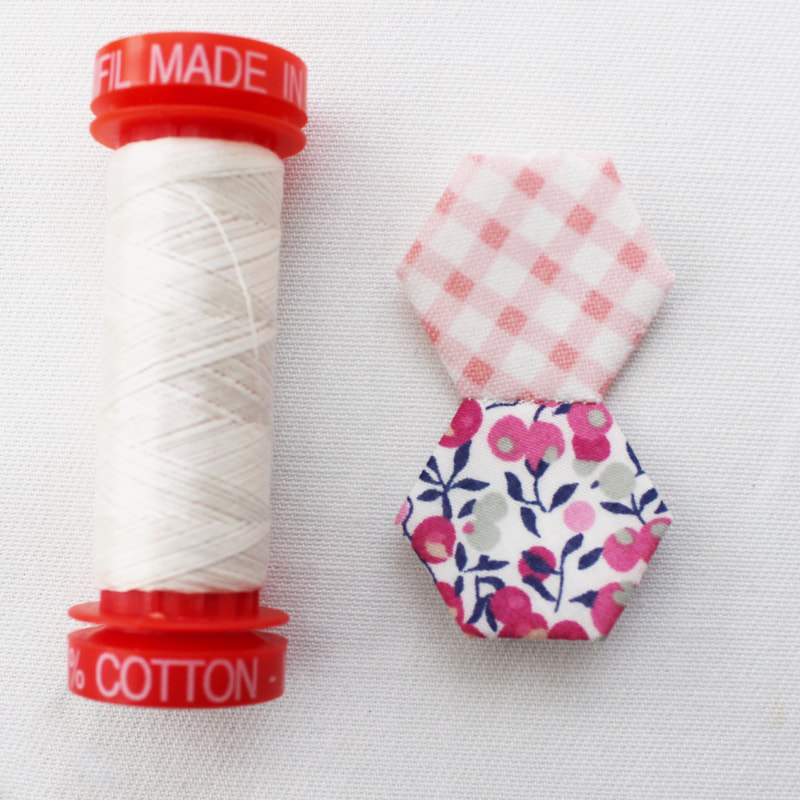 Next I tried Gutermann 100% cotton thread colour 919 which cost £2 for 100 metres. Again this thread was strong and fine and had excellent results, see below. 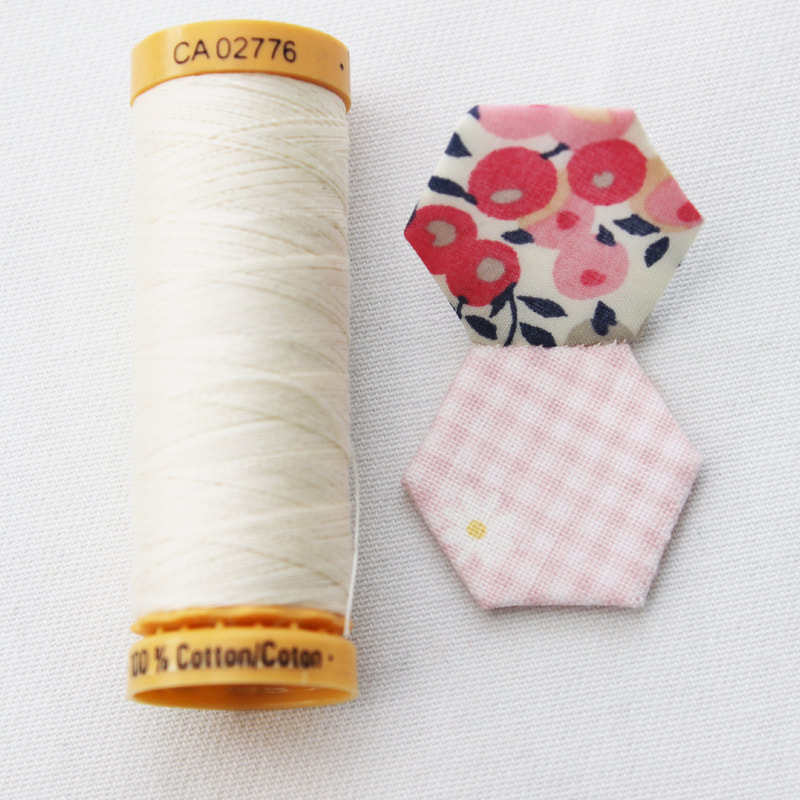 Finally I've been using Superior Threads The Bottom Line polyester thread which is 60wt in colour 621 and this cost me £6.95 for 1298 metres. The results were excellent, the stitches were almost invisible but as this is polyester and not cotton, it is slippy to use and sometimes the needle slides off. This has resulted in me gripping more tightly and causing me hand and wrist pain. (I am susceptible to this pain as I've suffered from carpel tunnel syndrome and RSI so please don't let this put you off this thread, the issue is my body not the thread!) 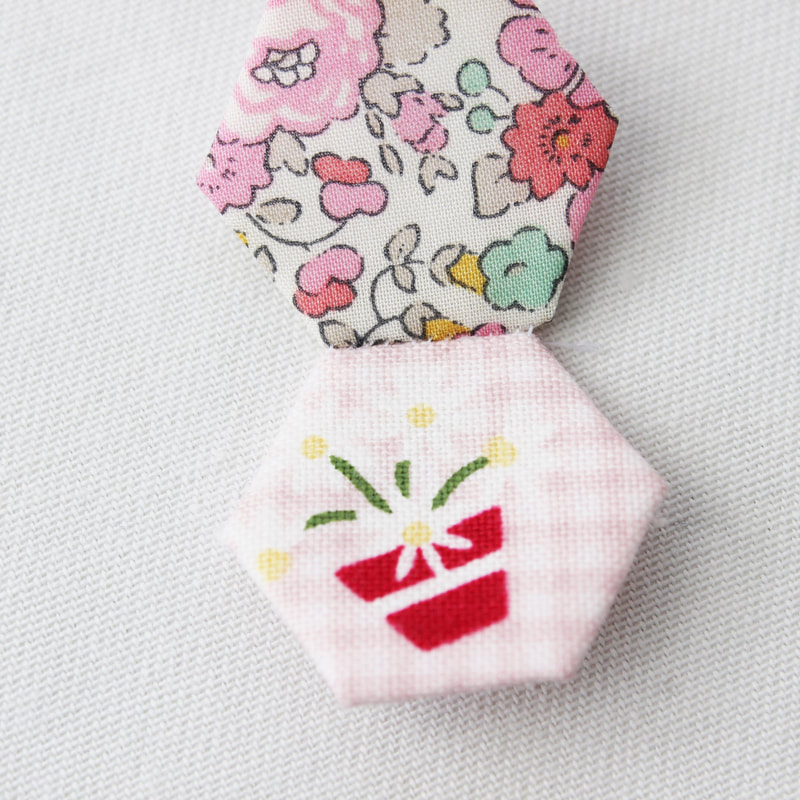 Overall, I've decided the Superior Threads is great for quarter inch hexies as my stitches can seem really big in comparison to the size of the hexies so I like that this thread minimises that and I will continue to use it for that. I love cotton thread and will use that for everything else. 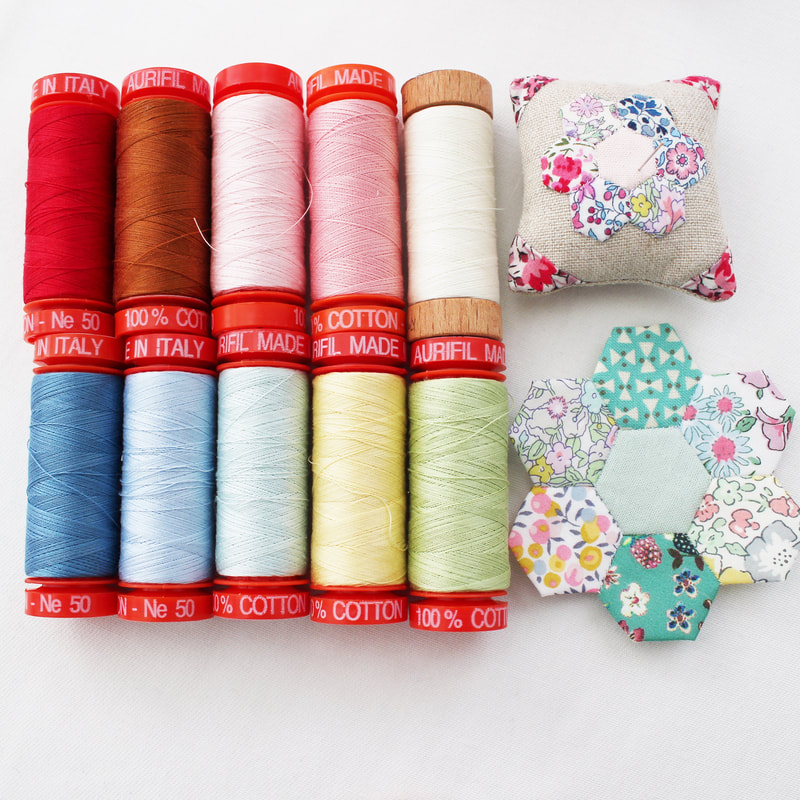 All this being said, you don't need to have this thread or these needles to do epp, just use what you have to get started. I recently saw an epp starter kit on Etsy that was over £40 and it didn't include any fabric or paper templates and this got me thinking, what does a beginner need to start out for epp? How much does it need to cost? EPP is a simple craft that requires simple tools and materials and therefore shouldn't cost a lot of money and you shouldn't need to invest a lot of money into it to start out. As a thank you for the support I've received on Instagram and over here on my blog, I've decided to host a little giveaway. All you have to do is leave me a comment on this blog post telling me what your favourite needle and thread is. I will leave the giveaway open for a week and then I will pick a winner randomly and it will be announced on Instagram and on this blog. You will win an epp starter kit designed by me that contains a few of my favourite things such as needles, thread, a Sewline glue pen, paper templates and some pretty fabric. This giveaway isn't sponsored by anybody and it's open worldwide but please just one entry per person. If you follow me on Instagram and on Bloglovin then it will be easy for you to see when I announce the winner. Thank you and good luck!
24 Comments
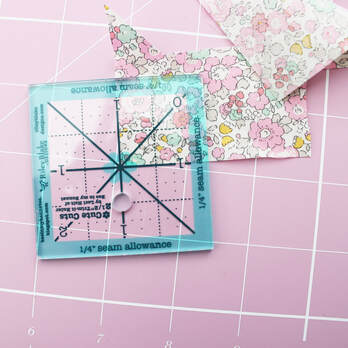
 I made these super cute tiny pincushions to take part in the teeny tiny pinnie parade that is taking place on Instagram at the moment. It is being hosted by Cheri @tinkerellen and I thought I'd share how I made them here just in case there's anybody out there who was curious or who would like to have a go too. They are perfect for using tiny scraps and the finished result is two inches square! I've linked to some products I've used but all links are just for your information and are not sponsored or affiliate in any way. If you have any questions you can always ask me on Instagram, in the comments here or through the contact form on the home page. I hope you like this tutorial! 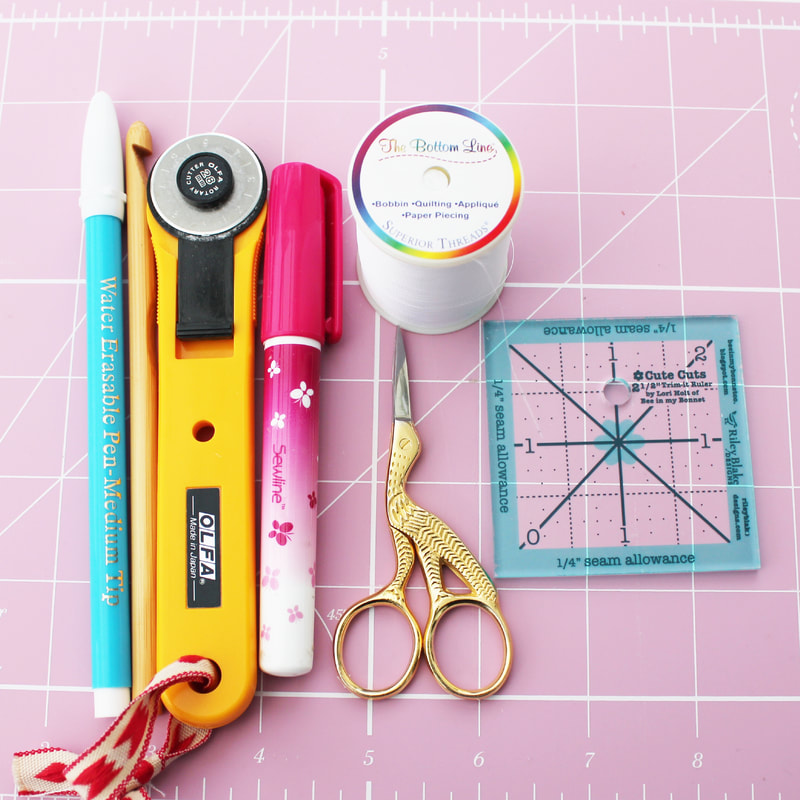 Tools To make this pincushion you will need the usual sewing supplies, needle, thread, sewing machine, rotary cutter, scissors, cutting mat, ruler, Sewline glue pen, erasable pen, point turner (I use a crochet hook). I'm a big believer in use what you have and in that you don't need fancy things to create beautiful projects, but I am going to recommend two things for this pincushion which are not in any way 'must have' items but they do make life easier. Firstly the little two and a half inch ruler pictured above. It is called Cute Cuts and I bought mine from Sew and Quilt. This is one of my most used tools for sewing as I find it to be the perfect size for most of the things I make and I use it daily. The other thing I am going to recommend is Superior Threads The Bottom Line thread. It is a polyester thread and it has been said that polyester thread can damage cotton fabrics over time (which I have no experience of) and whilst I do prefer using cotton thread, this thread is perfect for this project as it is strong and hardly visible. When making tiny things, your stitches can seem really big, so using this thread reduces this. Again, this can be bought from Sew and Quilt. You will also need seven, quarter inch hexagon templates. You can use paper or I use hexiform from Ashmead Designs. The hexiform doesn't need to be removed so this makes the process even easier. If you want to use paper, I have free printable templates here. Materials You will need:
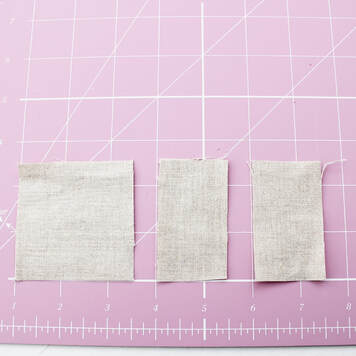  1. First make your English paper pieced hexagon flower. I have a video tutorial here showing how to make a larger hexagon flower. To make a small one the principals are the same, but I don't cut the thread after each seam, I carry it across the back, you can't see it so nobody will know! If using paper templates, you will need to press your flower, spray with spray starch and press again before removing the papers and then appliqué it onto your two and a half inch backing fabric. Again, the little ruler is so useful here as it helps you centre the hexie flower. 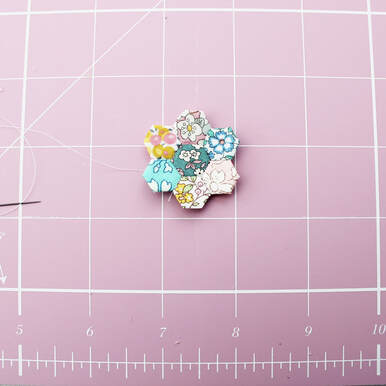 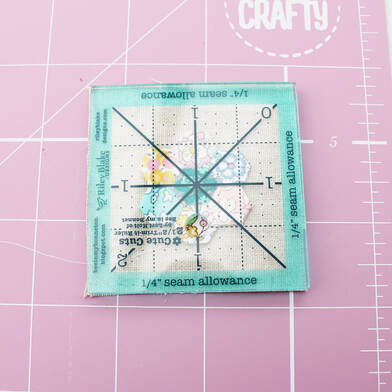 2. Next you need to mark where you will add the corners. On the top edge, I measured one inch in towards the centre from each corner and marked it with a water erasable pen. I then marked one inch down from each corner and marked it. I repeated this with the bottom corners, measuring and marking one inch in along the bottom edge and one inch up. 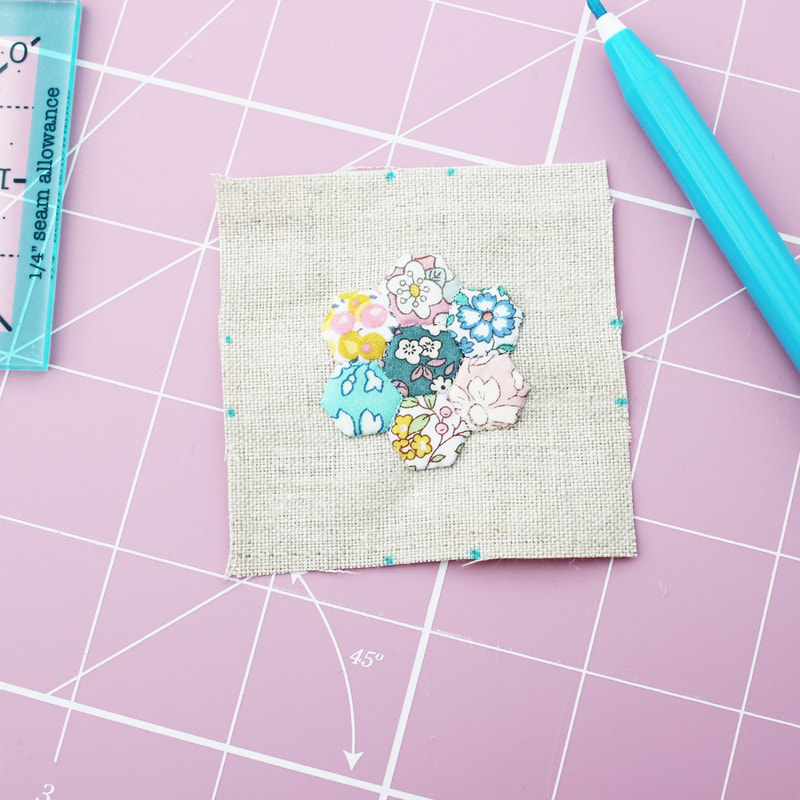 If it helps, you can draw a line across these points to mark the corners and show where you will stitch. 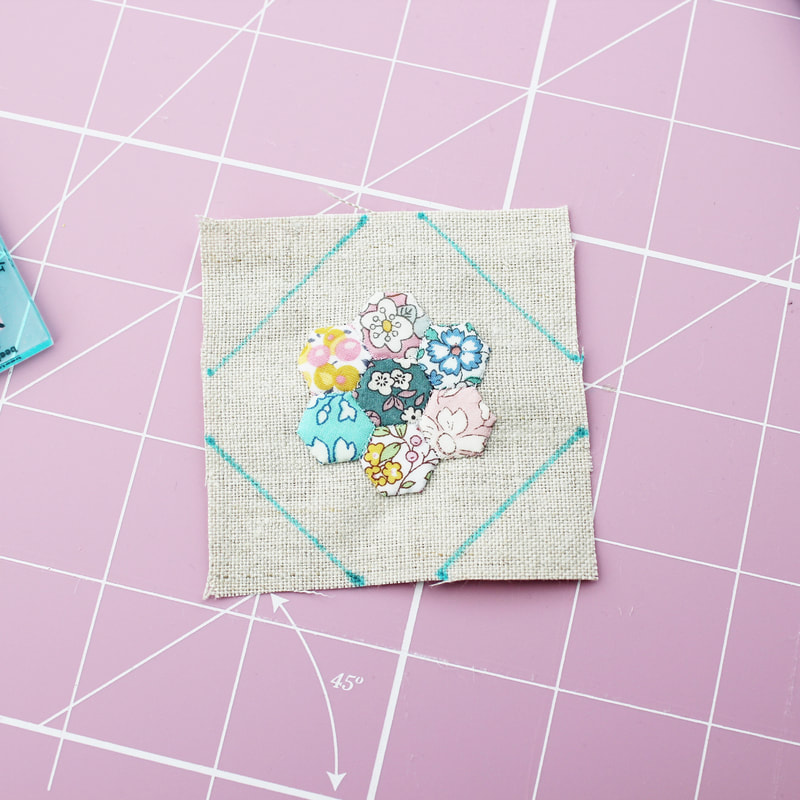 3. Next take your one inch squares and fold them in half. Finger press to get a visible crease across the square but take care not to stretch them out. If it helps, you could draw a line across the squares instead. 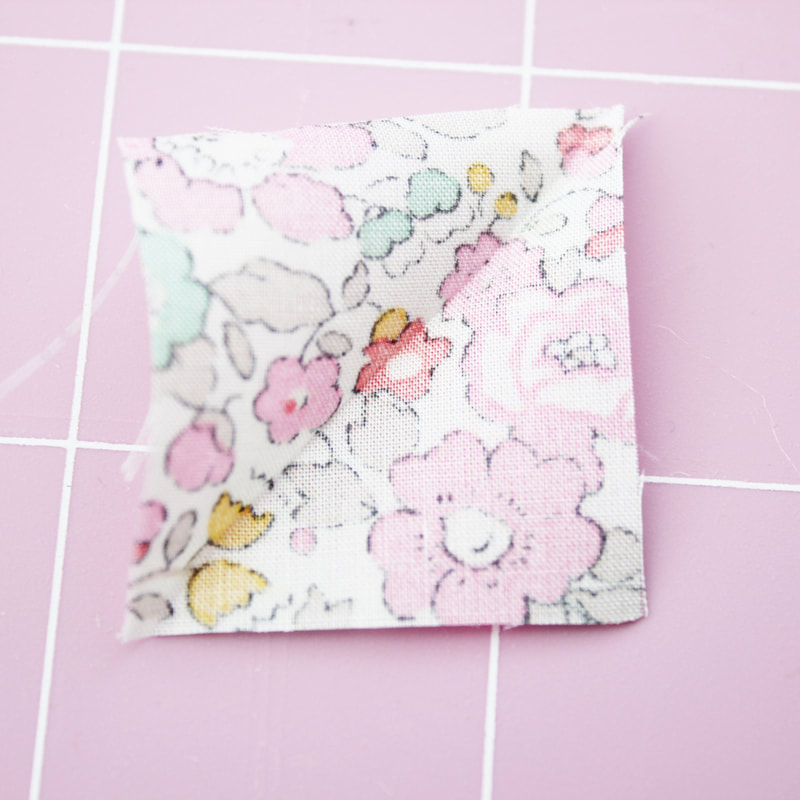 4. Place your fabric square on the corner of your pincushion top, right side facing down, lining up the diagonal lines. Your fabric square is slightly larger than the corner of your pincushion so it will overlap the edge. This will be trimmed off afterwards. I use a dab of Sewline glue to hold it in place as this works better than pins. Stitch across the diagonal line with your sewing machine and repeat for the remaining corners. 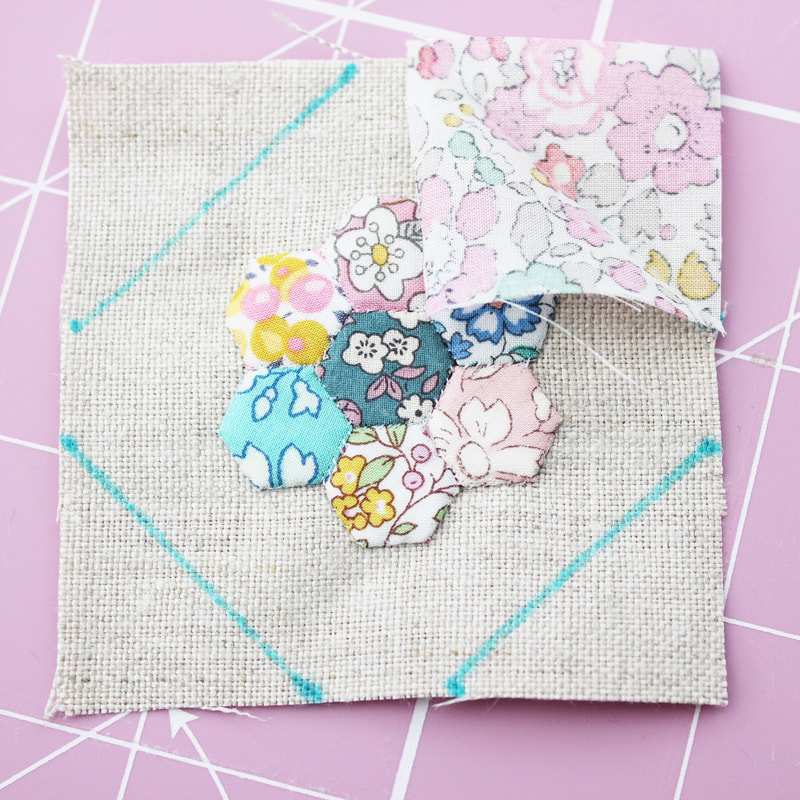 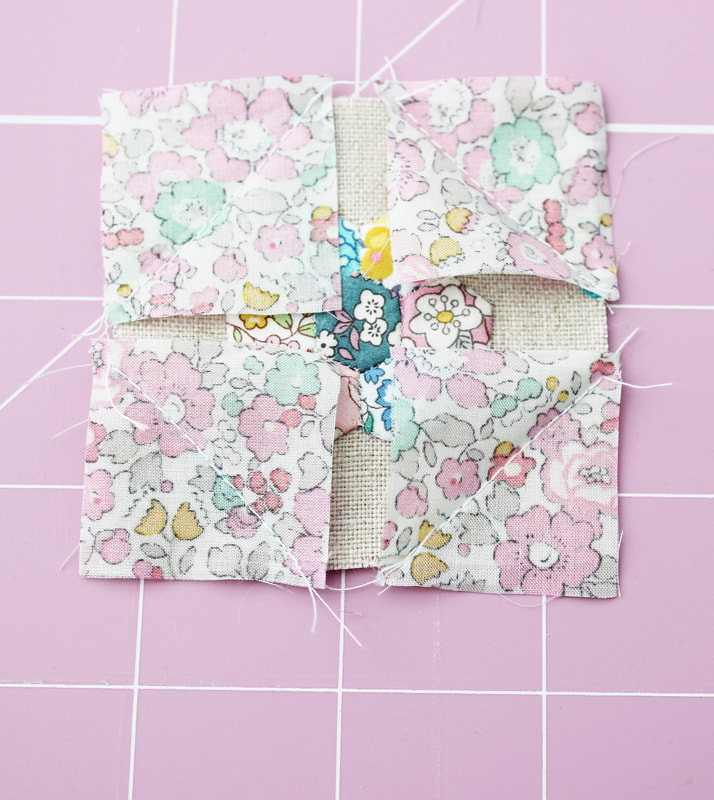 5. Trim the seam allowance at the corners back to a quarter inch and turn your corners out. Remove your water erasable pen marks and then press with an iron. Take care not to use the iron on the erasable ink as this can make it difficult to wash out. This is also the time to add any hand stitching details. I added a tiny running stitch around the edge of the hexie flower. 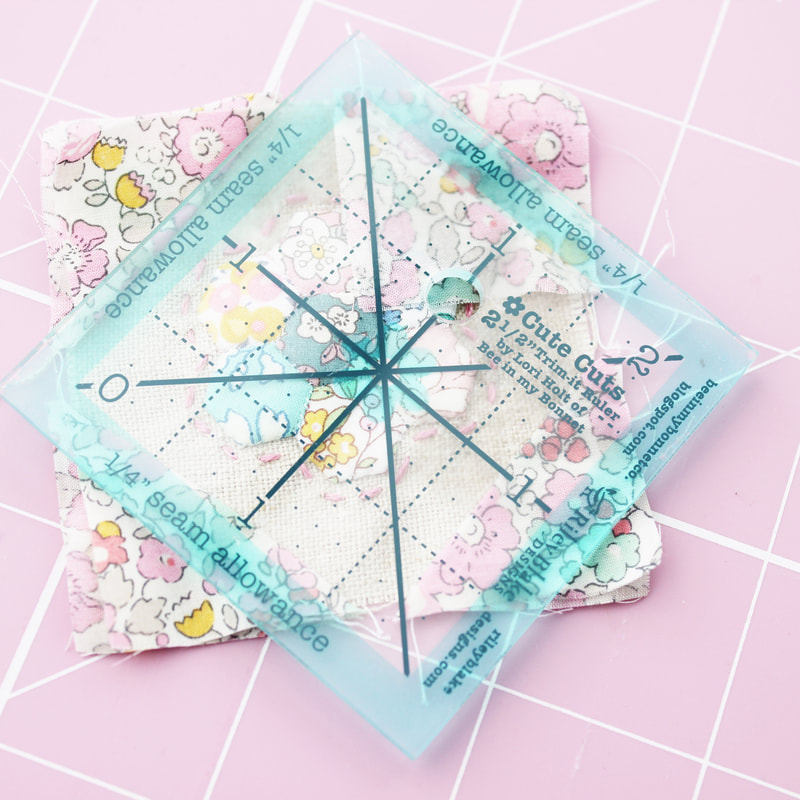 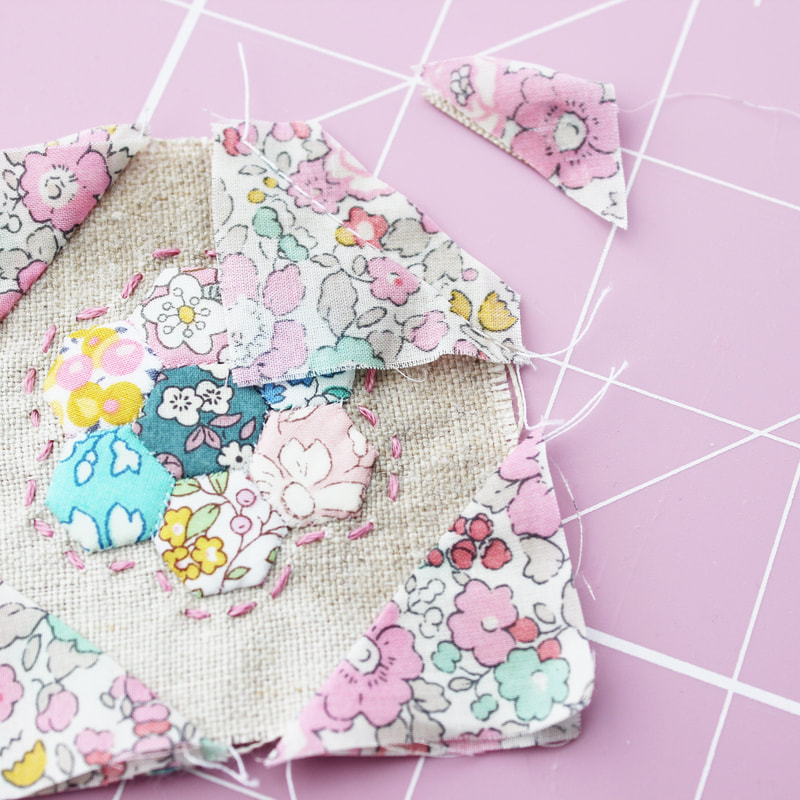 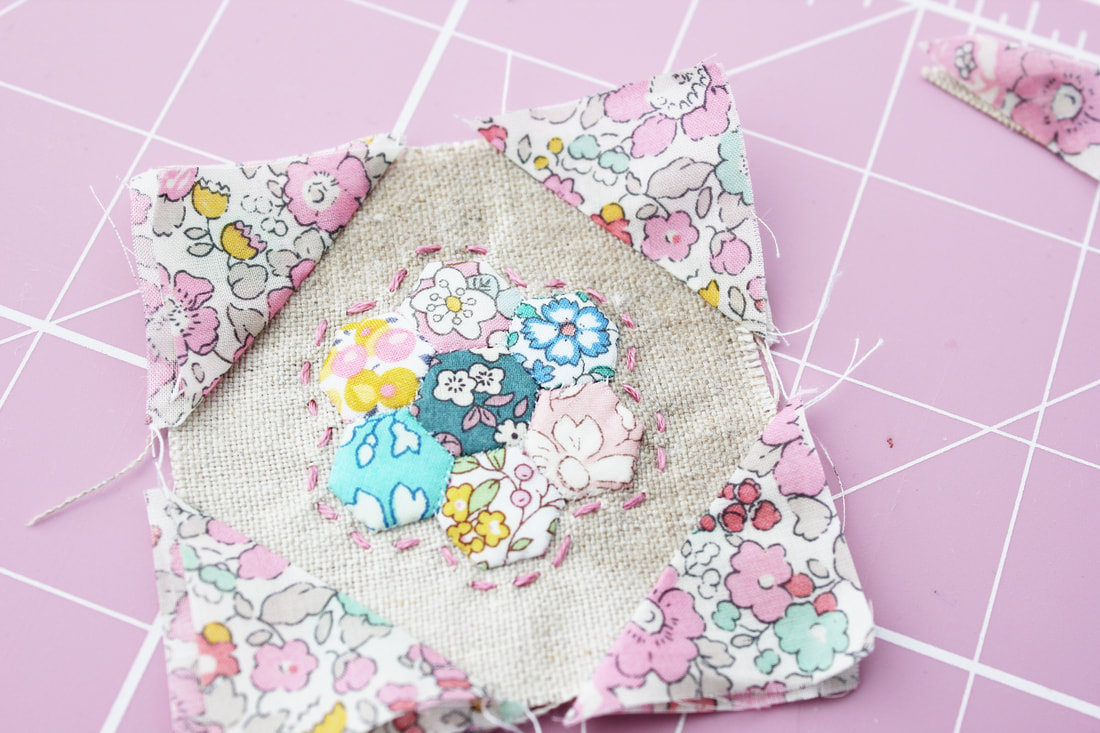 6. Using the little ruler, trim your block to make sure it is two and a half inches square. The two pictures below show before and after being trimmed, so it does make a difference. 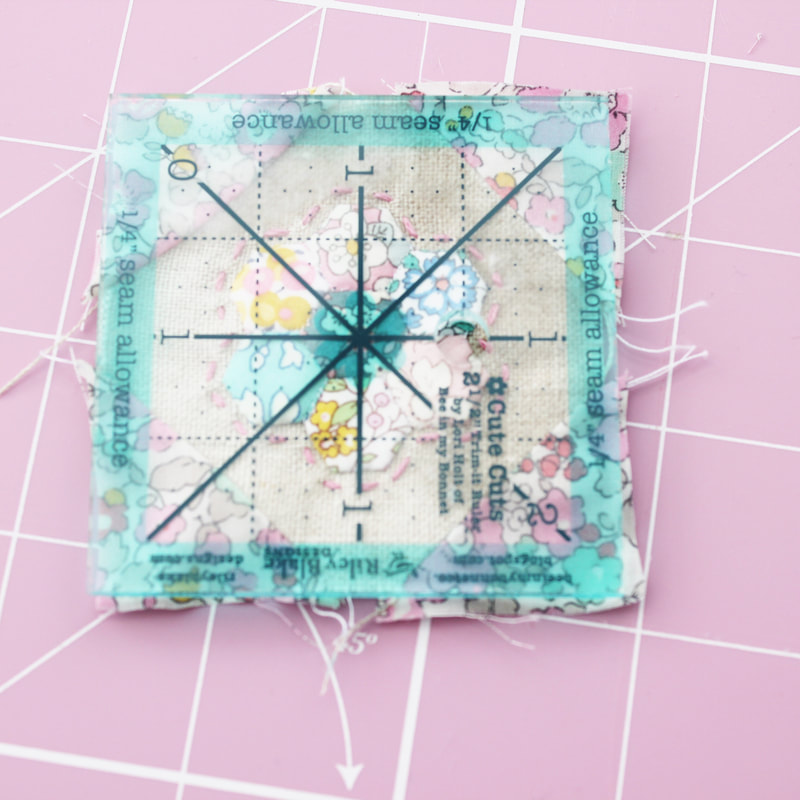 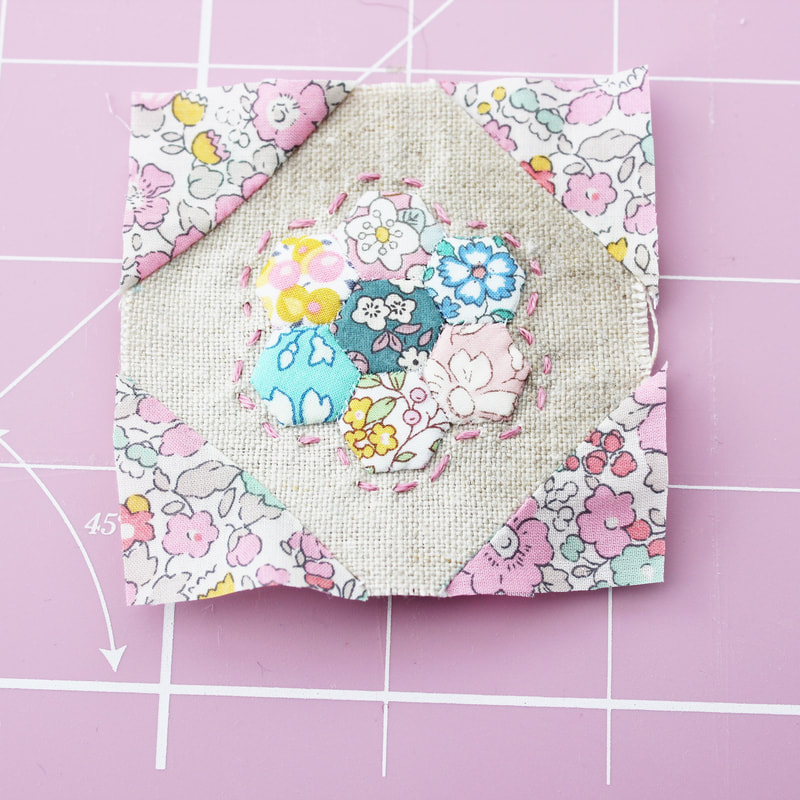 7. Now it's time to make the back. Take one of your rectangle pieces and fold over one of the long edges a quarter inch and finger press in place. Place it right sides together on top of one side of your pincushion top, making sure the folded edge in in the middle. 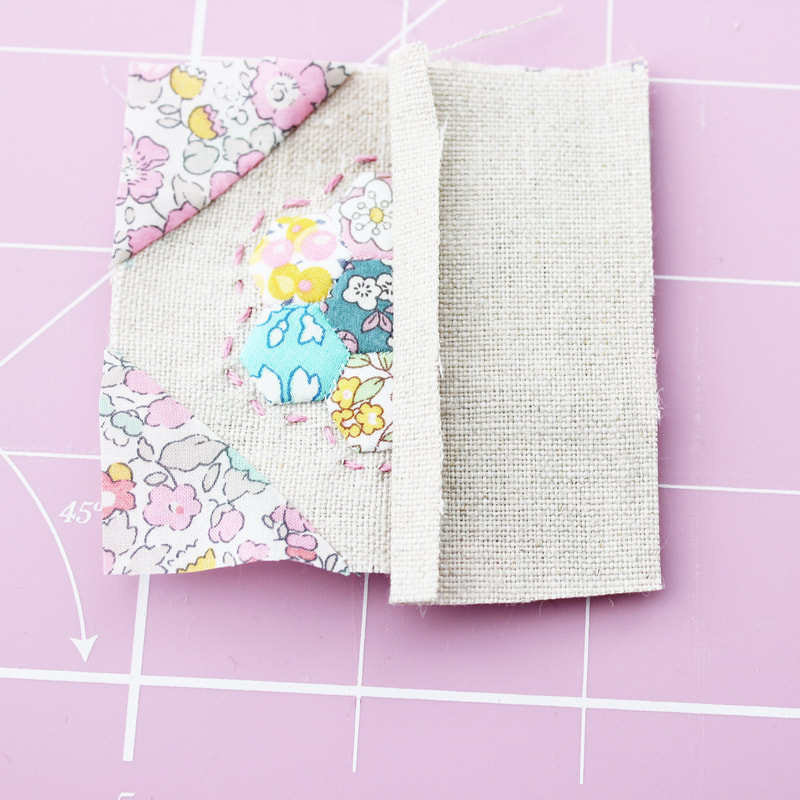 8. Stitch this in place along three sides, leaving the folded edge free. I started my stitching after the fold and finished it before the fold at the bottom. I used just less than a quarter inch seam allowance when sewing this together to allow for turning it right side out. Repeat for the other side with the other rectangle piece in exactly the same way. 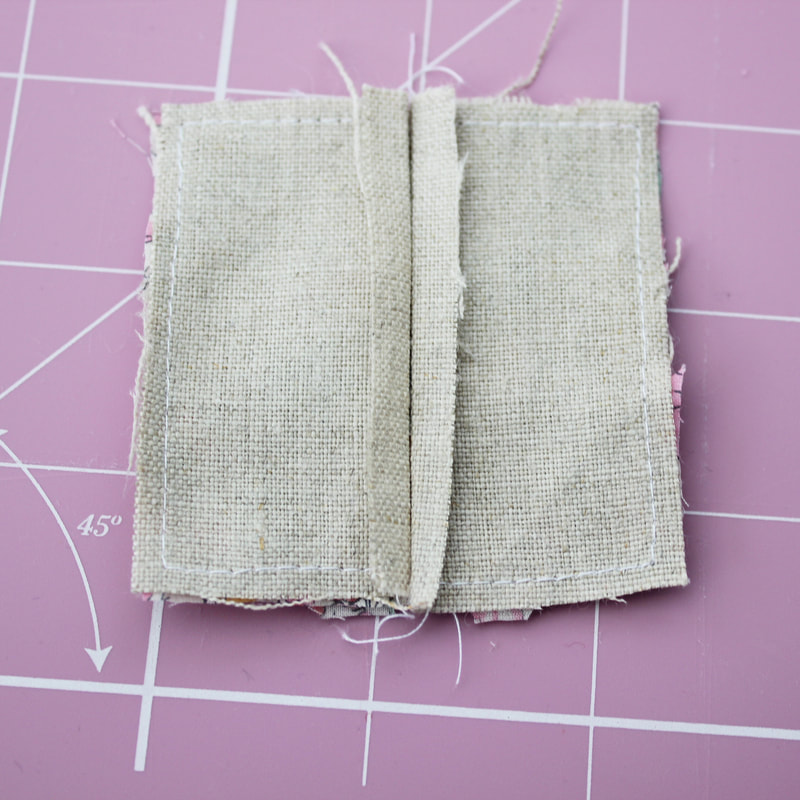 9. Now gently turn your pincushion right side out. I used a wooden crochet hook to help push out the corners. Press with your iron. 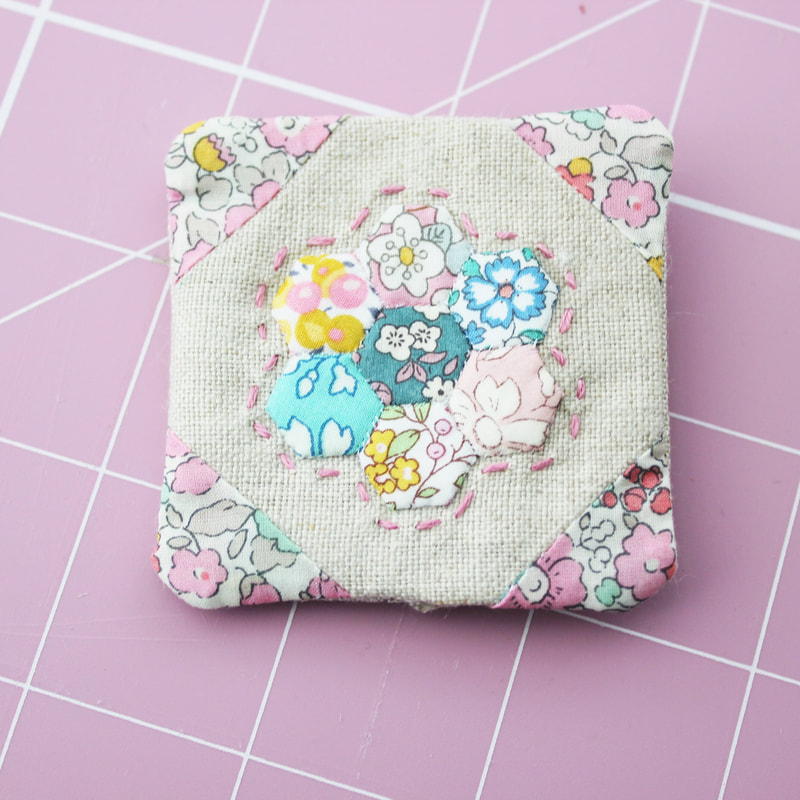 10. Now it's time to stuff your pincushion. I used toy stuffing but you can use crushed walnuts for a really nice pincushion feel. Take care not to overfill it as this will make sewing up the opening tricky.  11. Now stitch the opening closed. I used a ladder stitch for this which is another reason why polyester thread is good for this project as when you pull the opening closed, your thread won't snap. 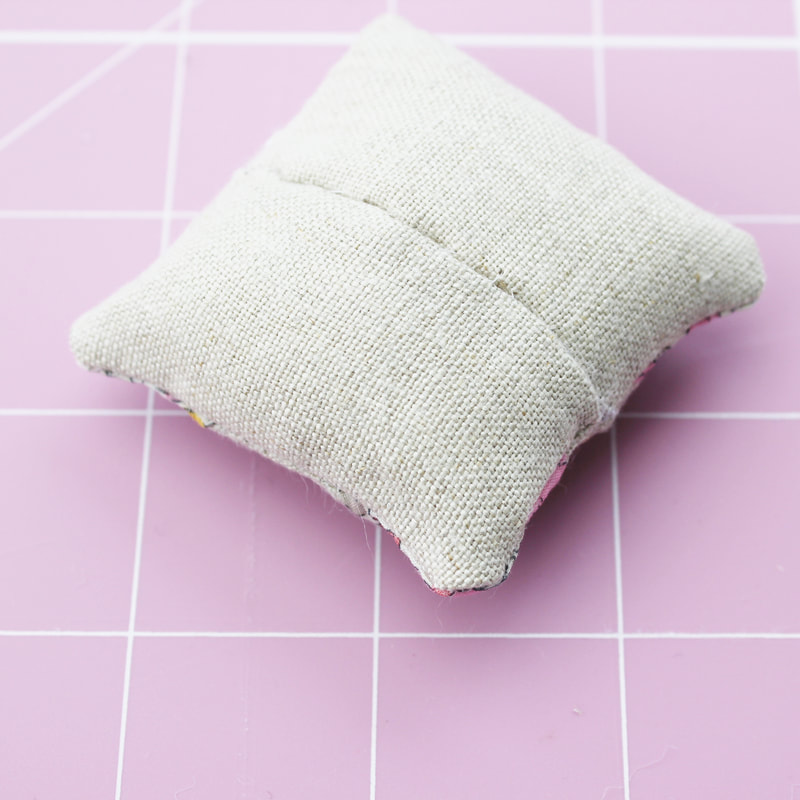 And that's it, your pincushion is complete! Such a fun little project and a great way to use teeny tiny scraps. 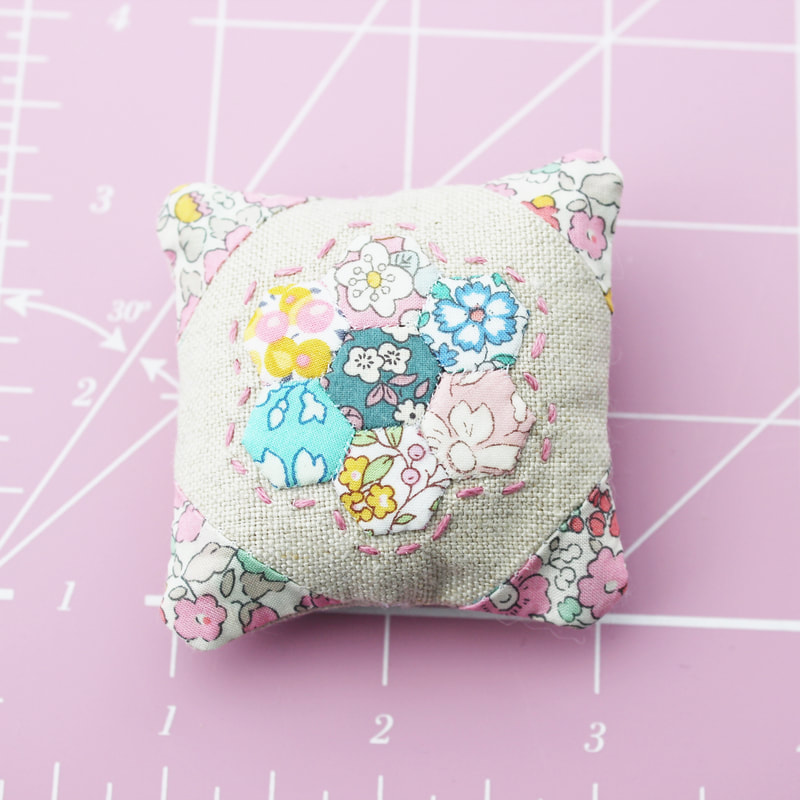 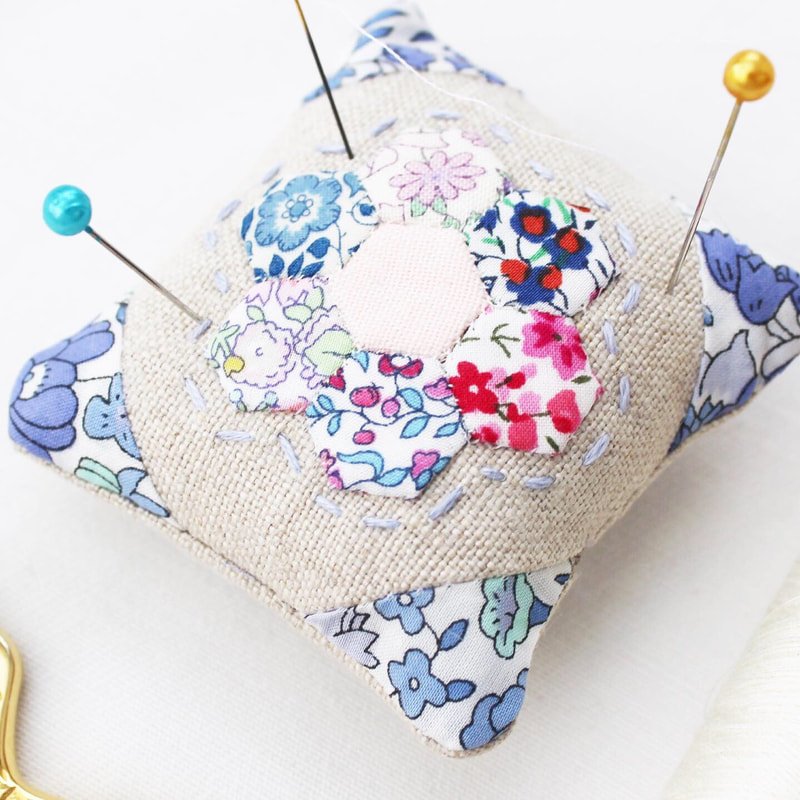 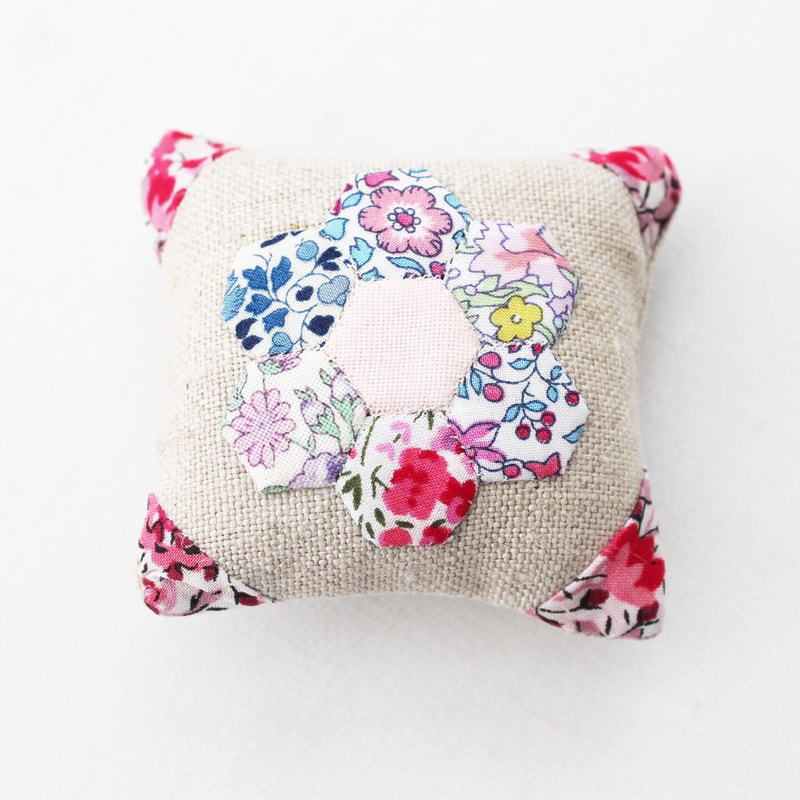 I hope you enjoyed this little tutorial and if you give it a try, I hope you love making your teeny tiny pincushion!
Happy sewing! 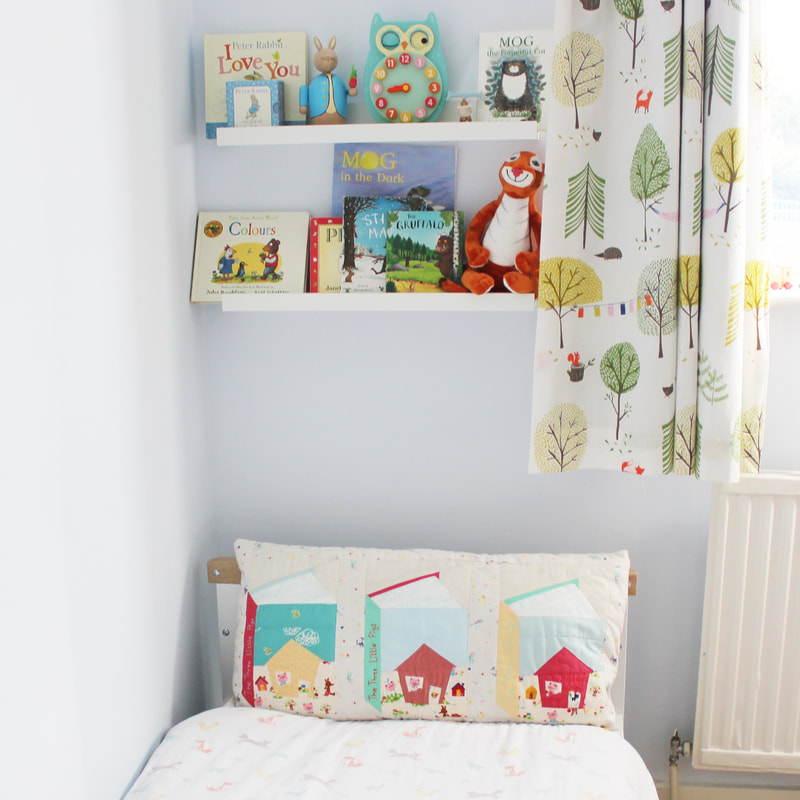 As a little change from the usual EPP topic of conversation around here, I'm going to share with you my finished FPP (foundation paper piecing) cushion. I started this as part of the Summer Book Club QAL run by Kate Basti using her Tall Tales book block pattern. When I began this project, I knew I was going to make a cushion/pillow rather than a quilt. Reading is one of my little boy's favourite things to do. I often find him in his room reading books to himself either sitting in his little armchair or lying in bed. It's hard for him to sit up in bed to read because there isn't anything comfortable to lean against, which brought me to the idea of making him a cushion and a book themed one would be perfect! After searching though my fabric stash and buying some story themed fabric to add to what I already had, I realised that my cushion needed a little something extra to make it really exciting. I had some Three Little Pigs fabric that I had bought about 10 years ago and that gave me the idea for incorporating The Wonky House pattern by Larisa who is @stitchingnotes on Instagram. It's such a cute pattern and I thought it would go perfectly with the books and I hoped that if I could get the sizing right then I could use the houses as the front covers. Well somehow I managed to pull it off! So it was my first attempt at FPP and even though it really isn't perfect, I really love this cushion.  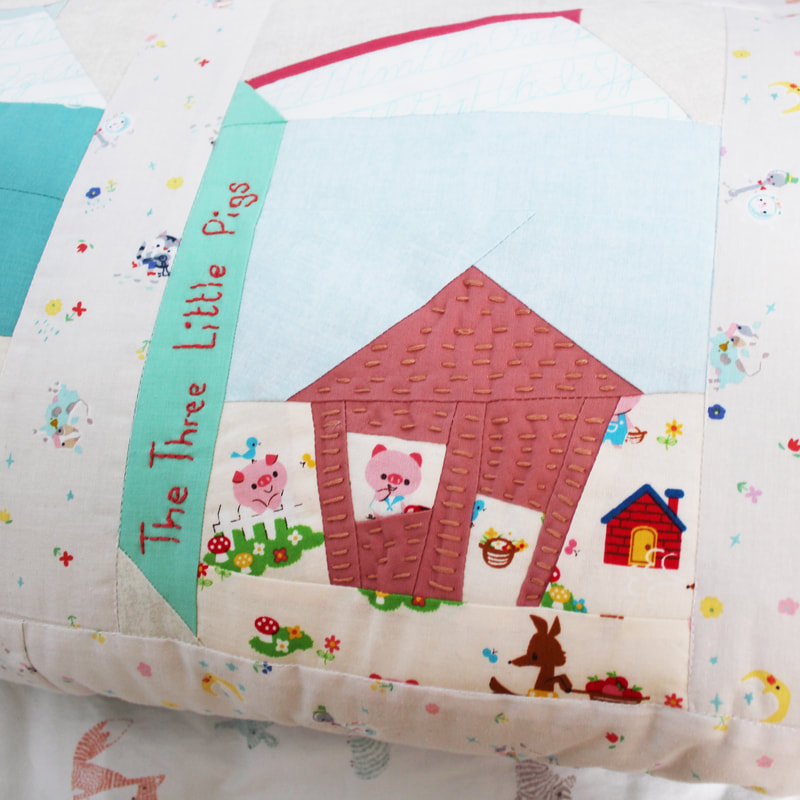 First of all it felt fantastic to actually finish something! Most of my projects are very much long term projects so I don't often experience the feeling of finishing something, and it feels nice! Secondly, the cushion is so soft and squishy and lovely to cuddle into. Once I'd pieced the front and back panels, I quilted them onto wadding by stitching with my machine in the ditch and adding hand quilting details. This gives it a lovely quilted effect and makes the cushion extra comfortable. I loved added the hand stitched details, I think that was my favourite part of making this cushion. There was something so soothing and relaxing about repetitively stitching into the quilted fabric, I loved it. Thirdly, I used some fabrics that were very special to me. I bought them many, many years ago in the hope of making a child of mine something special, and that has eventually come true and means so much to me. 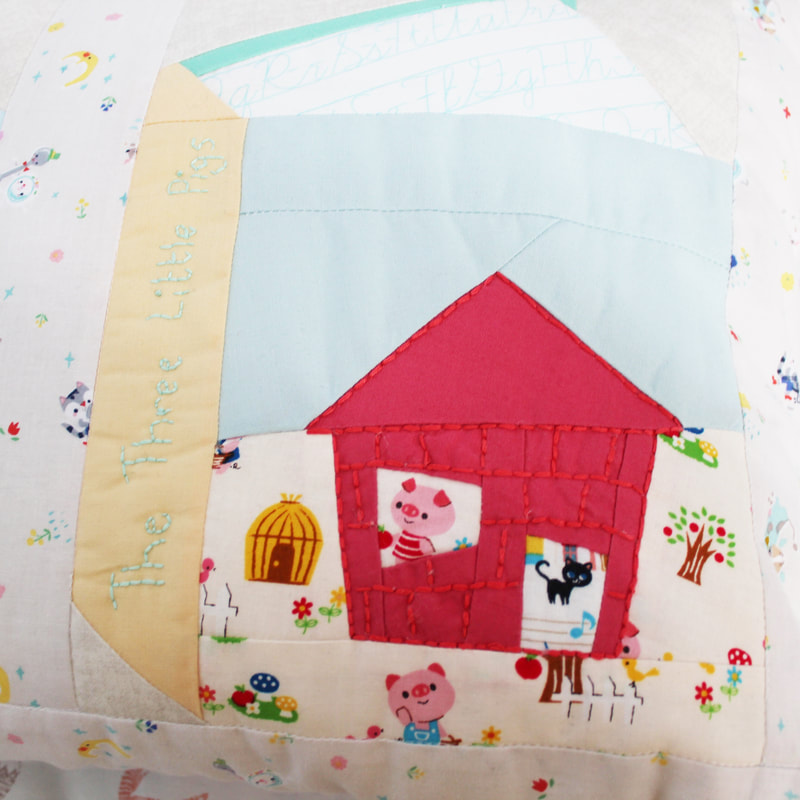 I will give this cushion to my little boy on his third birthday which is coming up very very soon! It's so incredibly important to me that I make things for him that he will love. He loves the story of the Three Little Pigs so I hope it will help him to retell the tale and I hope that beautiful illustrations on all of the fabrics I've used will be something he can use to help him develop his speech further. I remember being a similar age to him and having a dress that had a park scene printed on it. It was full of detail and I loved looking at it and imagining stories. I hope he does the same with his cushion. 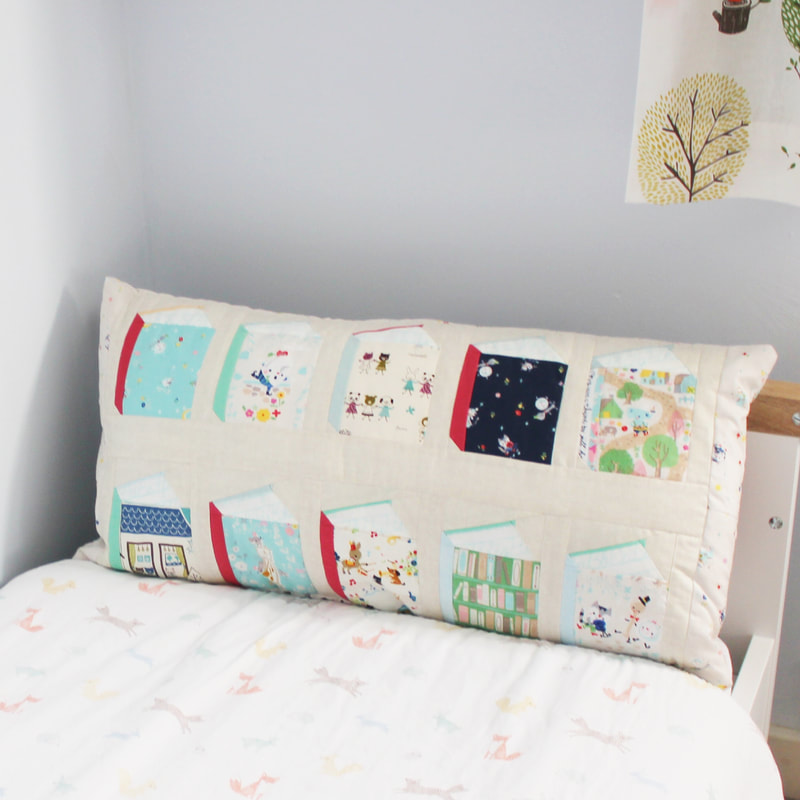 I really enjoyed FPP once I had got my head around the technique and I'm sure I will be trying it again. I think FPP is like magic! It's so fun how you can create images with your piecing, I can't wait to tackle some other patterns. If you are a beginner at FPP like me, I recommend both of the patterns I have mentioned here as they are definitely both achievable for beginners. I did have to use my seam ripper a few times but once I'd gained an understanding as to how to do FPP, it wasn't as tricky as I first thought. My piecing wasn't perfect but I am trying to embrace imperfections and learn from them for next time! And don't forget to check out this blog post of mine from a while back as it is full of useful hints and tips for FPP success! 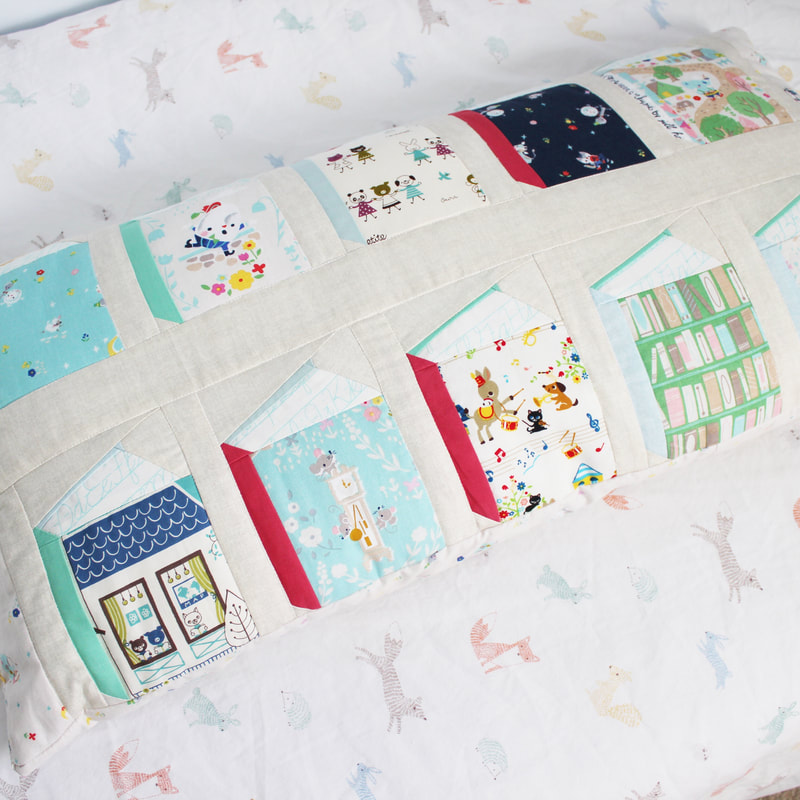 I'm lucky enough to be going on holiday tomorrow and I'm really looking forward to it. I'm holidaying in the UK so I won't be going on a plane, in fact, we are just travelling in the car and it will be about a 5 hour journey without stops. I've been thinking about which sewing projects to take with me for months! For me, more thought goes into that than it does into what clothes to take, but if you are reading this then I'm guessing you put lots of thought into your travel sewing projects too! I usually pack too many sewing projects, for fear of running out - which never happens! As I like to switch between projects often, I need to make sure I have a variety with me because otherwise I run the risk of losing interest and doing nothing. It's a family holiday so I anticipate many an evening spent playing board games together so I want to take projects that are easy to pick up and put down. Whilst I'd love to take embroidery with me, I know that any stitching time will be in the evenings and I just can't see well enough without a daylight lamp, so I think the conclusion is to take EPP projects with me! 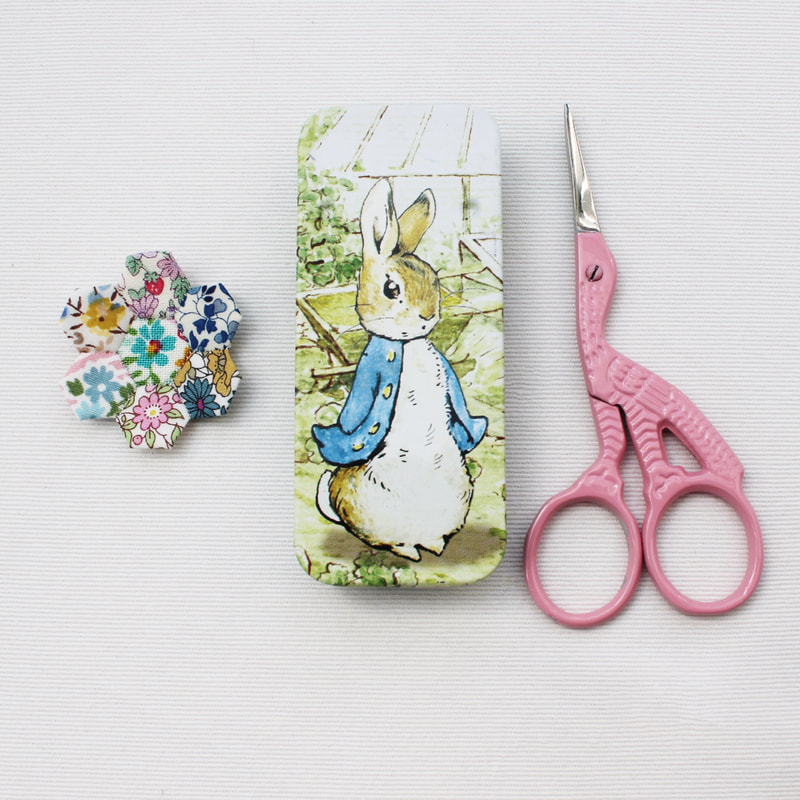 First up, I'm going to take my current two scrappy projects - quarter inch hexies and three quarter inch diamonds. I don't yet have a concrete plan for these projects, I'm just making it up as I go along, but taking some pretty scraps, sharp scissors and glue pens will be all I need in addition to the paper templates, thread and a needle. The ultimate portable project! 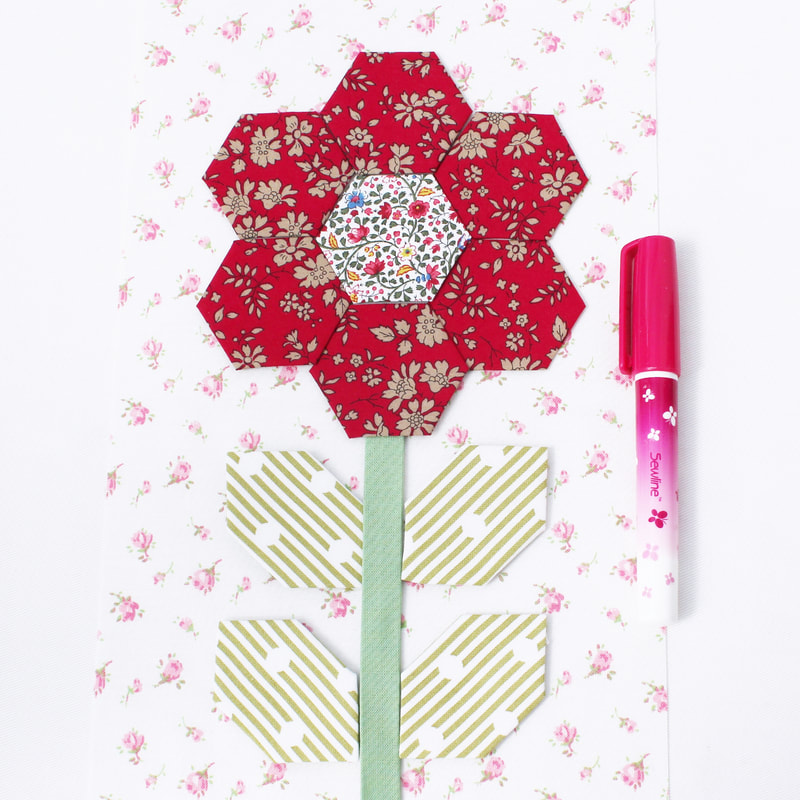 I'm also going to take my current Sew and Quilt blocks of the month. I am loving this quilt so much that I know I will be thinking about it whilst I am on holiday and I will end up desperate to work on it! So I've been glue basting as many shapes as I can like mad to make sure that I can just pick it up and stitch.  I will pack my projects in small pouches like this one pictured below. I also purchased a Clover Needle Dome as I thought this might be useful for keeping needles safe and threaded ready to sew. So far I really like it and it works perfectly. I also purchased some needles in little cases, again hoping that this would be a safe way to store them whilst travelling. Crucially, I stocked up on Sewline glue pen refills! I'm pretty certain I won't need this many but running out on holiday would be a disaster! 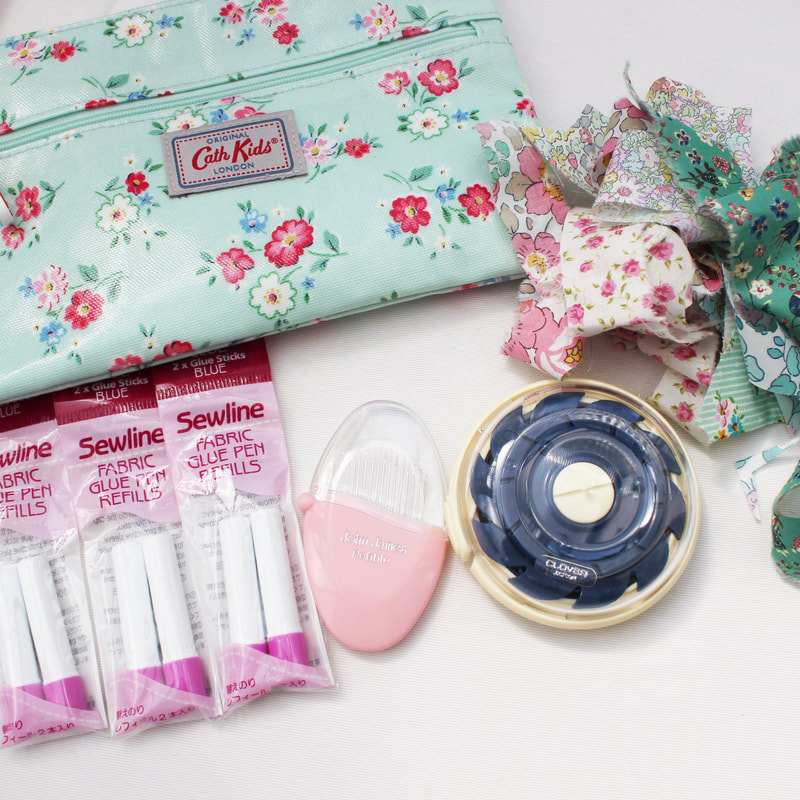 Do you take your sewing projects on holiday? Have you ever taken your sewing machine on holiday?! I'd love to hear all about it so please leave me a comment here or over on Instagram.
Happy sewing!  I absolutely love all things to do with sewing and I write this blog and share my pictures on Instagram and Pinterest to share my joy with you. The more I share, the more I am connecting with others and I love it! I don't have anybody in my 'real' life that shares this passion with me so I love talking all things stitchy with all of you online. However I really struggle with putting myself out there into the world, and I’m definitely guilty of writing a blog post and not telling anyone about it as I just find it hard to “promote” myself as such. But I’ve received lots of lovely compliments about my blog lately, so I just wanted to say thank you to everyone who reads it. It blows my mind that so many people are interested in what I have to say. So I will try harder to be braver and to announce my posts on Instagram each time I write one. I’m surprised by how much I love writing, and particularly writing about sewing! I really love having this little space to share my thoughts and I have lots of ideas for more things I want to share here in the future. Today I want to talk to you about what I share and why. I also want to tell you a little more about me too. As well as my own sewing journey, I share products, companies and patterns that I genuinely love. Currently there aren't any affiliate links on my site and there isn't any sponsored content. I share what I love and what I think will be of genuine interest to my readers. 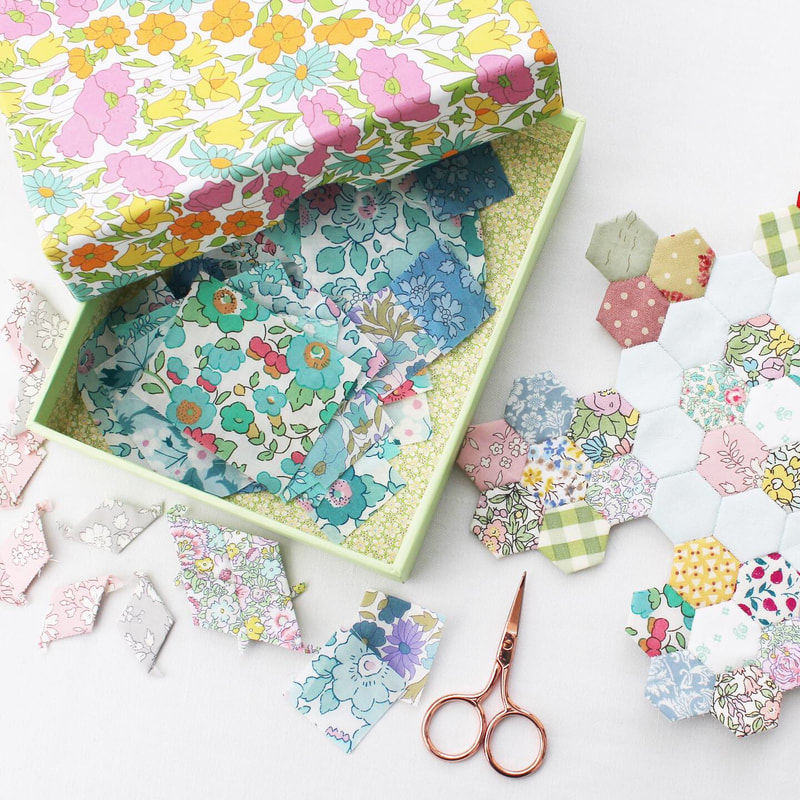 Sewing can be an expensive hobby. With endless new beautiful fabric ranges being released, gorgeous notions and tools, not to mention fantastic sewing machines with all of the bells and whistles, there's always something to tempt us! I like supporting small, independent businesses wherever possible. I find you are more likely to get excellent customer service and a unique product and that's what I love. However I am not averse to shopping the sale in Hobbycraft or John Lewis either, and both of those shops are the only sewing shops available to me locally. I know some people have huge fabric stashes full of variety and that’s fantastic. I have quite a small stash of fabric, many of the fabrics I've got were bought years and years ago, I tend to hold onto things for far too long! I'm trying hard to use what I've got, but I have bought some fabric this year too. I also love repurposing fabric from old clothes and this costs significantly less than buying new fabric. I am currently a stay at home mum, which is my dream job but it doesn't bring a wage in! So I have to consider every purchase carefully. I don't spend much money on cosmetics, clothes or going out, any spending money I do have, I spend it on my hobby. I’m not judging anyone for their spending habits, I’m simply just sharing mine. Believe me, I’d love to spend lots of money on the latest fabrics and I feel the pressure to keep up sometimes, but it just isn’t possible for me. As well as being passionate about sewing and sharing what I love, I am passionate about sewing being accessible to as many people as possible. I see and feel the benefits of sewing each and every day. It is calming, soothing and relaxing. It helps improve mental health and wellbeing and this article in the Guardian newspaper explains it beautifully. But if sewing is an expensive hobby that requires so many tools and notions, and if we constantly feel we need to use the latest fabrics, how can it be accessible to all? That's where embroidery and English paper piecing come into their own. Both types of sewing require minimal, relatively inexpensive tools and materials. Making a large quilt is a huge commitment in terms of time and investment of money, but there are many smaller embroidery and epp projects you can do at a fraction of the cost. Over the coming months, I hope to share more projects here that are inexpensive to make as I strive to include more balance in my blog between projects that I have chosen to spend money on and projects that cost very little. I also hope that continuing to provide some free tutorials and free printable patterns will be a step towards making sewing accessible to more people. Speaking of which, have you seen my free printable Dresden flower template? Click here to find it, print it and make it! Thank you to everyone who has given this a go and shared it online, it's been really exciting for me to see everyone's versions of it and I really appreciate it. 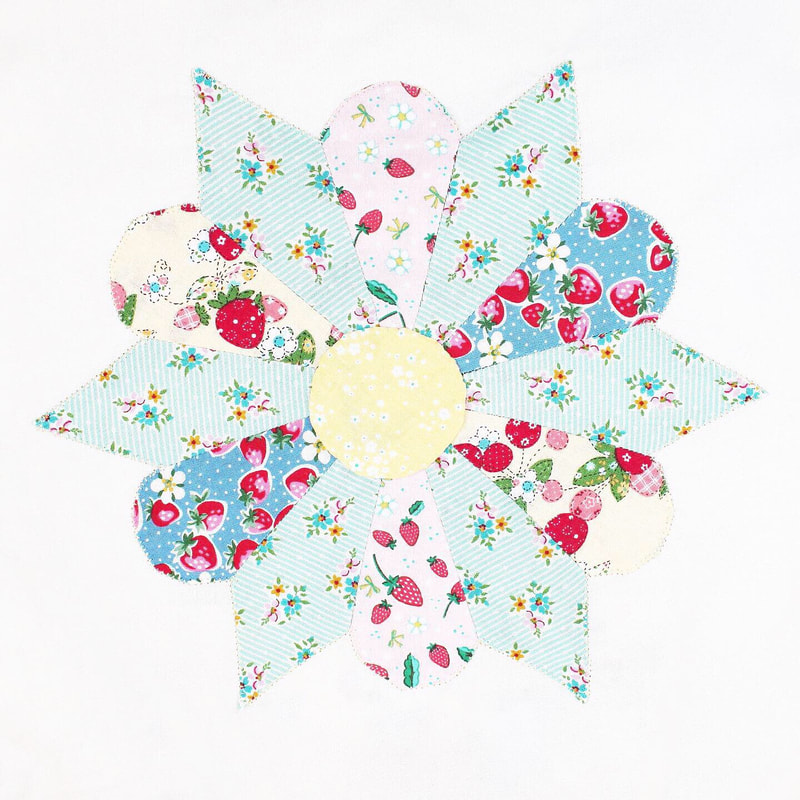 What are your thoughts on the topic of sharing online? Do you feel a pressure to keep up with others or are you happy doing your own thing? I'd really love to know. You can leave me a comment here or send me a message via the contact form on the home page if you wish.
Thanks for reading and happy sewing! 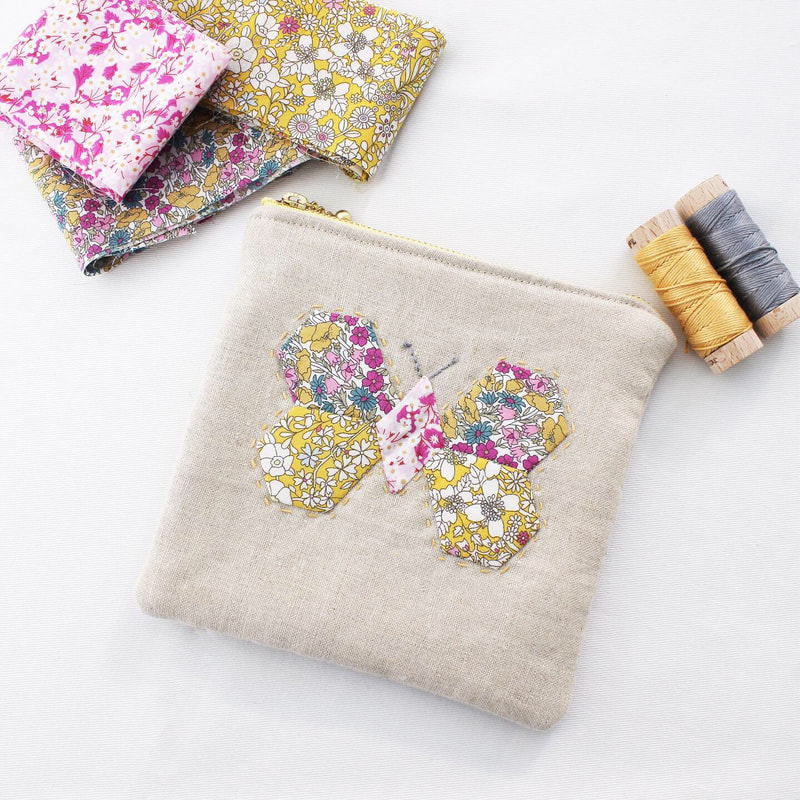 This is just a quick little blog post to mention a free pattern I have on my website. I realised yesterday that I have forgotten to write about my little English Paper Pieced butterfly design! I thought of this little design quite some time ago now and when I made a little pouch with one on the front, a lot of people were interested in it so I made the templates available on my website, and quite a few people made one which made me so so happy! The larger version (seen above) uses 3/4 inch jewels for the wings, and the smaller version (seen below) uses 1/2 inch jewels for the wings. The pattern includes the printable templates, written instructions and a video showing some sewing tips. 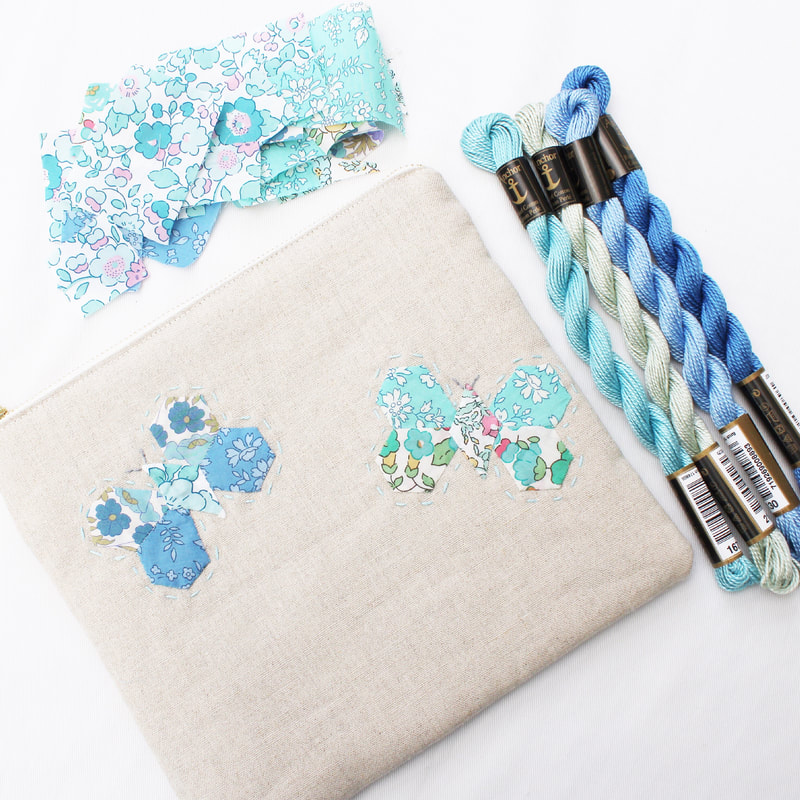 I also started working on making this motif into a proper block to join with others to make a cushion. This is still a work in progress but when it is complete this will be the final free pattern in my little butterfly collection, unless I think of something else! I hope you like these patterns as much as I do. If you do make one, please share it on Instagram and tag me so I can see. Happy sewing!  Every year that I've been to the Festival of Quilts, I've gone without a plan. This has led me to walk around a little bit aimlessly, not knowing where to look or what to buy because there is so much to see and so much choice. So this year I went with a shopping list and I did manage to get some items from the list, but then I went off piste and bought more floral fabric. In fact, my list said no kits (as I have so many!) and it also said solid fabric and linens. As you'll see, I didn't stick to that either! Before you see what I bought, I just want to say that I had been saving up for the Festival of Quilts for a long time. This is the one occasion each year where I buy quite a lot of things at once. For the rest of the year I will buy very little. 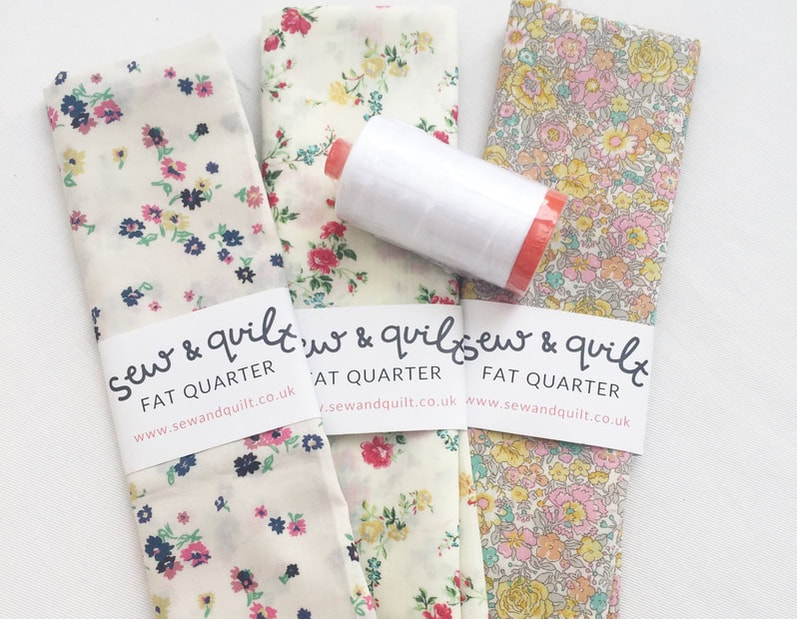 My first stop was one of my favourite shops, Sew and Quilt. I got to meet the very lovely Jessie and Robin and chat to them about the show. I've admired Jessie's work for so long. In fact, I wouldn't have even tried EPP if it wasn't for her. I'd never considered doing EPP even though I'd seen it and admired it. I was put off by the thought of making my own papers because I was short on time and just wanted to do the sewing part. I was also put off by the idea of thread basting. But one day I thought maybe I should try it and I was googling EPP papers and stumbled across her shop and the rest is history and I'm so glad! Through her I discovered glue basting and pre-cut papers, both of which make EPP a breeze. From Sew and Quilt, I bought three Liberty fat quarters and some Aurifil thread for my machine. 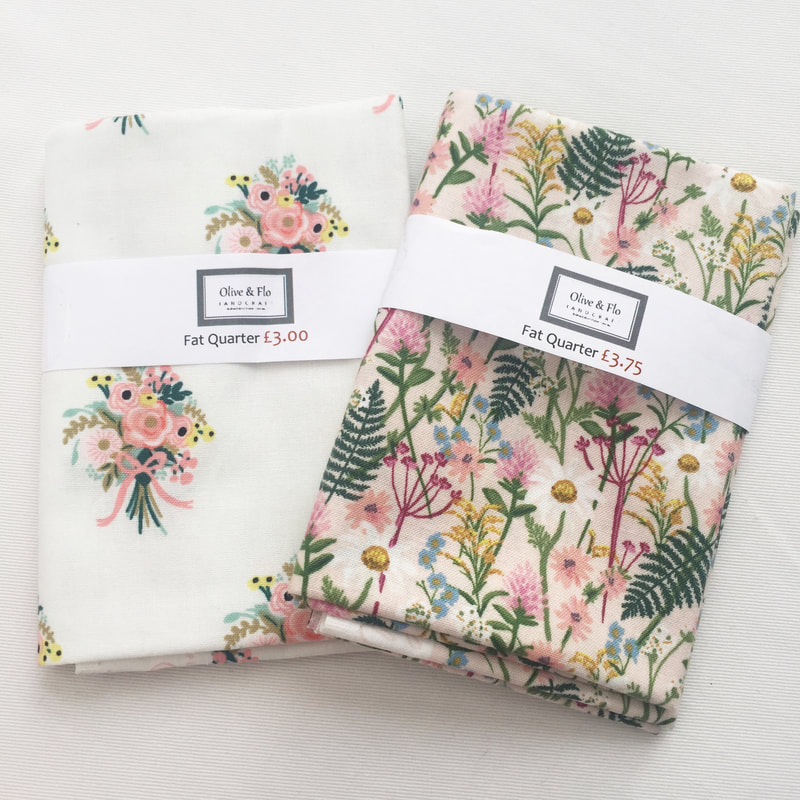 Next I went to Olive and Flo Handcraft and bought these beautiful Cotton and Steel fabrics. Olive and Flo Handcraft is such a lovely shop with a fantastic selection of modern fabrics. 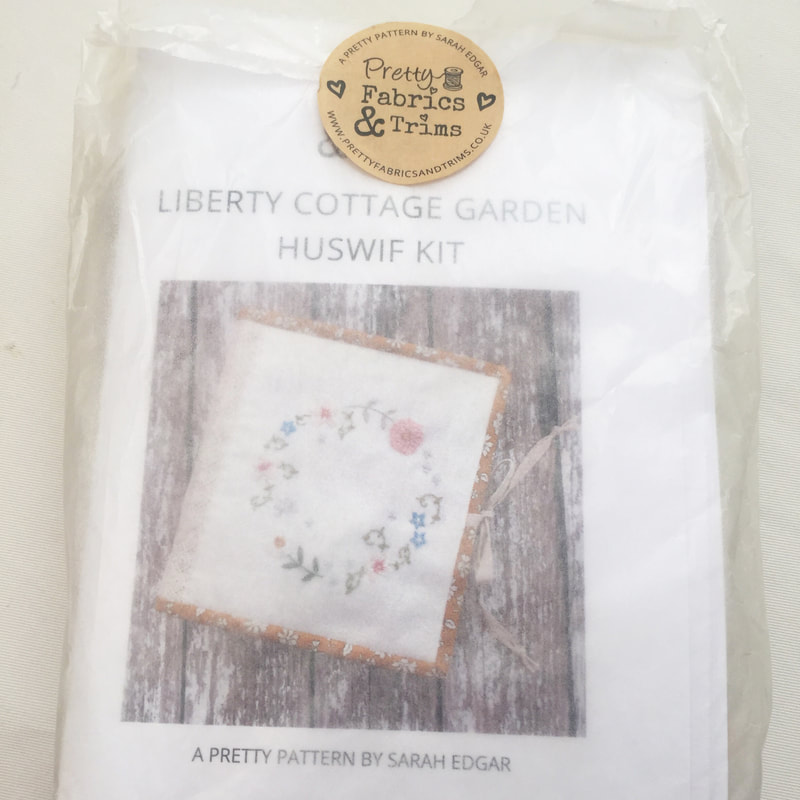 I then went on to Pretty Fabrics and Trims and met the lovely Sarah and Penny and bought this beautiful kit which I've been admiring for so long. I had told myself not to buy any more kits but I just had to go against that to buy this and I know I will really enjoy making it.  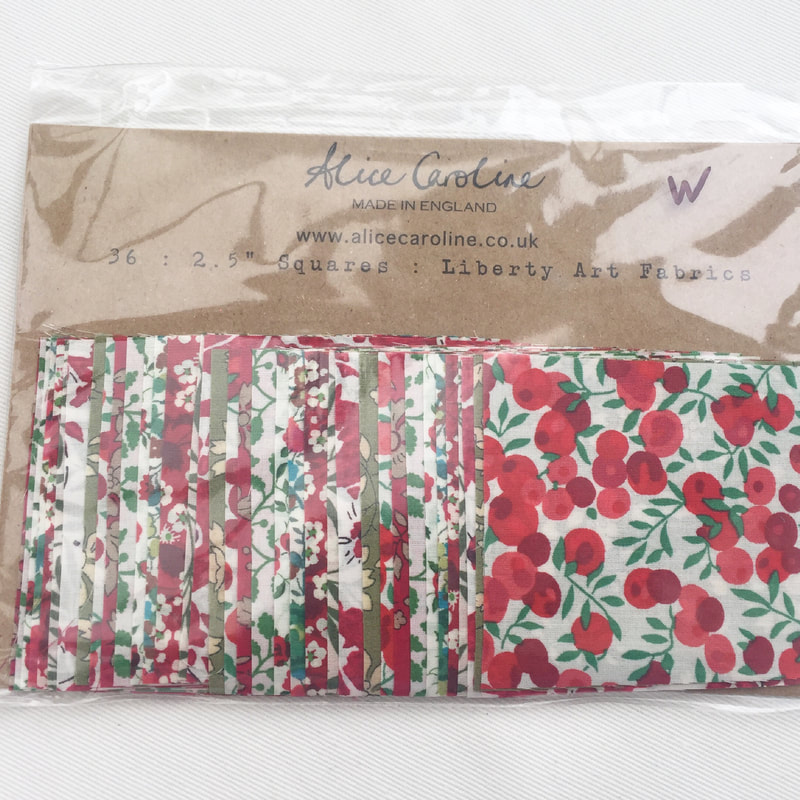 Next up was Alice Caroline where I allowed myself to buy a few too many Liberty fabrics. They were all so lovely I had a difficult time choosing. I am planning something Christmasy with the red and green squares and I'm really excited about that. 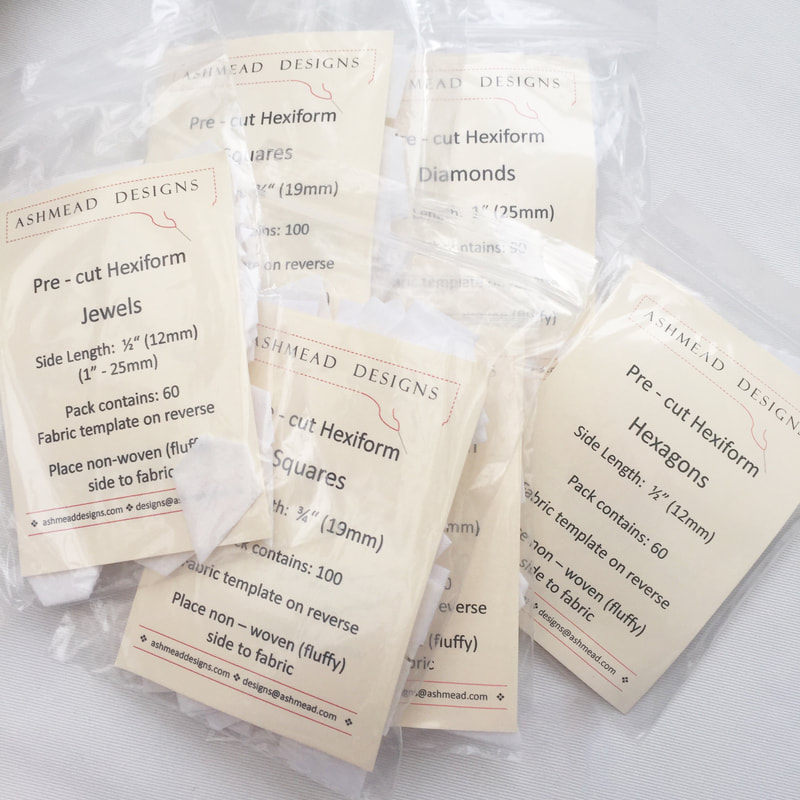 Finally, I bought some more hexiform shapes from Ashmead Designs as I use them quite often and I thought it was a good opportunity to stock up.
There are so many fantastic stalls at the festival, it can be quite overwhelming! But I really enjoyed it and I will hopefully be back next year. If you have never been before, I highly recommend it. My two blog posts about the festival are only a glimpse into what it is like there, there is so much more to see. Have you been? What did you buy? I'd love to know in the comments below. Happy sewing! 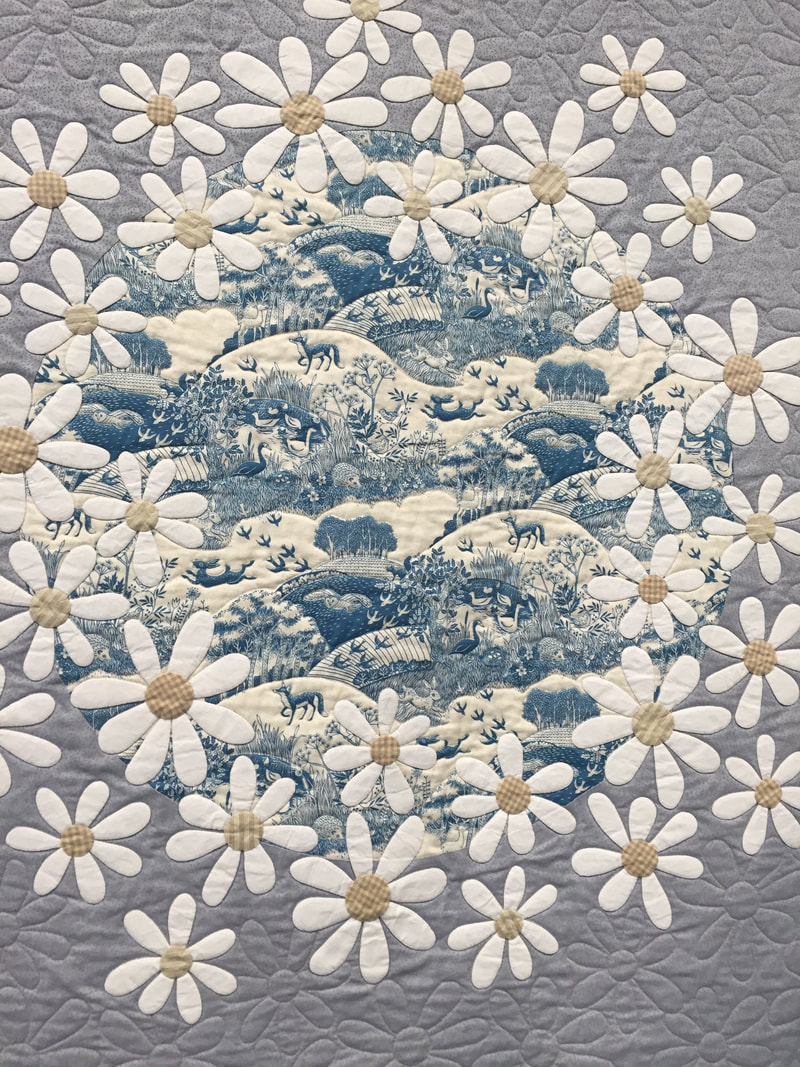 On Sunday 4th August I visited The Festival of Quilts at the NEC in Birmingham. It's about a two and a half hour drive from where I live but luckily my husband's family live in Birmingham, meaning we were able to visit them and have a lovely time seeing everyone and also meaning they were able to look after our little one whilst we visited the festival. We've been at least three times before, maybe even four, I've lost count! We always enjoy seeing the quilts, it's like visiting a huge art gallery, the standard is so impressive and it is always so inspiring. So when we arrived, our first stop was to see all of the quilts, we always do this before the shopping, it makes sense because then you aren't carrying your purchases around all day. Of course the first category we looked at was the mini quilts. I used my phone to take these pics, they aren't very good as I took them quickly not to get in people's way. Also, I apologise that not all makers are credited, I left my show guide behind by mistake. Here are a few of my favourites. 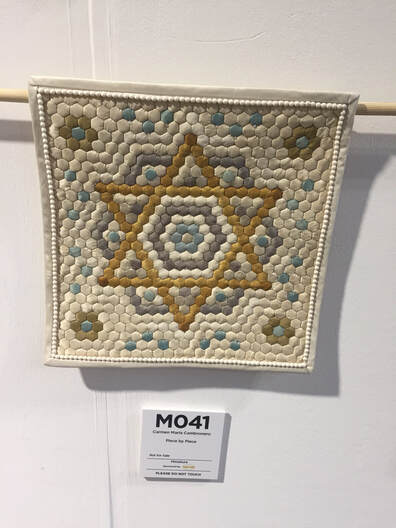 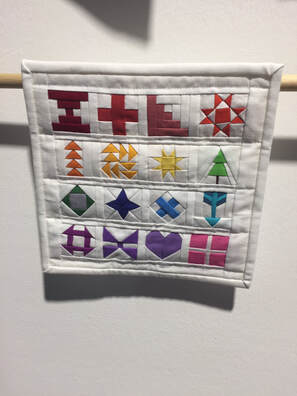 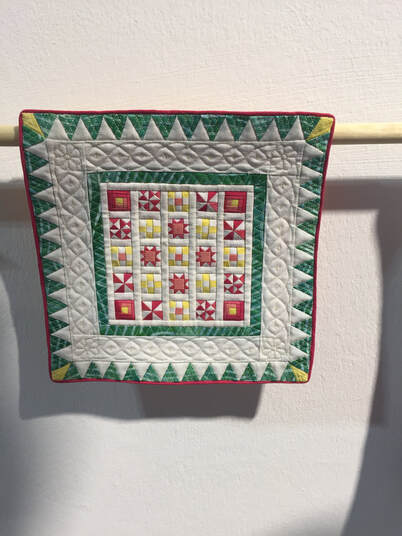 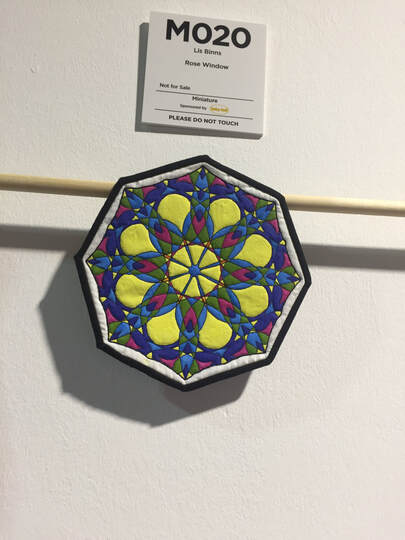 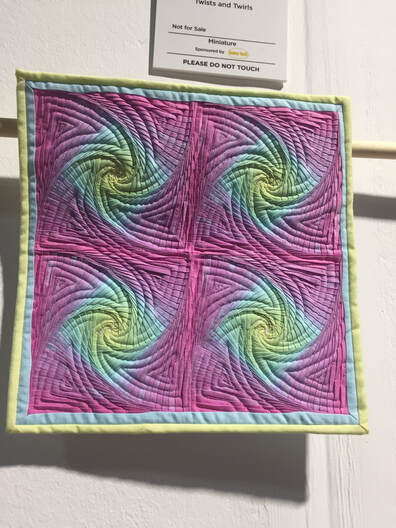 After the mini quilts we went on to view the larger quilts. The quilt that caught our eye the most was this one below called Endangered. I had to video it to show you because it was so so clever! As you walked past it, you could see three animals appear and disappear, a rhino, a leopard and a zebra. We thought it was so clever in the way it was constructed and how the images appeared like magic, but also this highlighted the quilt's important message about endangered species perfectly. My video isn't the best but hopefully you can see the animals. As we walked around the rest of the quilts on display, I had a think about which categories I was drawn to the most. Turns out I really like traditional and contemporary quilts. However, I can really appreciate the art quilts and the modern quilting category too. Even though I don't make abstract or really modern designs, I really love seeing all of the different styles on display and I find it so interesting. 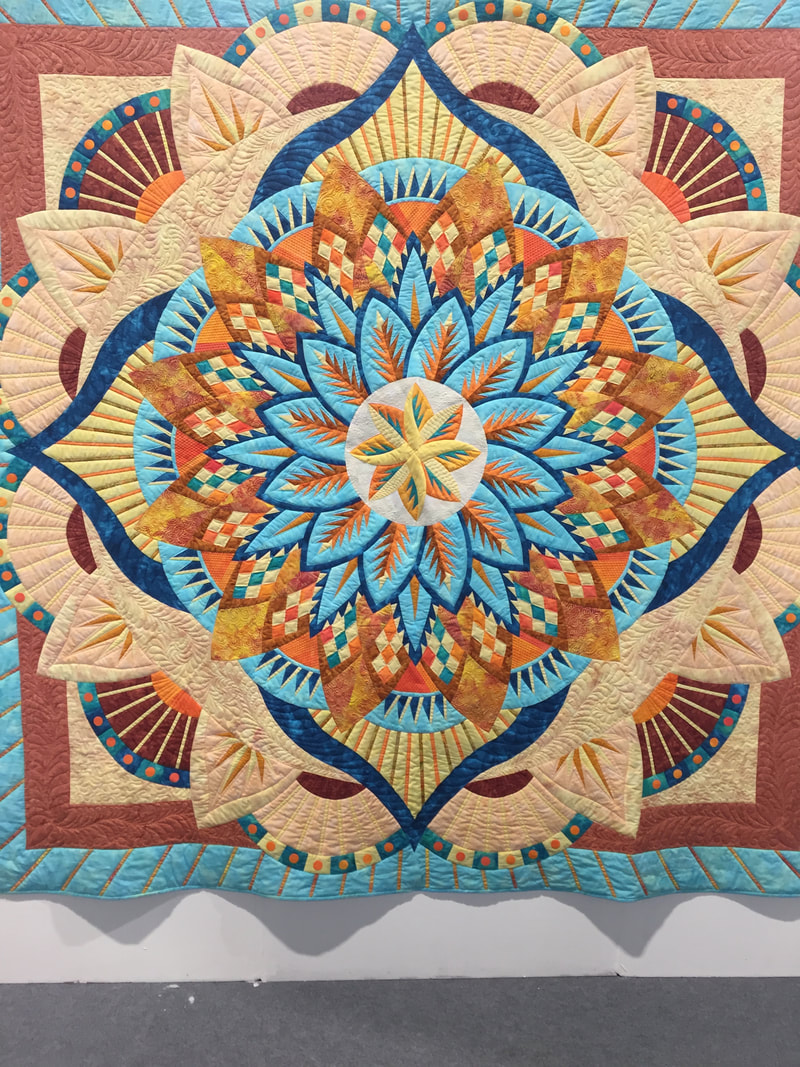 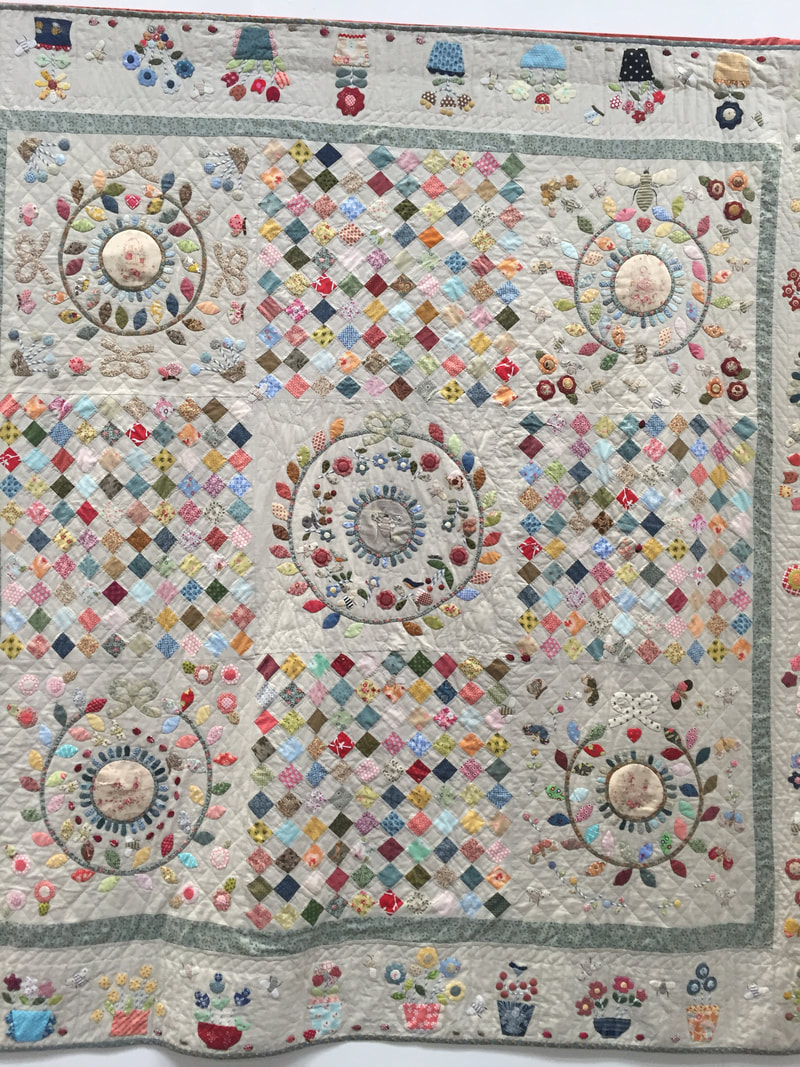 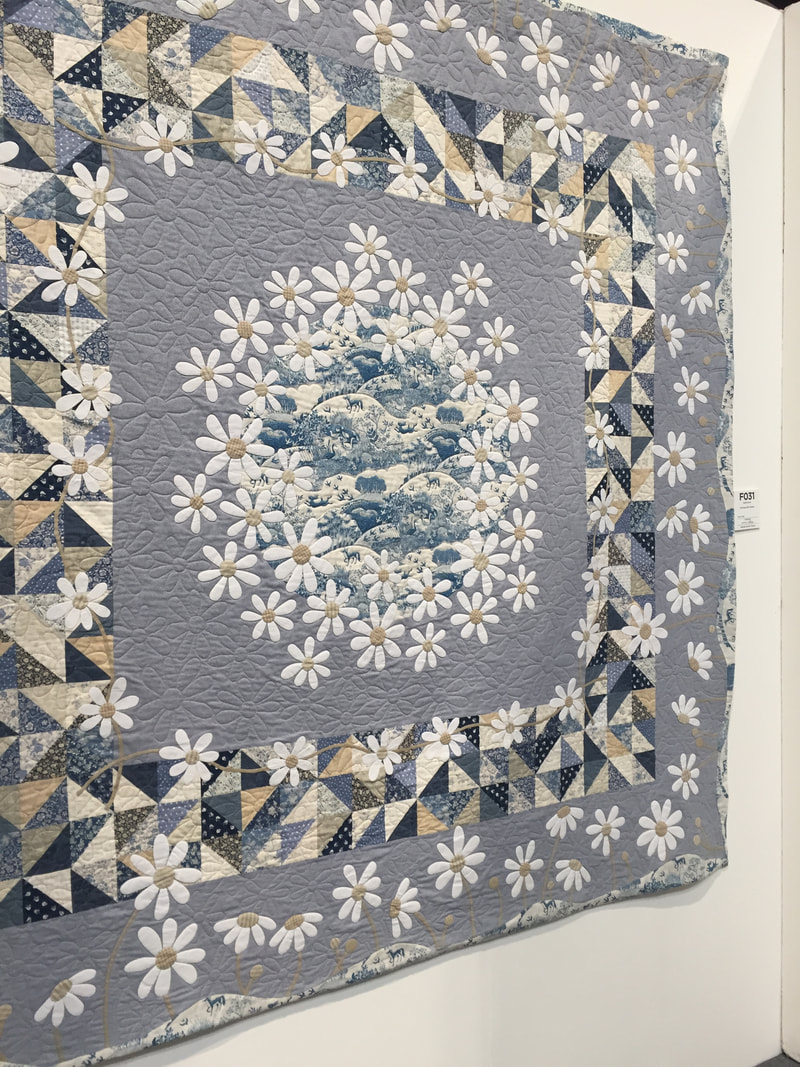 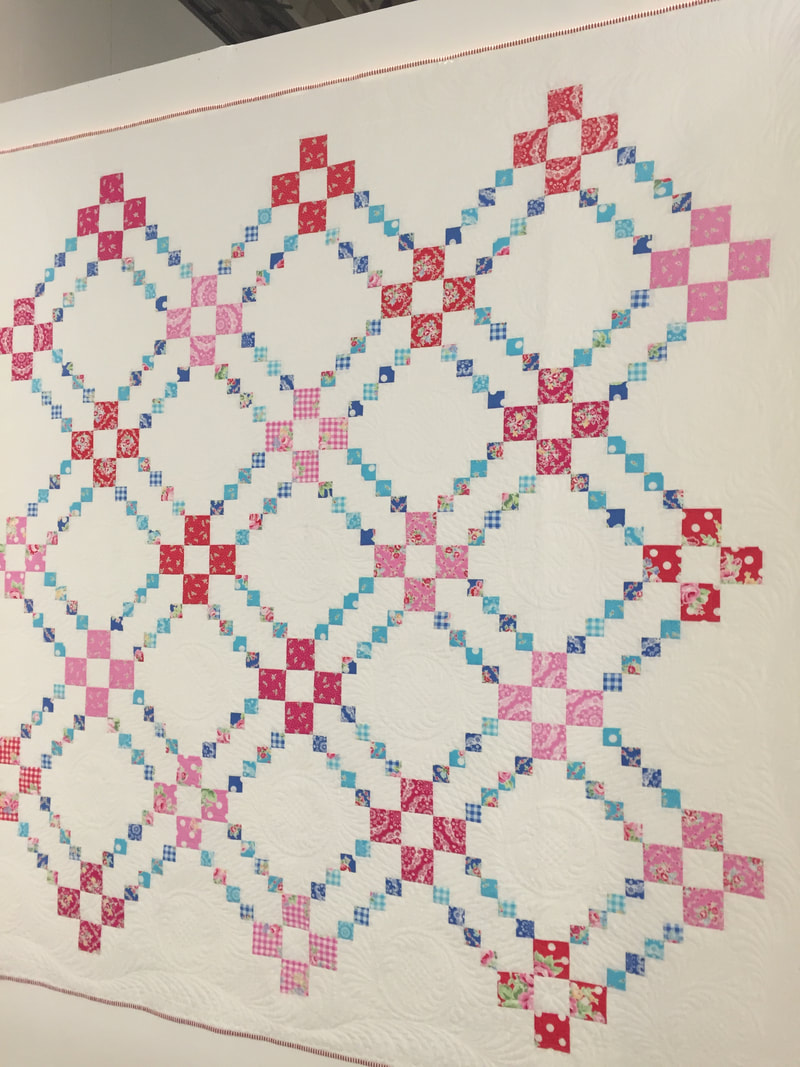 Above - Trudi Wood 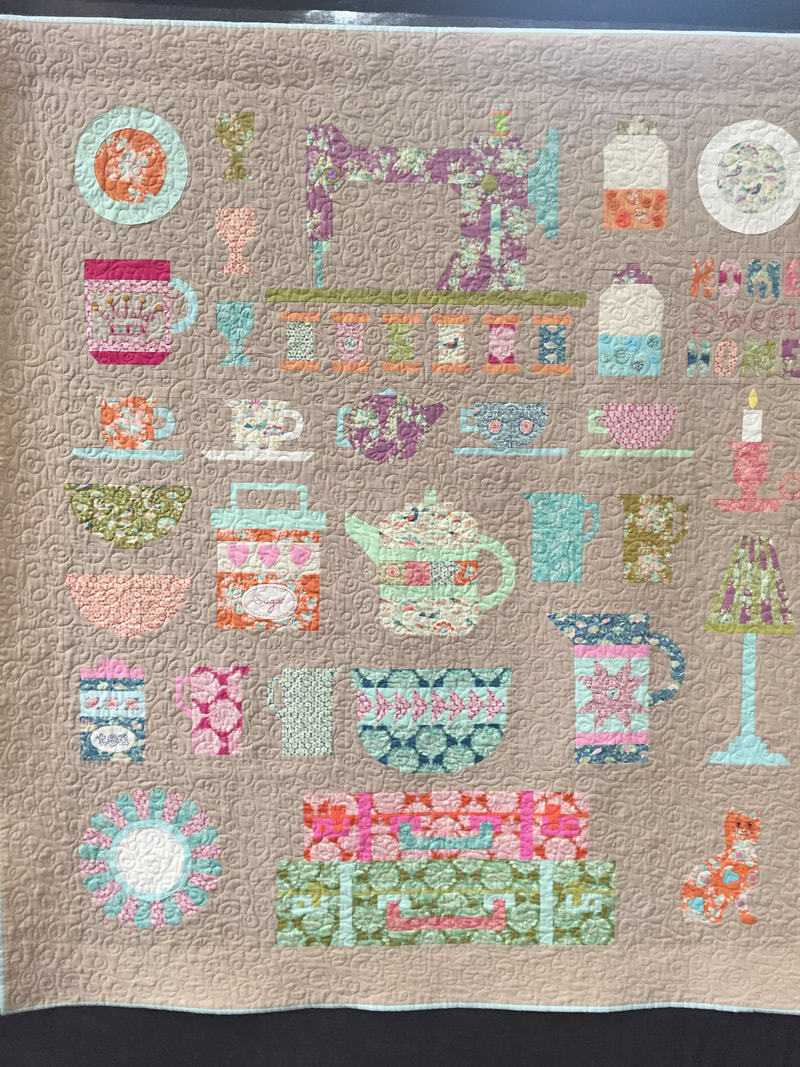 Above - Jo Avery 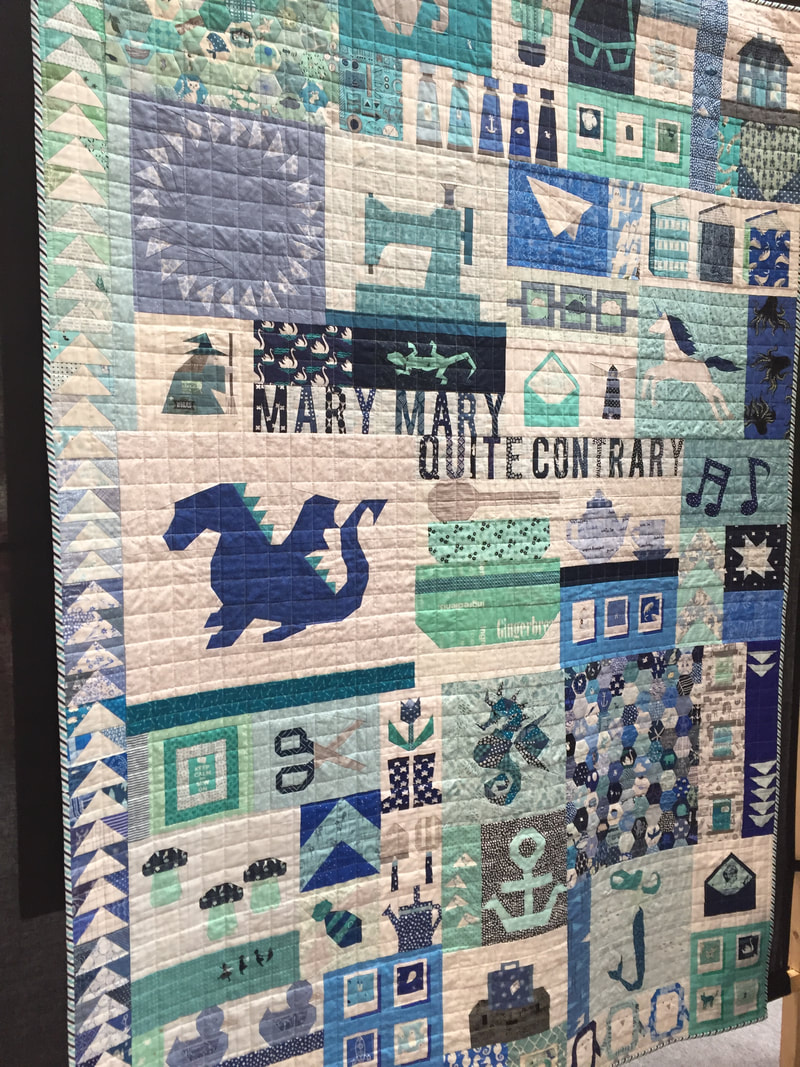 Above - Cloudtori 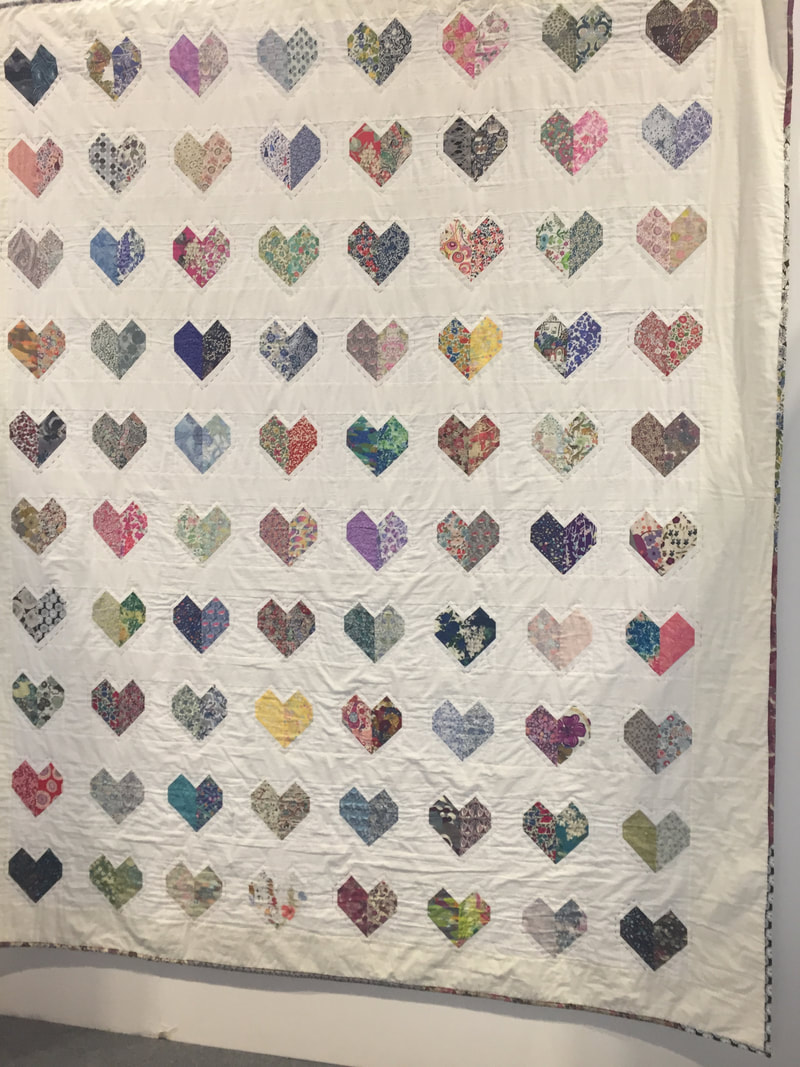 Above - Caroline One of my absolute favourites was Sweet Sunday in Somerset by Helen of henhouse homemade I loved everything about this quilt, the colours, the mix of vintage linen and liberty fabric, the fact it's English Paper Piecing and hand quilted, it's truly spectacular. It's absolutely full of amazing detail and I love it. 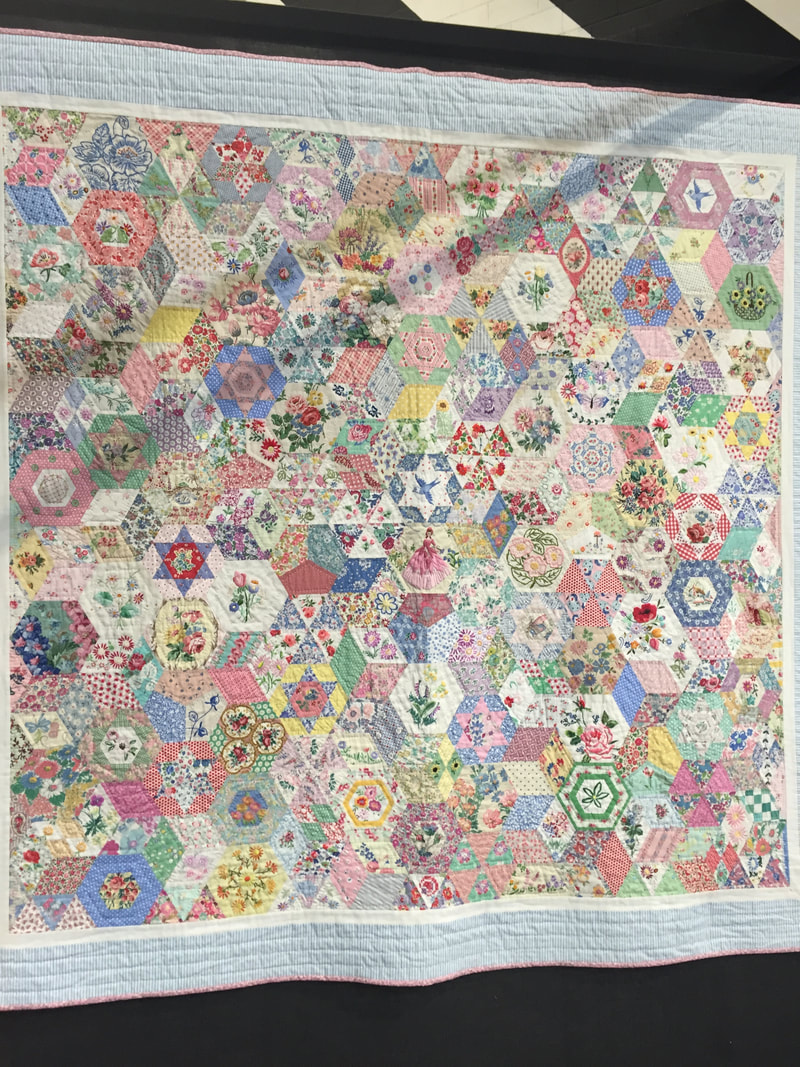  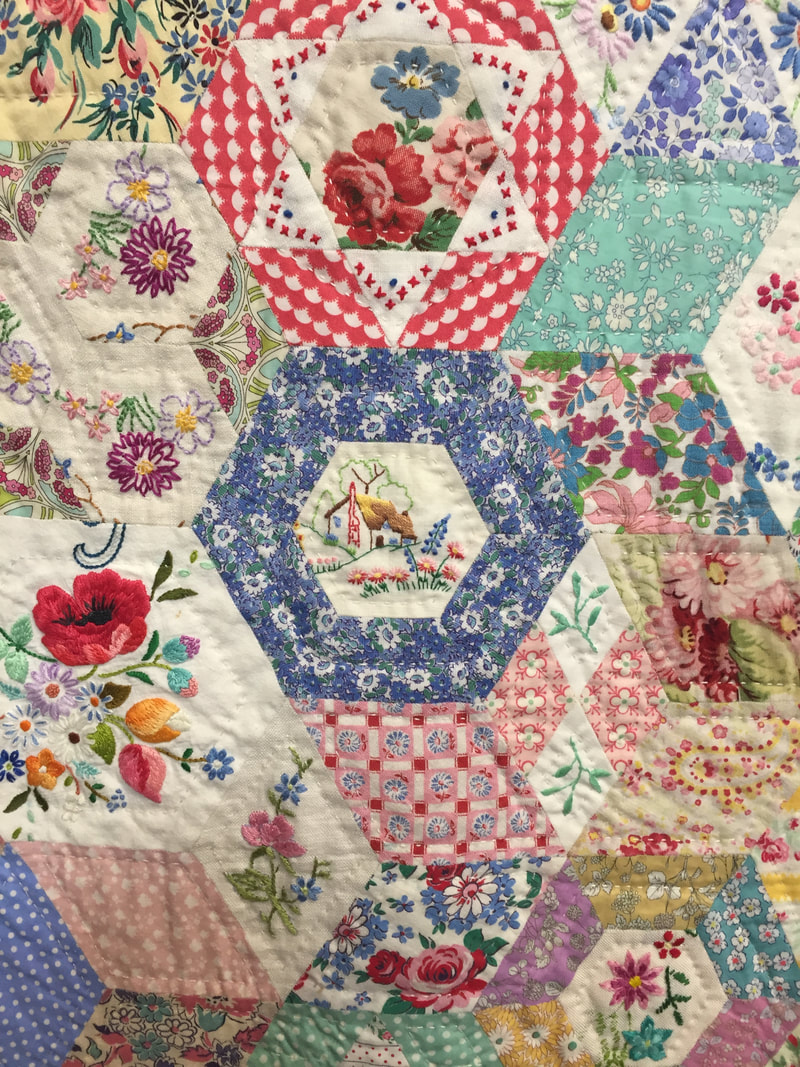 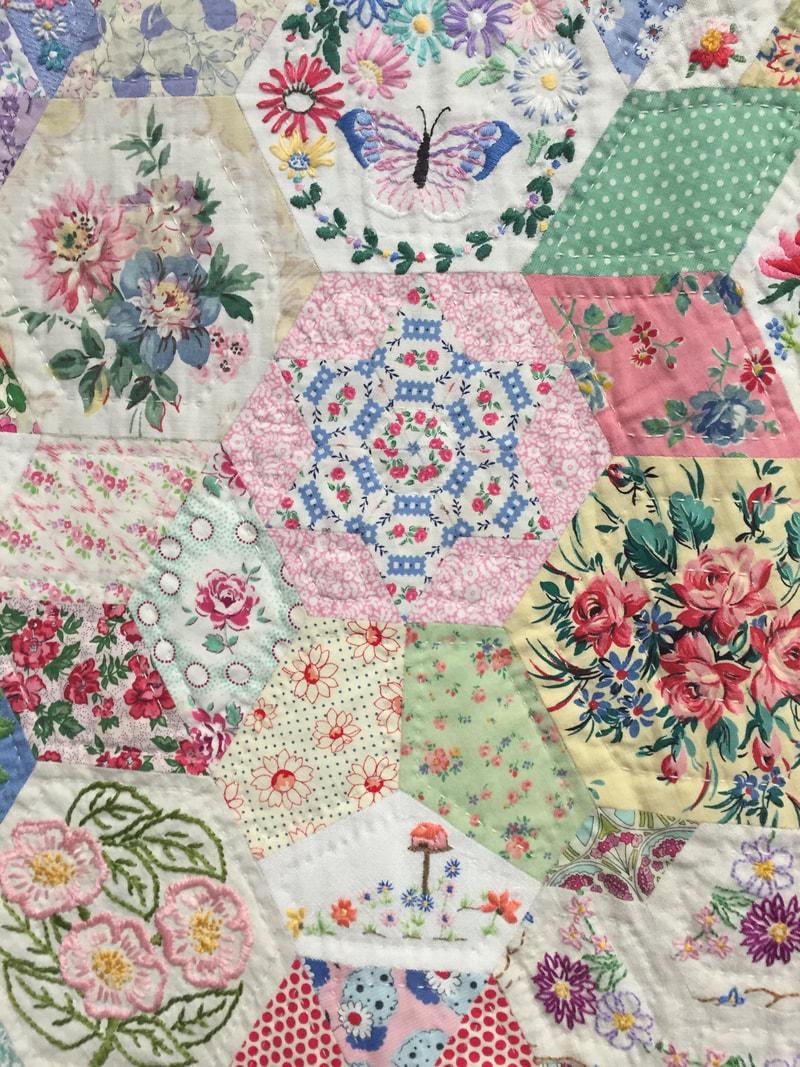 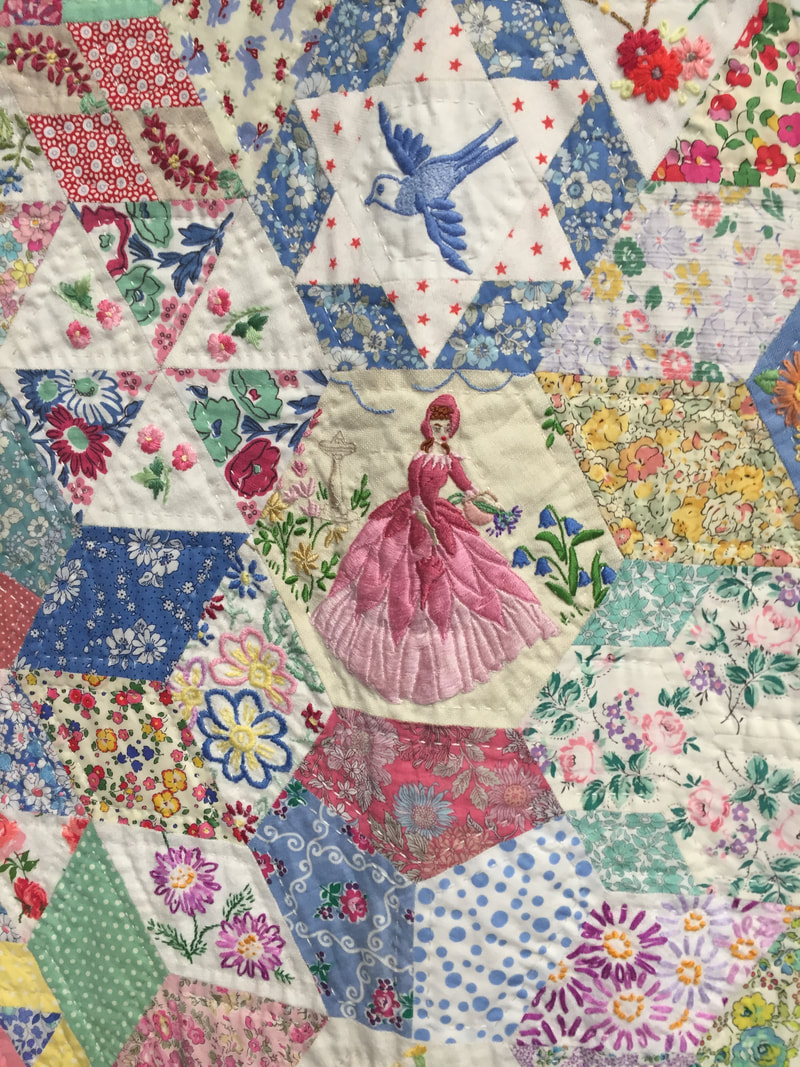 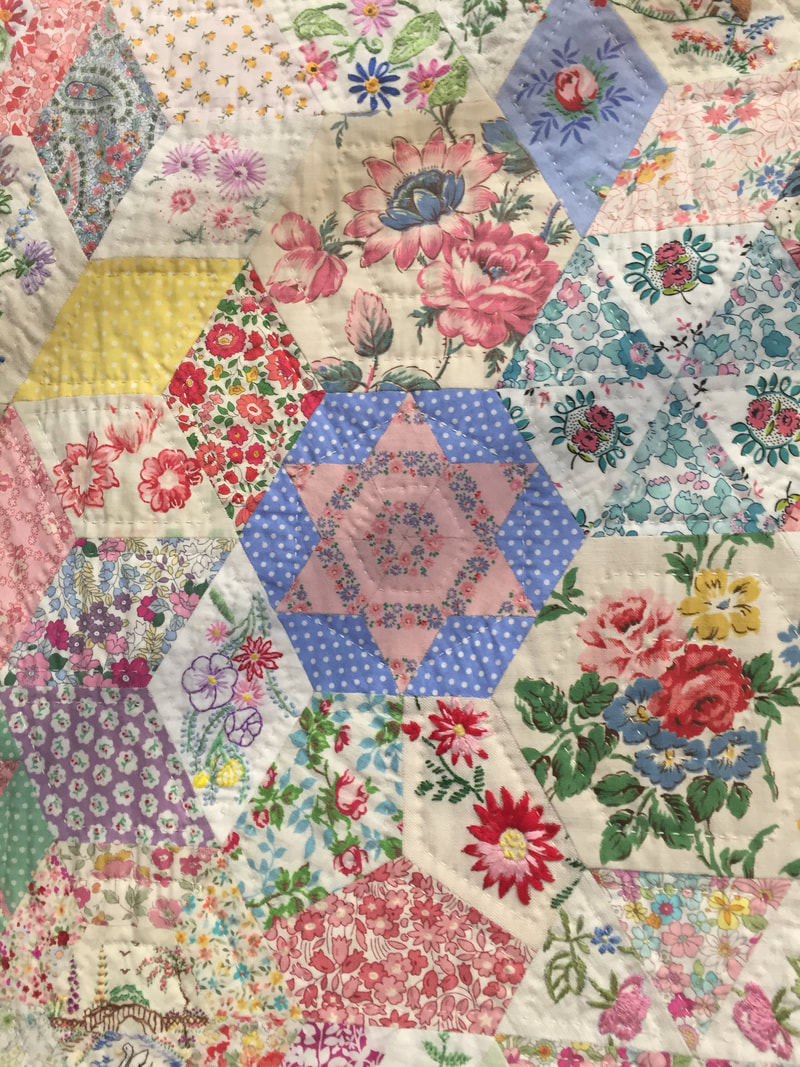 There is so much I could share about Festival of Quilts as there is so much to see, I've only really scratched the surface here. If you've never been before I highly recommend it as there really is something for everyone and it is such an exciting place to be. Well this became a rather long blog post, so stay tuned for part 2 in which I will share what I bought. I hope you've enjoyed seeing what I loved about the festival of quilts. Did you go? What were your highlights? Please let me know in the comments.
Happy sewing!  I'm going to tell you the little story about how and why I entered my mini quilt into a local art gallery competition. If you are like me and have never entered a competition or shown a quilt before, I hope that after reading this you will feel inspired to give it a go too! There is no doubt in my mind that patchwork is art. You only have to see the incredible quilts on display at the Festival of Quilts to appreciate just how talented quilters are. From choosing colour palettes to complex patterns, accurate cutting, matching seams and points, intricate piecing, quilting designs, the list goes on and on! Despite this I've had a hard time seeing my work as artistic, which is a reflection of my own lack of self-confidence. When my Dad saw my half inch hexie mini quilt, he said it was artistic, and that is a big compliment coming from him! I was eventually talked into entering it into the Lancashire Open Art Exhibition at Chapel Gallery and I was completely surprised when it was accepted! 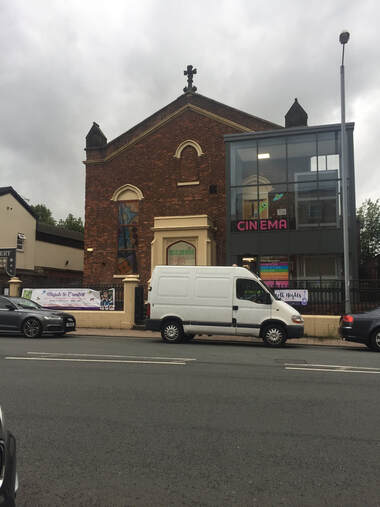 When it comes to art and art competitions, textiles is underrated and under represented. It is seen by some as less skilled than drawing or using paint and often viewed as more of a homemade crafts/hobby type thing. So I was really pleased that my piece was chosen and I was also glad to see a few other textile pieces in the exhibition. I find it difficult to promote myself and put myself out there in terms of my work, but thinking of it as a way of promoting textiles really helped me push past this. The more of us who show our work in these sorts of events, the better it is for the quilting industry and the more likely it is that quilting, embroidery and textiles in general, will be seen as artistic forms by more people. Maybe some people don't think of quilting as art because they haven't seen the amazing quilts that are out there? I know when I mentioned I was going to the Festival of Quilts to my brother he said, is that about duvets?! 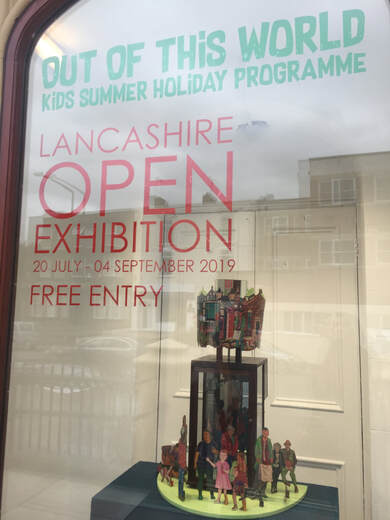 Now I've never entered a quilt into a quilt show, so I can't speak about what that is like, but I can tell you a bit about my experience of entering it into an art gallery and give you some tips for if you are going to do this one day. Tip 1 - Frame your work. Mine is a mini quilt so this was easy to do. I turned up to submit my piece with it unmounted and was told that it couldn't be accepted like this because it could be taken easily off the wall. (I had put two felt loops on the back with a dowel running through so it could hang off a nail!) It needs to be in a frame or mounted on a board which can be fixed to the wall with mirror plate fixings. Tip 2 - Don't frame it yourself unless you know what you are doing - unlike me! I bought an inexpensive frame from a shop, put my piece inside and then proceeded to struggle for half an hour to attach the mirror plate fixings to the back of the frame, resulting in splitting the wood. Keep in mind that I was rushing to do this as I knew there was a deadline to submit it. In the end I went to a local framers and explained my frame emergency and they sorted it out for me, and even gave me an 'artist's discount'! I am so glad I got it framed in the end because next to the other pieces of work it looked right. Unmounted would have looked wrong, so this was a good decision. Tip 3 - When you submit your piece to the gallery and they ask 'What's the title?" they mean what is the piece called, not what is your title (i.e. Mrs or Mr), yes, I made this rookie artist mistake!! Tip 4 - If you want to sell your piece, you will have to put a price on it. I had no idea what to sell it for so I put it not for sale. I've had some interest in it and somebody I know asked to buy it! But this is a sentimental piece so I'm leaving it not for sale. It's really hard to put a price on your work, especially if you are like me and are just starting out, but whatever you do, be sure not to undervalue your skills. Tip 5 - Enjoy the process! I felt nervous about the whole thing and now I look back, there was really no need. It's really fun that my piece is hanging in the gallery for the entire summer. 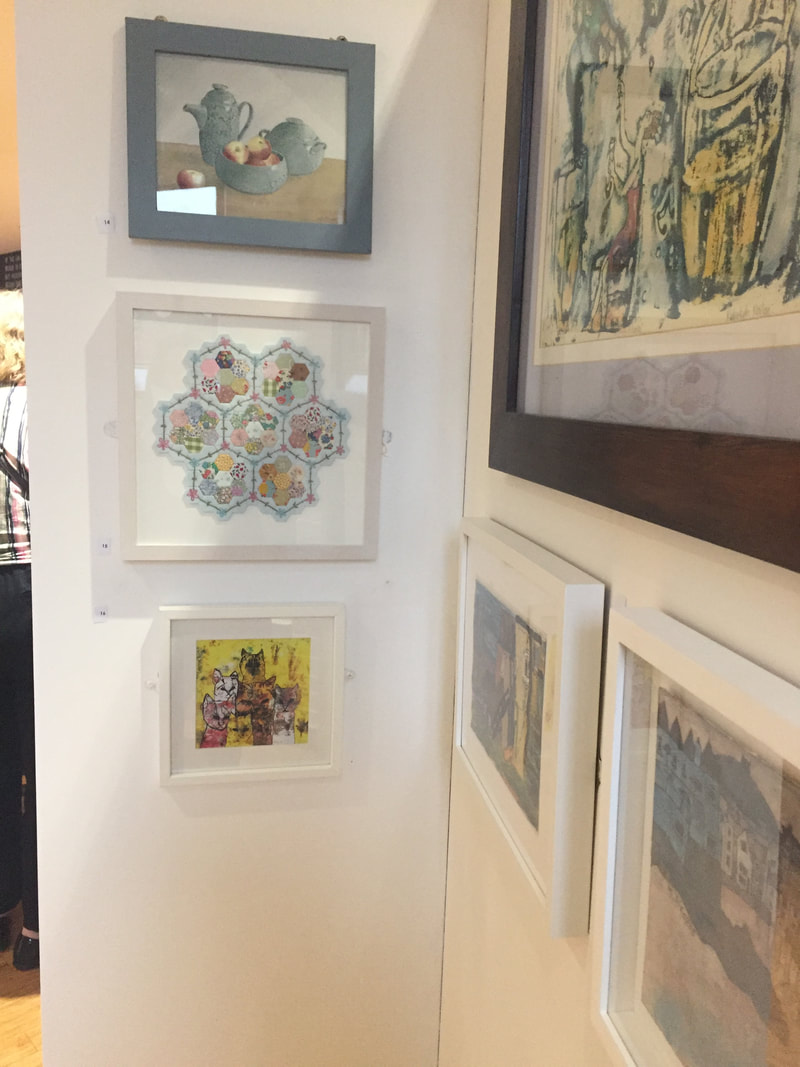 I named my piece Mabel's Garden. Mabel was my Gran who I sadly lost this year. She was a massive inspiration to me as she took a keen interest in my sewing and was a fantastic embroiderer, knitter and crocheter herself. She regularly used to visit Chapel Gallery to view the art and have a latte in the cafe. I think she would have been so happy to see my work in there. When we were little her garden was lots of different flowerbeds with paths in between so this mini quilt reflects that (the blue hexagons are the paths). My quilt is based on a traditional quilting pattern called Grandmother's Flower Garden so I thought this would be a fitting tribute to my Gran. 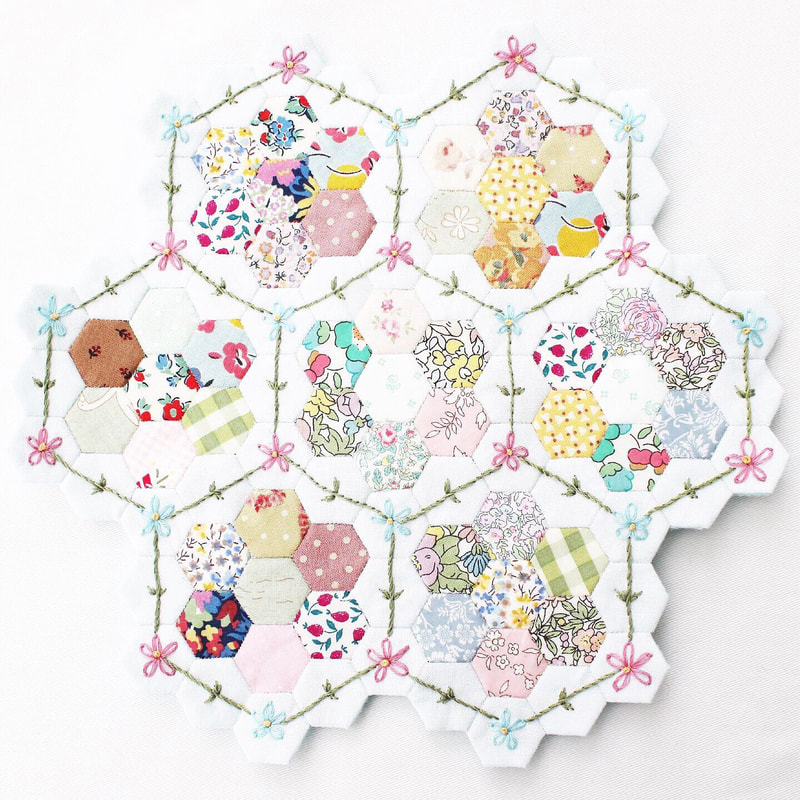 Have you ever shown your work in a show, gallery or competition? I'd love to hear your experience in the comments below.
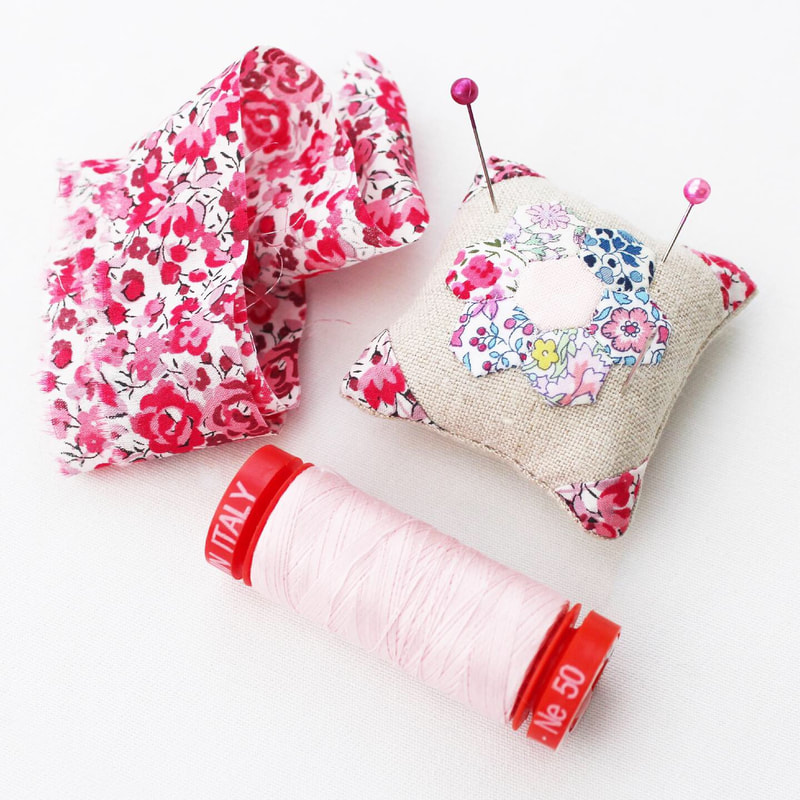
Happy sewing! 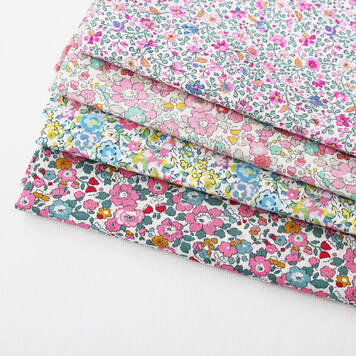 It's no secret that I love Liberty fabrics, as many of you do too. I use them in many of my projects and I love everything about them, from the colours to the prints to the way they feel. Liberty tana lawn is my favourite. It has such a high thread count that you can hardly see the weave and the detail in the prints is excellent quality, so much so that it doesn't really compare with other fabrics. (Although I do absolutely love other fabrics too!) We all know that Liberty fabrics are not cheap. In fact, the ones I own are by far the most expensive fabrics I've ever bought and ever will buy. But today I am going to share with you some ways to make sewing with Liberty fabric more affordable. These are the things I do, to make using Liberty fabric possible for me. I am on a budget so I cannot afford to buy lots and lots of fabric. 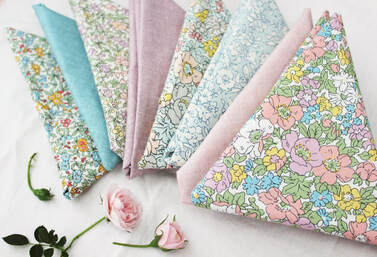 1. Use Liberty quilting cotton. Liberty released a range of quilting cottons a year or so ago and they are beautiful. The prints are as gorgeous as the tana lawn and they feel soft, smooth and drapey to work with. At around £15 per metre, the price is comparable to some quilting cottons, depending on what you buy and where, but it is cheaper than the tana lawn. So if you want to make something from Liberty but you are on a budget, this is an excellent choice. I'm currently making my hexagon quilt from Liberty quilting cottons. 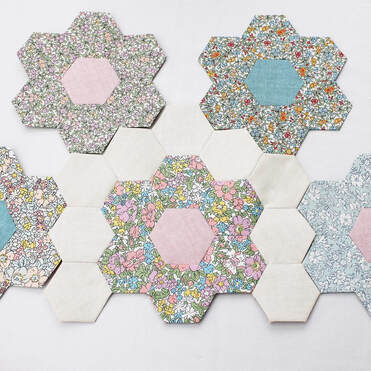 2. Mixing in other fabrics. Making a whole quilt from Liberty would look spectacular, there's no doubt! But I couldn't afford to do this. So mixing Liberty with cheaper fabrics is a great alternative and also gives the Liberty chance to shine! For my hexagon quilt I'm using Makower linen texture fabric and this is one of my favourite solid fabric ranges. You can, however, mix Liberty with any fabric you wish and Moda basics are a really affordable range that I like to use and it comes in a vast amount of colours. 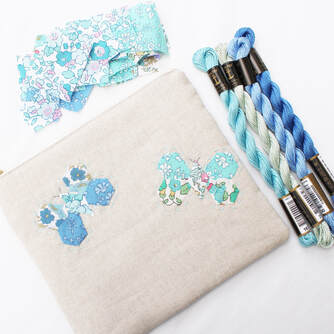 3. Use small pieces in small projects. Just a small piece of Liberty mixed with some linen or other fabrics is sometimes just enough to make a project shine. I've used tiny amounts in my two butterfly pouches and I lined them with cheaper, but still pretty, quilting cottons. 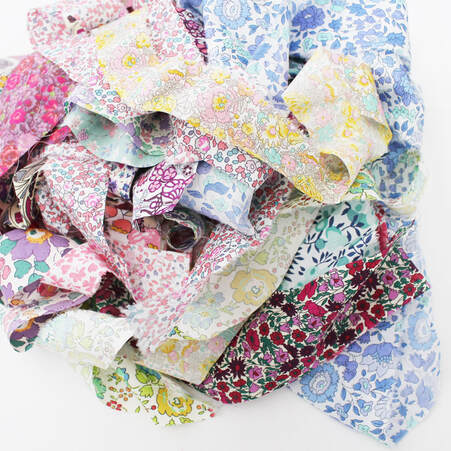 4. Buy small amounts. Whenever I've bought Liberty fabric, I've bought either a jelly roll (2.5 inch wide strips), fat quarters, pre-cut squares or scraps. Once I bought a couple of metres of Liberty cotton, many years ago, with the aim of lining a jacket I was making. Other than that, I only buy really small amounts. You can buy a fat quarter of tana lawn for around £5.50 to £6 and as the fabric is wider than most standard quilting cottons, you get a little more for your money. Jelly rolls are quite expensive at around £38. However the one I bought has lasted me over 3 years and I still have lots of it left (even though I have used it in many projects), because of the way I use it and mix it with other fabrics. My top, top tip for buying small amounts is the Liberty tana lawn scrap bags from Alice Caroline. I recently bought a scrap ribbon pack (pictured above) for the first time for £4 in their sale and I was over the moon with what I received. I got a huge amount of really long strips, in all kinds of different prints. All of the strips are really long and wide enough for half inch and quarter inch hexies. Some of the strips are even wider and could be used for one inch hexies or possibly bigger. It's a really affordable way to be able to play with many different Liberty prints. Each scrap pack is different so I can't say what you would get if you bought one but I was really pleased with my selection.  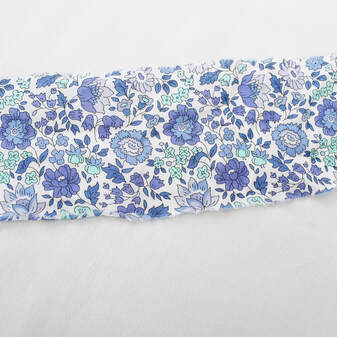 5. Shop the sales! Yes, Liberty fabric does go into the sales every now and then. Alice Caroline have great sales where they sell scraps, bolt ends, remnants and just simply discount some prints. You can definitely get a bargain there. Also, I once bought some Liberty quilting cotton for half price in Guthrie and Ghani which was an amazing bargain! So it's worth keeping your eye on your favourite fabric shops because you never know when some beautiful prints might sneak into the sale.  I really hope these little tips will give you some ideas and inspiration for how to affordably use Liberty fabrics in your projects. As with everything on my website, I am not paid or sponsored to say any of this, there aren't any affiliate links, I just provide links for your convenience. Let me know your thoughts on this in the comments and if you have any tips please share them too.
Happy sewing! |
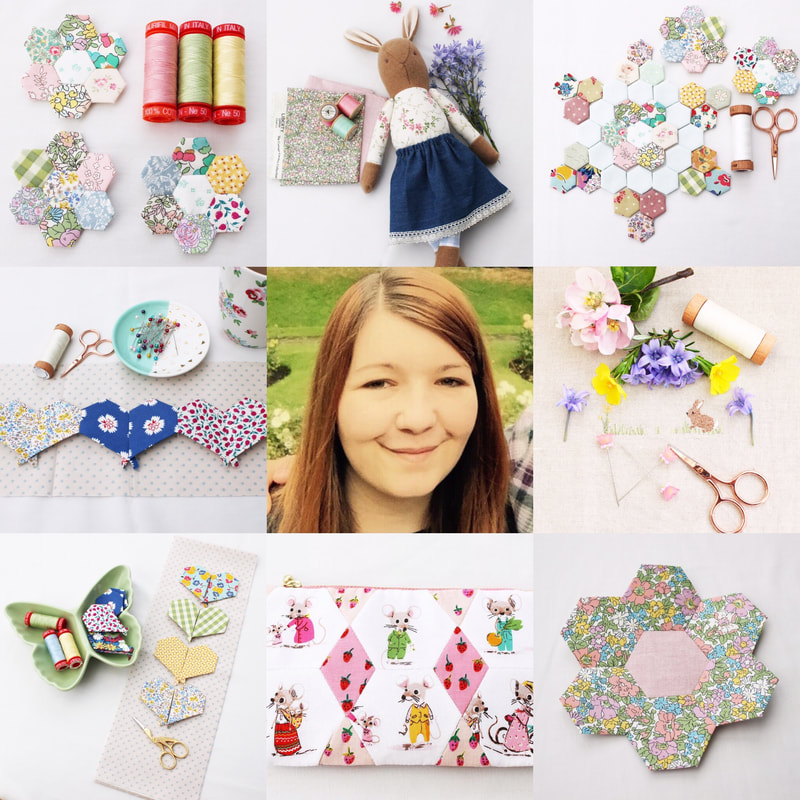
Follow me on InstagramAbout the Author
My name is Emma and I love all things sewing, especially EPP. My little blog is the place where I document what I'm making. I hope you enjoy reading what I'm up to! All opinions are my own and I only share things that I think you will love. Thank you for taking the time to stop by. Archives
September 2023
Categories
All
|
 RSS Feed
|
Copyright Vintage Sewing Box 2024
|
| ||||||