|
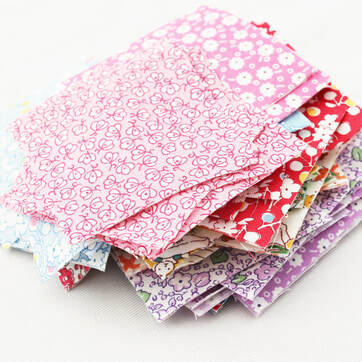
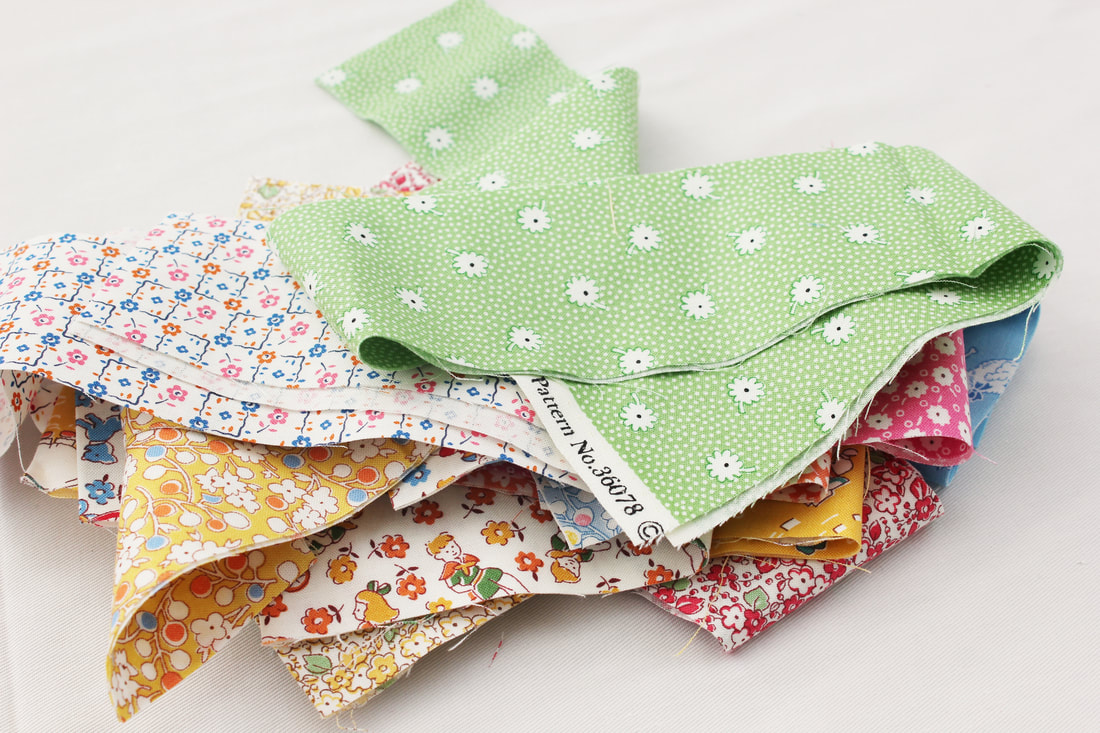
Every year that I've been to the Festival of Quilts, I've gone without a plan. This has led me to walk around a little bit aimlessly, not knowing where to look or what to buy because there is so much to see and so much choice. So this year I went with a shopping list and I did manage to get some items from the list, but then I went off piste and bought more floral fabric. In fact, my list said no kits (as I have so many!) and it also said solid fabric and linens. As you'll see, I didn't stick to that either! Before you see what I bought, I just want to say that I had been saving up for the Festival of Quilts for a long time. This is the one occasion each year where I buy quite a lot of things at once. For the rest of the year I will buy very little. 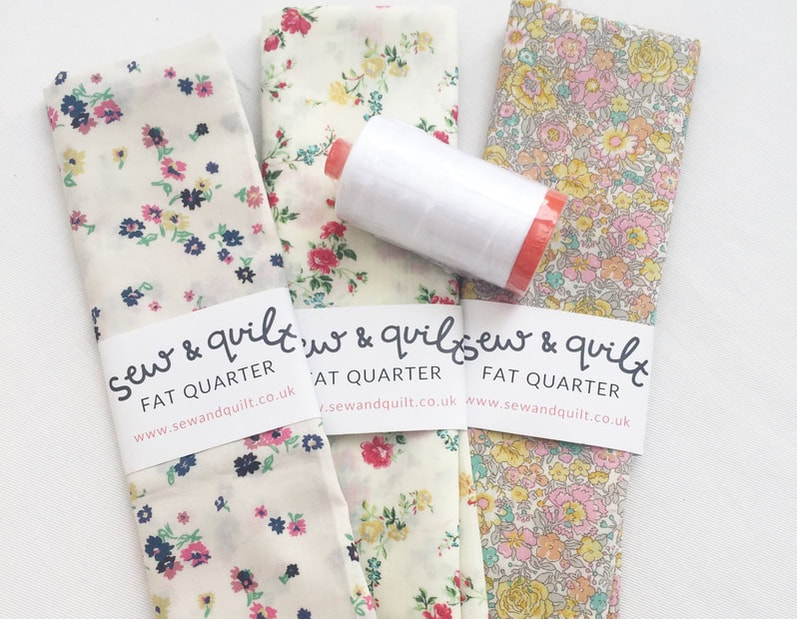 My first stop was one of my favourite shops, Sew and Quilt. I got to meet the very lovely Jessie and Robin and chat to them about the show. I've admired Jessie's work for so long. In fact, I wouldn't have even tried EPP if it wasn't for her. I'd never considered doing EPP even though I'd seen it and admired it. I was put off by the thought of making my own papers because I was short on time and just wanted to do the sewing part. I was also put off by the idea of thread basting. But one day I thought maybe I should try it and I was googling EPP papers and stumbled across her shop and the rest is history and I'm so glad! Through her I discovered glue basting and pre-cut papers, both of which make EPP a breeze. From Sew and Quilt, I bought three Liberty fat quarters and some Aurifil thread for my machine. 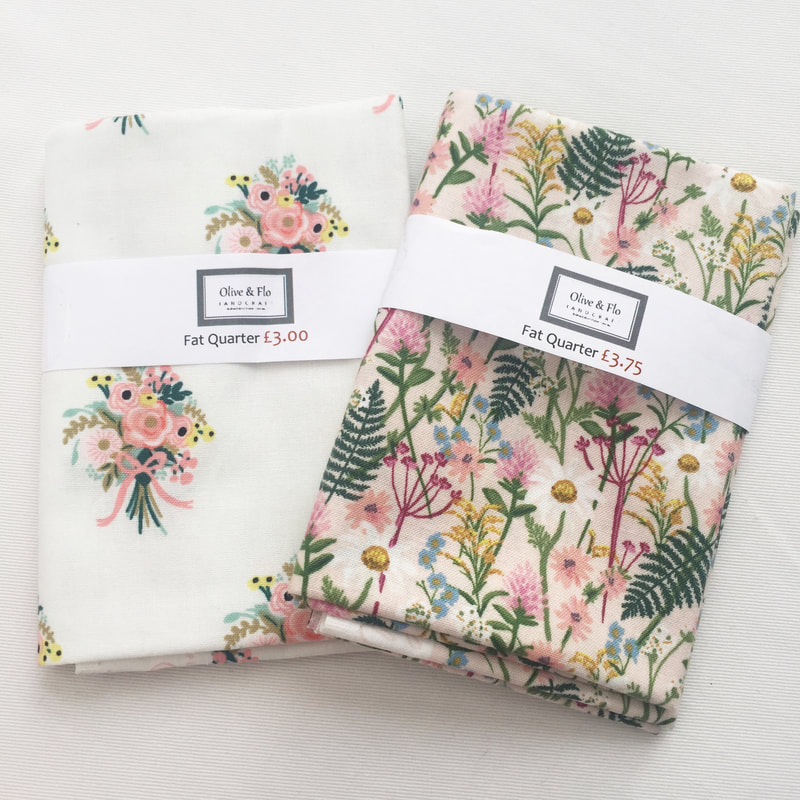 Next I went to Olive and Flo Handcraft and bought these beautiful Cotton and Steel fabrics. Olive and Flo Handcraft is such a lovely shop with a fantastic selection of modern fabrics. 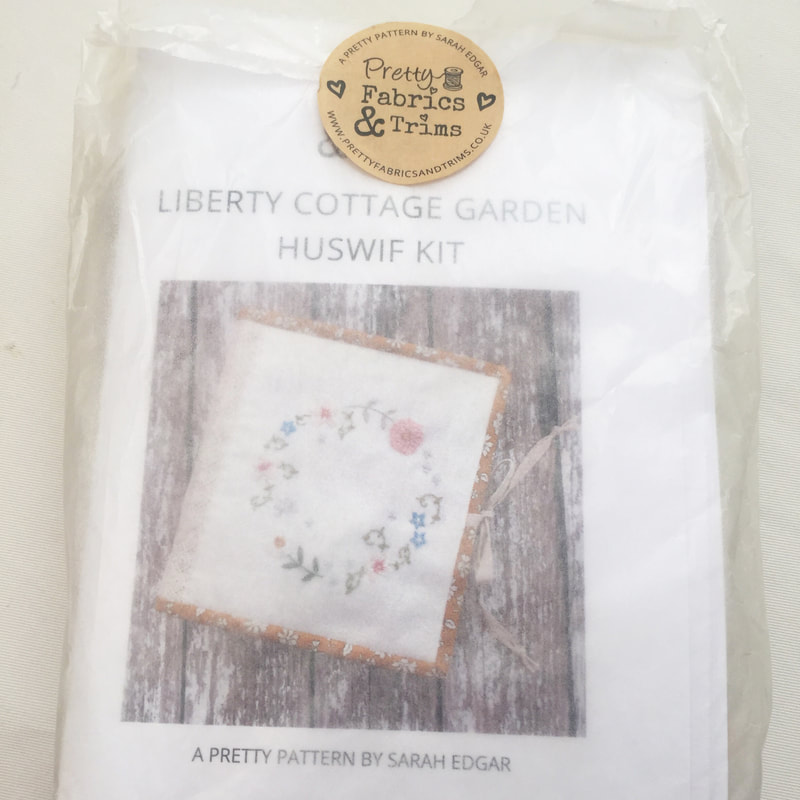 I then went on to Pretty Fabrics and Trims and met the lovely Sarah and Penny and bought this beautiful kit which I've been admiring for so long. I had told myself not to buy any more kits but I just had to go against that to buy this and I know I will really enjoy making it.  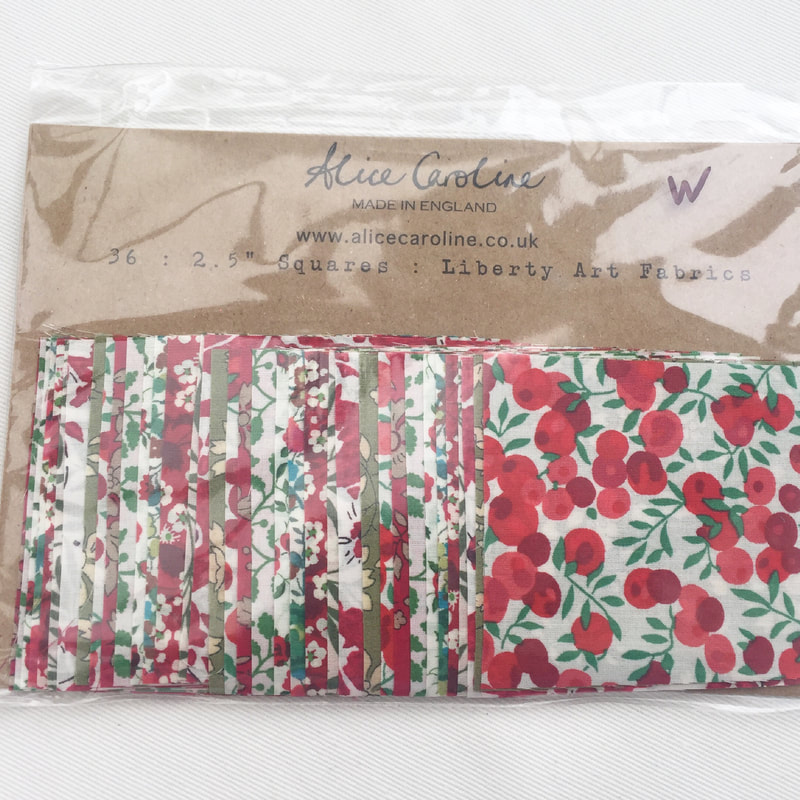 Next up was Alice Caroline where I allowed myself to buy a few too many Liberty fabrics. They were all so lovely I had a difficult time choosing. I am planning something Christmasy with the red and green squares and I'm really excited about that. 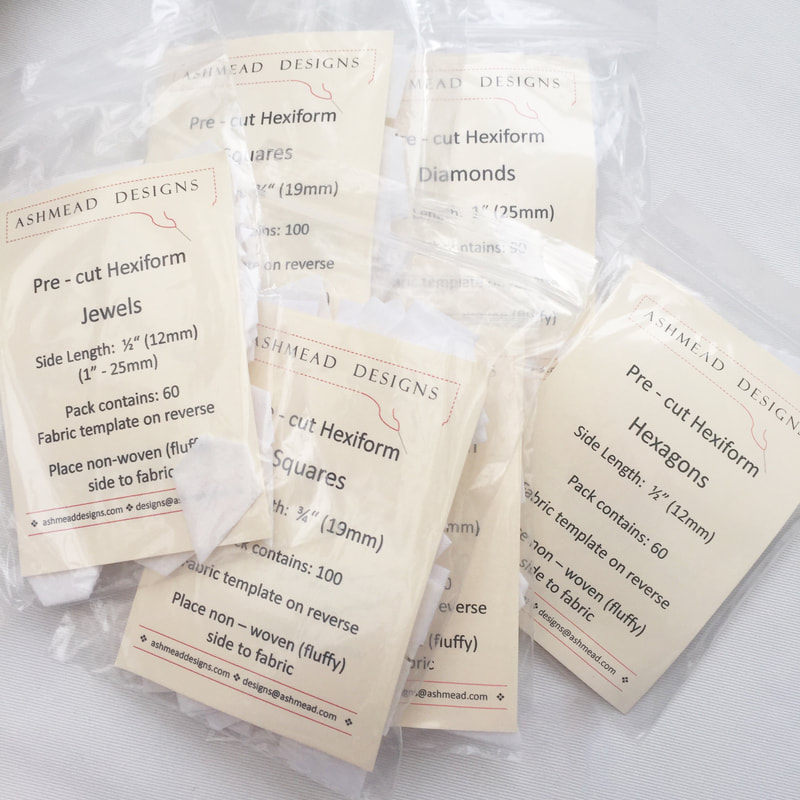 Finally, I bought some more hexiform shapes from Ashmead Designs as I use them quite often and I thought it was a good opportunity to stock up.
There are so many fantastic stalls at the festival, it can be quite overwhelming! But I really enjoyed it and I will hopefully be back next year. If you have never been before, I highly recommend it. My two blog posts about the festival are only a glimpse into what it is like there, there is so much more to see. Have you been? What did you buy? I'd love to know in the comments below. Happy sewing!
2 Comments
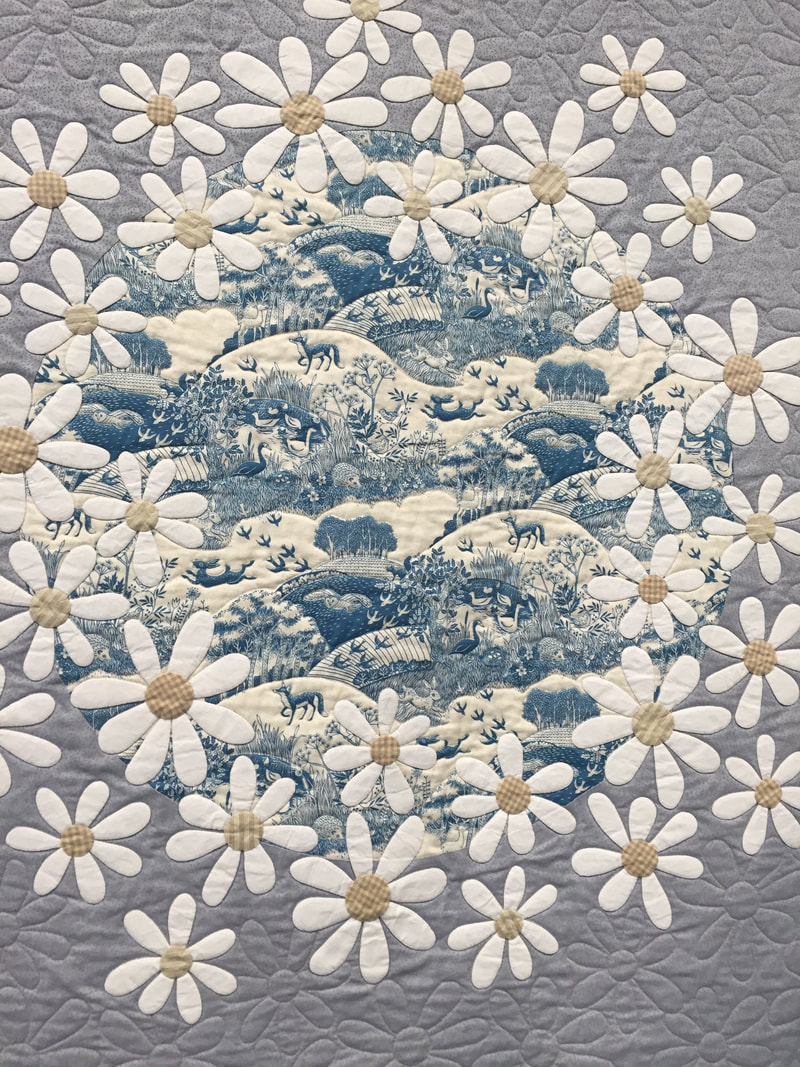 On Sunday 4th August I visited The Festival of Quilts at the NEC in Birmingham. It's about a two and a half hour drive from where I live but luckily my husband's family live in Birmingham, meaning we were able to visit them and have a lovely time seeing everyone and also meaning they were able to look after our little one whilst we visited the festival. We've been at least three times before, maybe even four, I've lost count! We always enjoy seeing the quilts, it's like visiting a huge art gallery, the standard is so impressive and it is always so inspiring. So when we arrived, our first stop was to see all of the quilts, we always do this before the shopping, it makes sense because then you aren't carrying your purchases around all day. Of course the first category we looked at was the mini quilts. I used my phone to take these pics, they aren't very good as I took them quickly not to get in people's way. Also, I apologise that not all makers are credited, I left my show guide behind by mistake. Here are a few of my favourites. 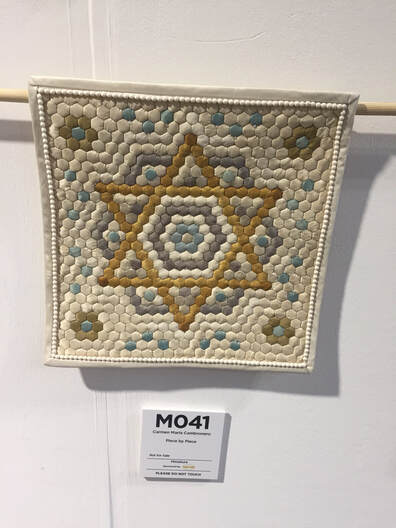 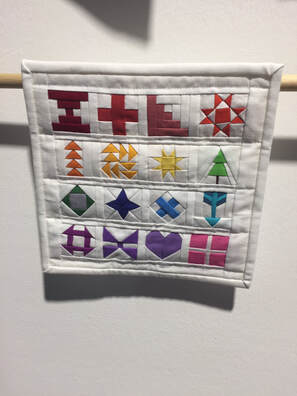 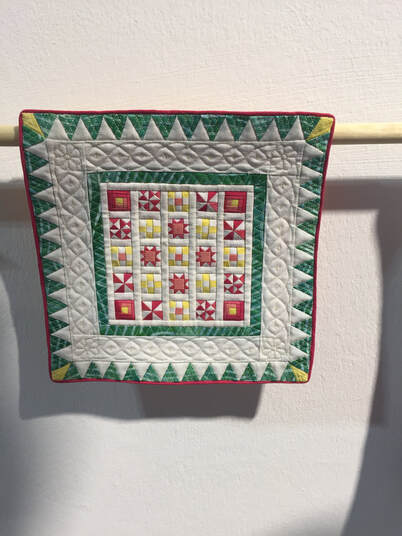 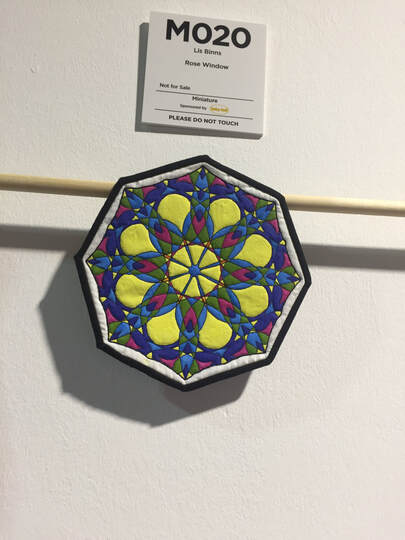 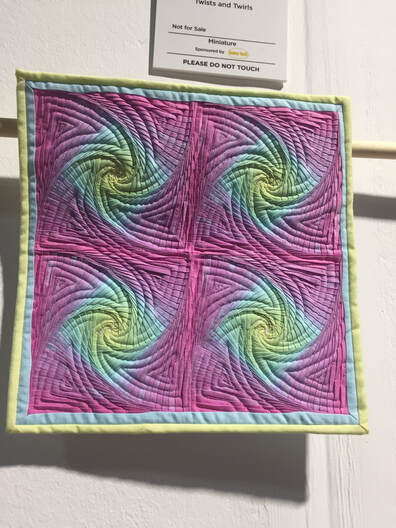 After the mini quilts we went on to view the larger quilts. The quilt that caught our eye the most was this one below called Endangered. I had to video it to show you because it was so so clever! As you walked past it, you could see three animals appear and disappear, a rhino, a leopard and a zebra. We thought it was so clever in the way it was constructed and how the images appeared like magic, but also this highlighted the quilt's important message about endangered species perfectly. My video isn't the best but hopefully you can see the animals. As we walked around the rest of the quilts on display, I had a think about which categories I was drawn to the most. Turns out I really like traditional and contemporary quilts. However, I can really appreciate the art quilts and the modern quilting category too. Even though I don't make abstract or really modern designs, I really love seeing all of the different styles on display and I find it so interesting. 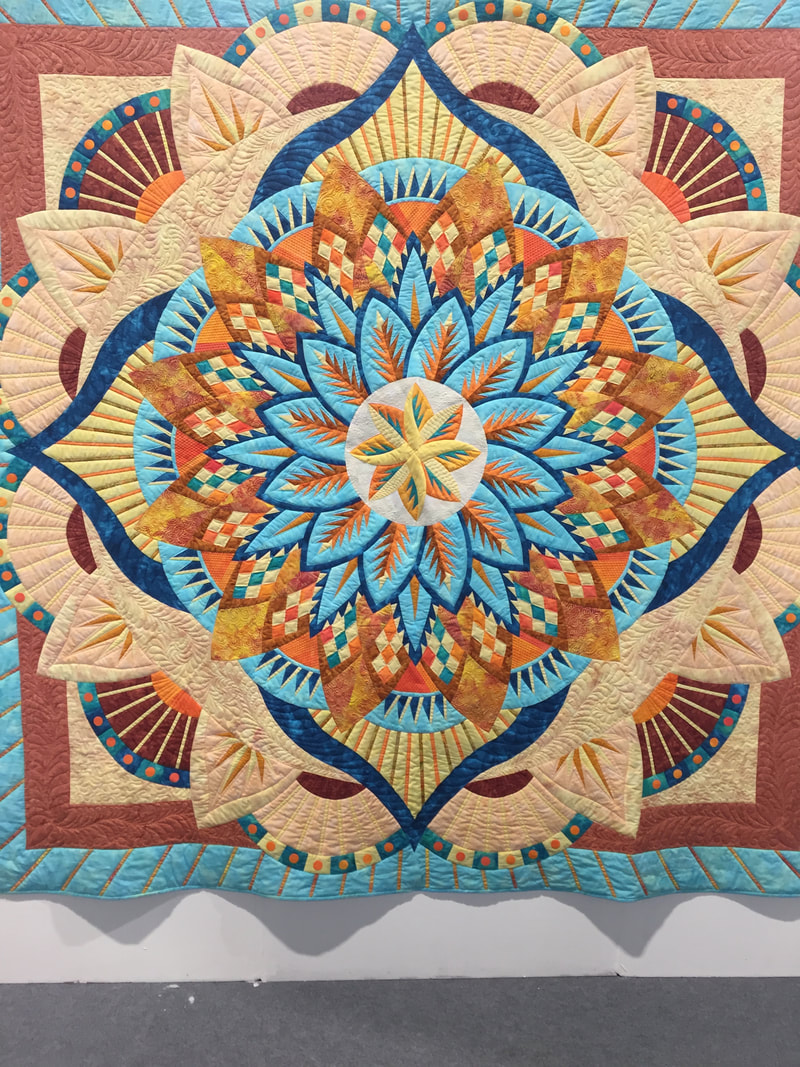 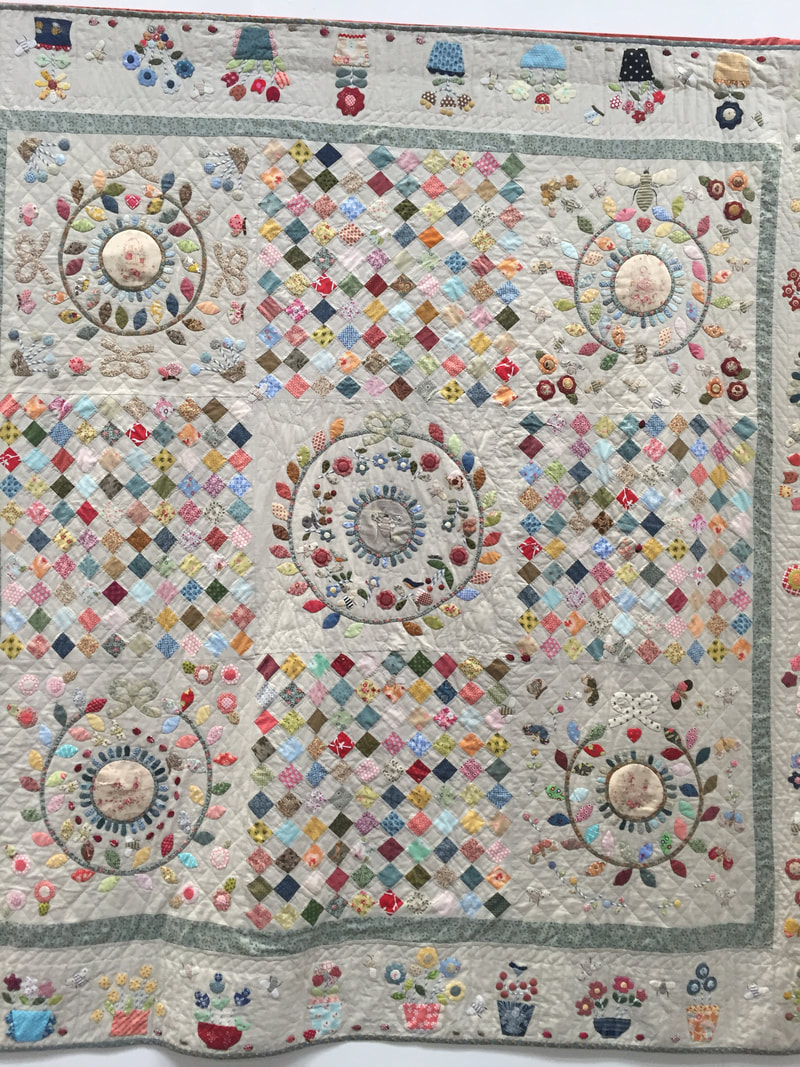 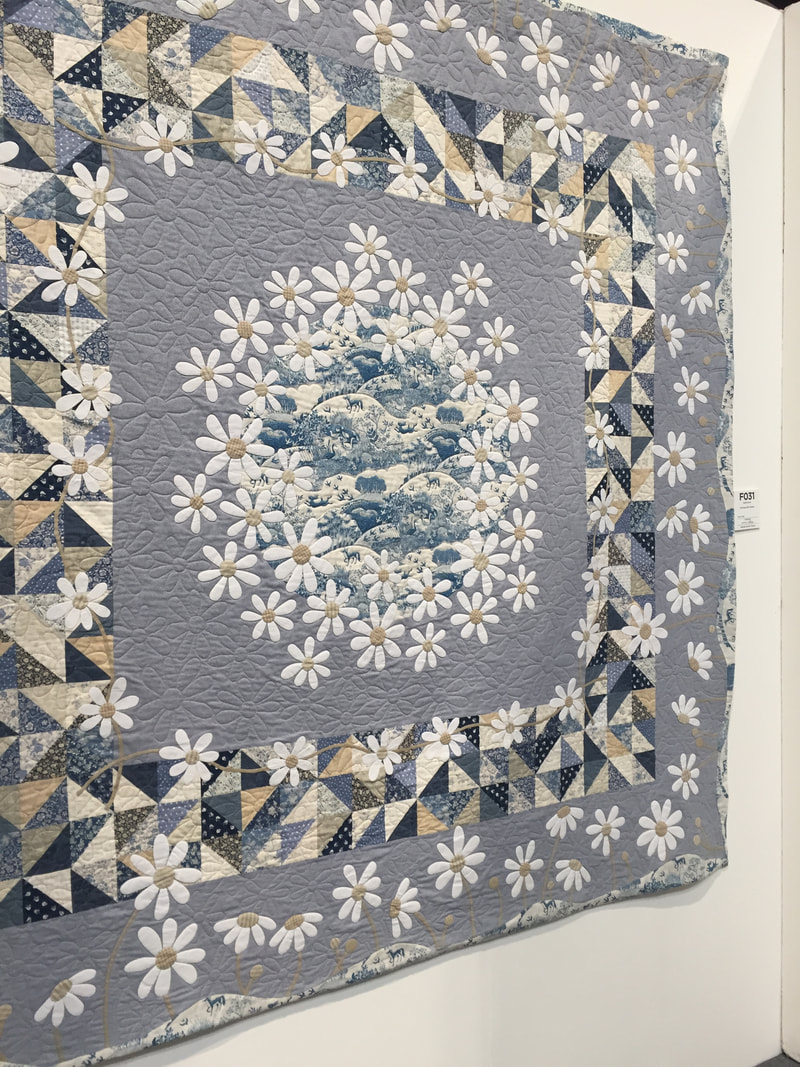 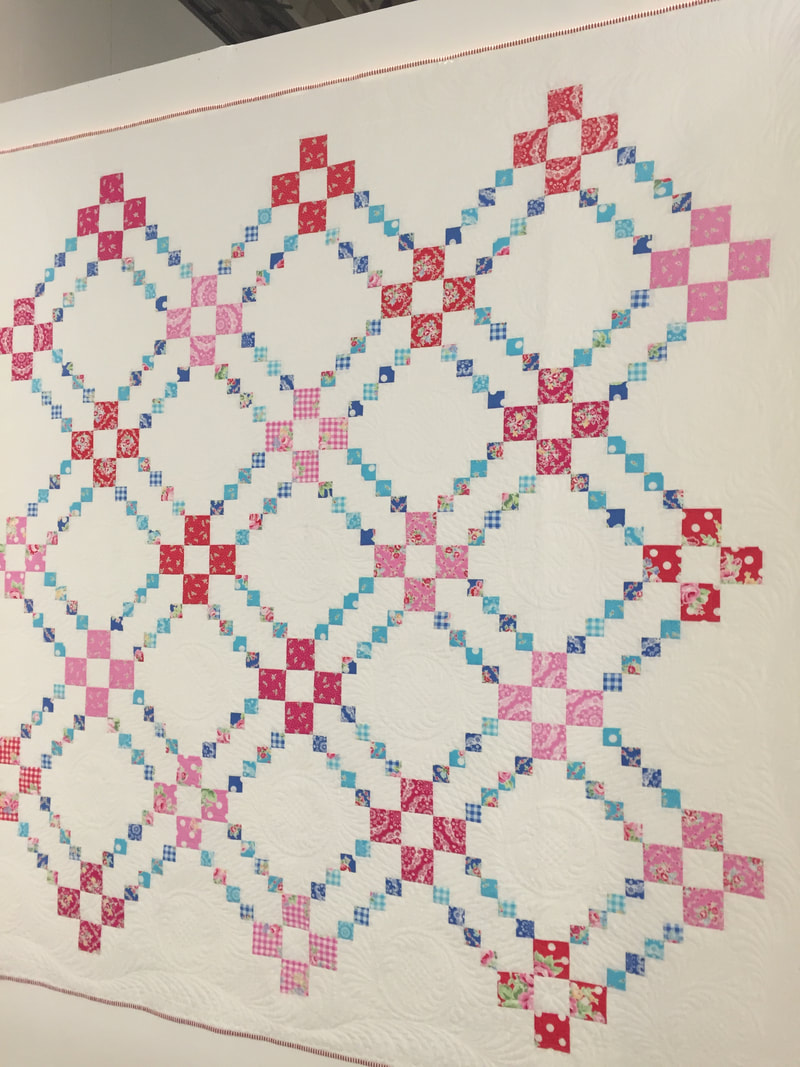 Above - Trudi Wood 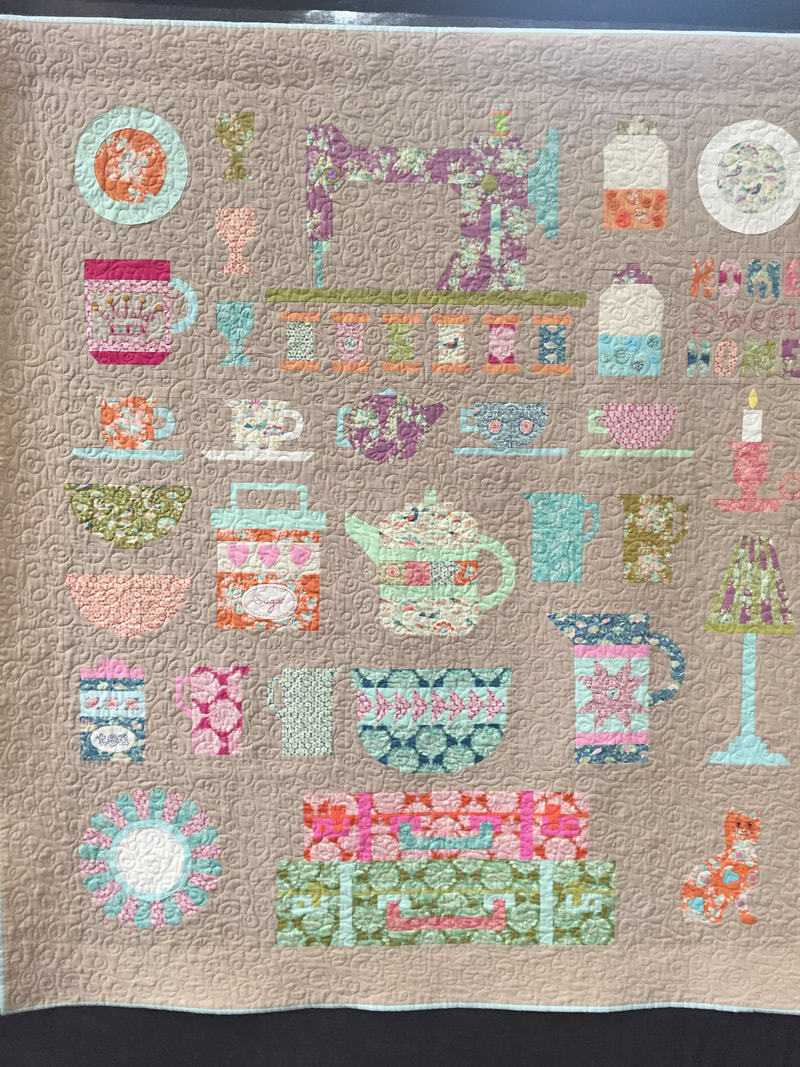 Above - Jo Avery 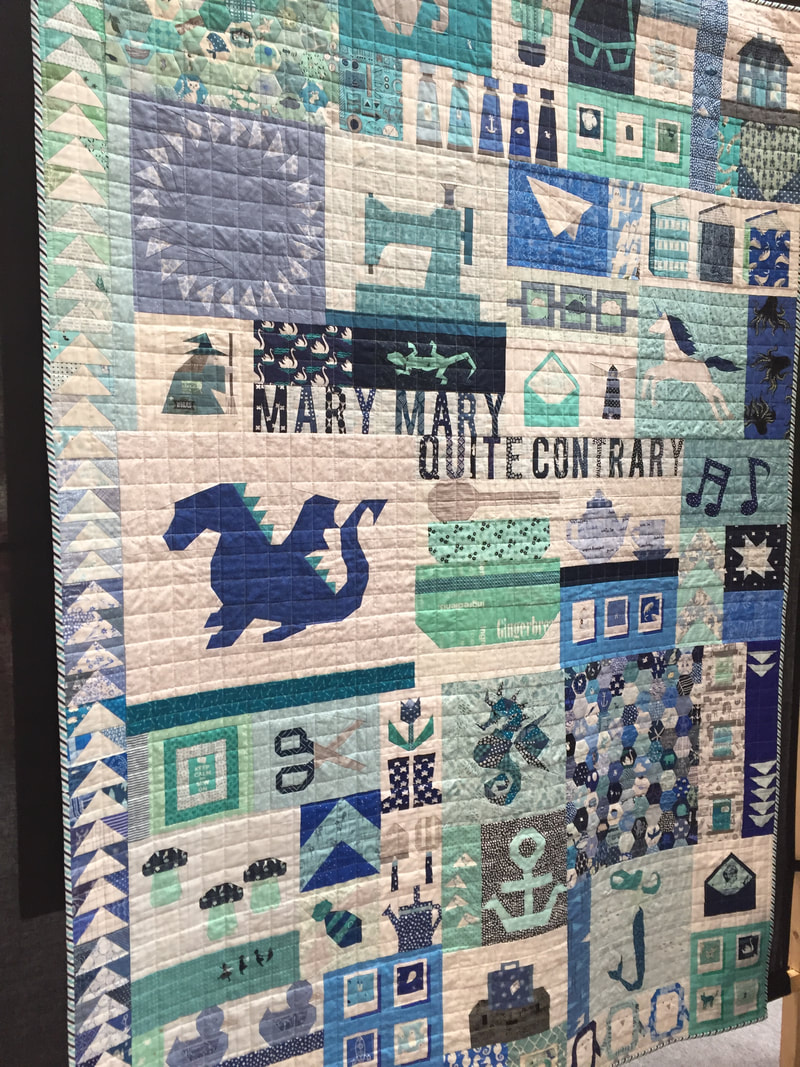 Above - Cloudtori 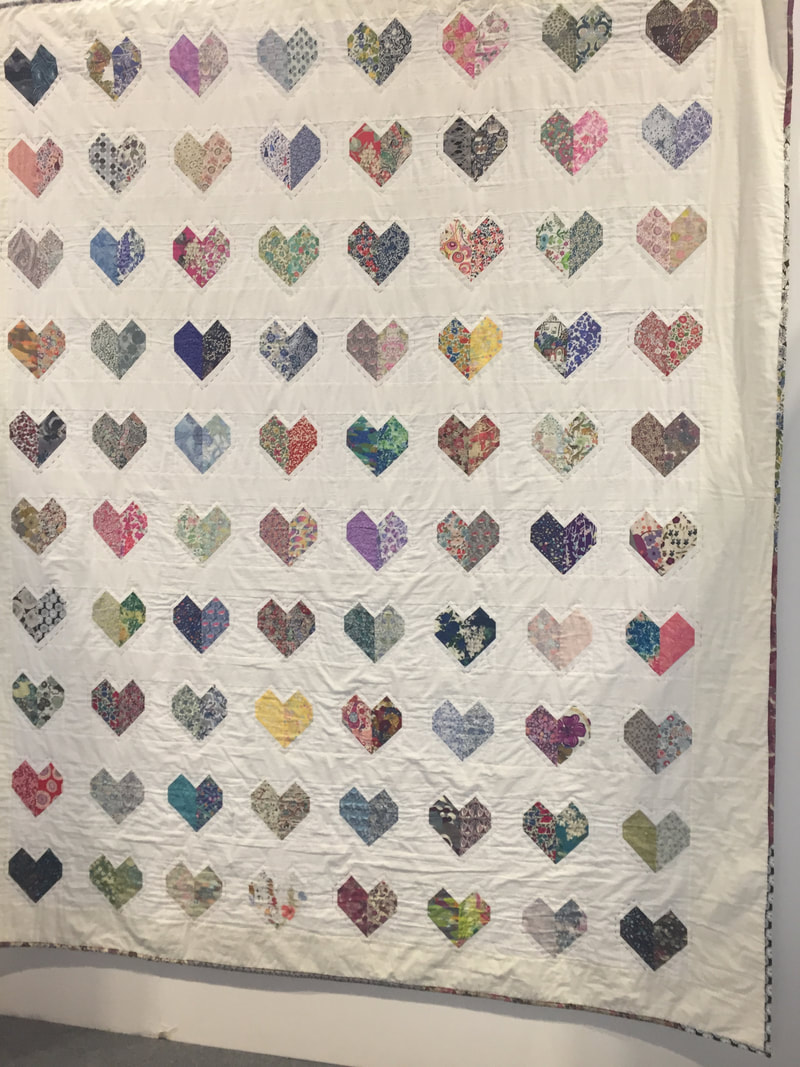 Above - Caroline One of my absolute favourites was Sweet Sunday in Somerset by Helen of henhouse homemade I loved everything about this quilt, the colours, the mix of vintage linen and liberty fabric, the fact it's English Paper Piecing and hand quilted, it's truly spectacular. It's absolutely full of amazing detail and I love it. 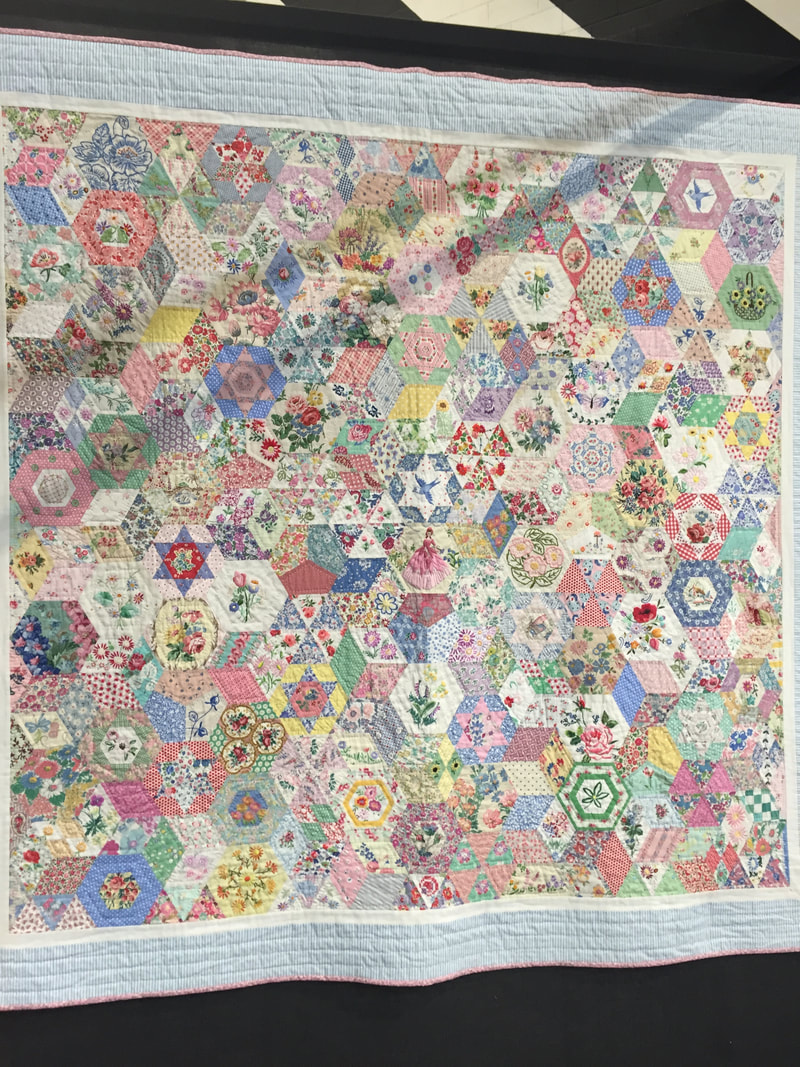  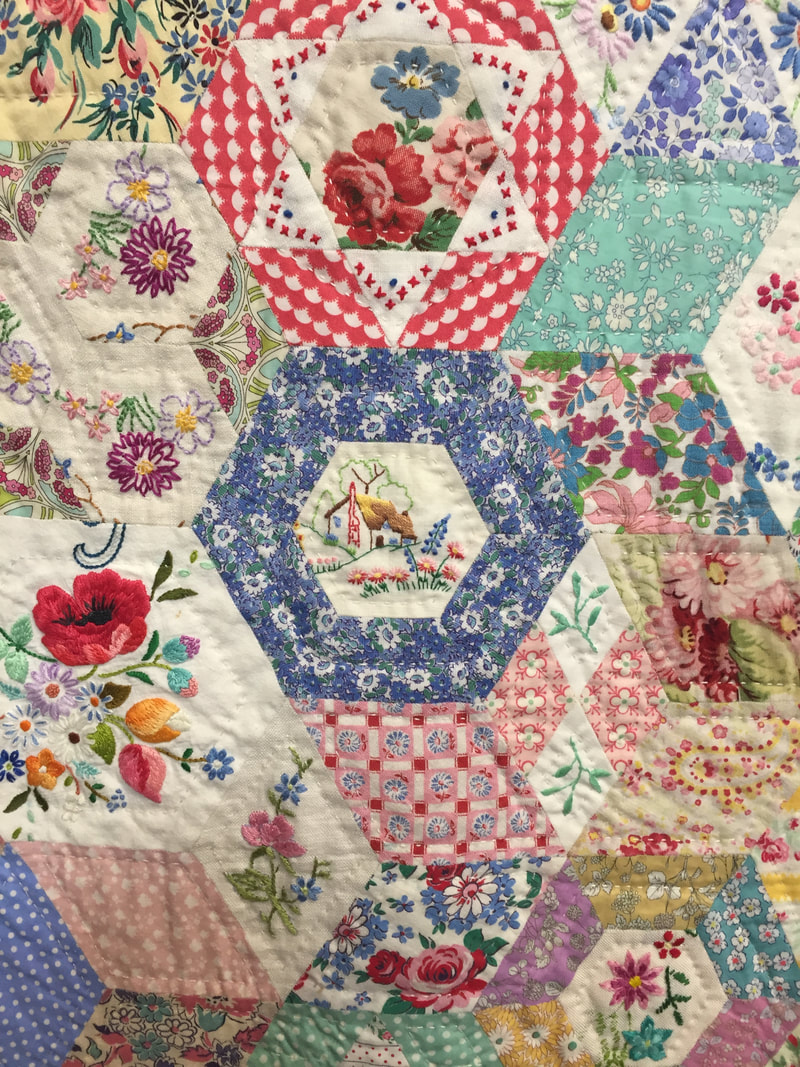 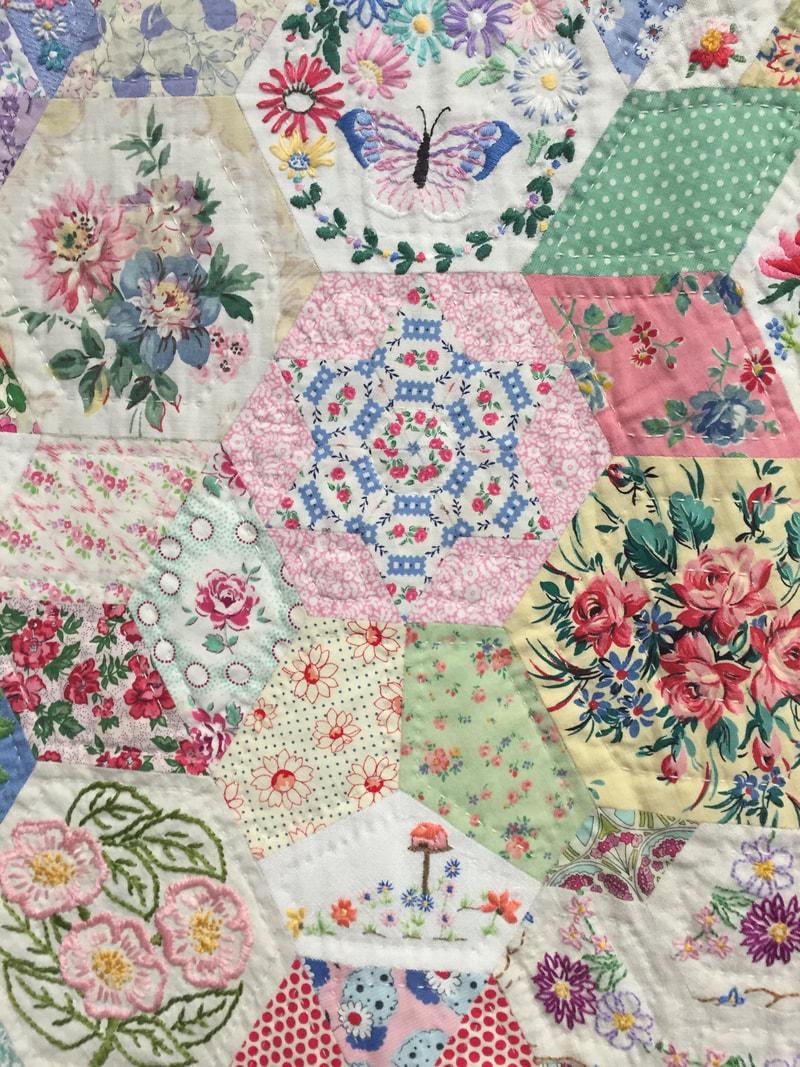 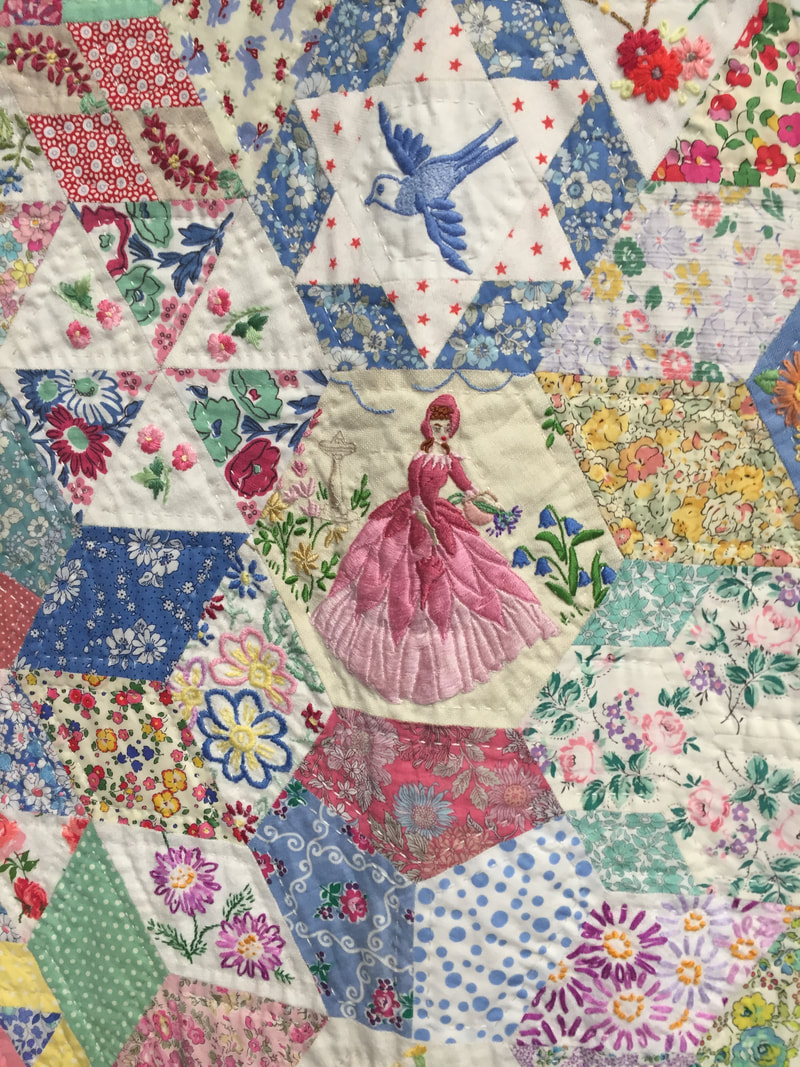 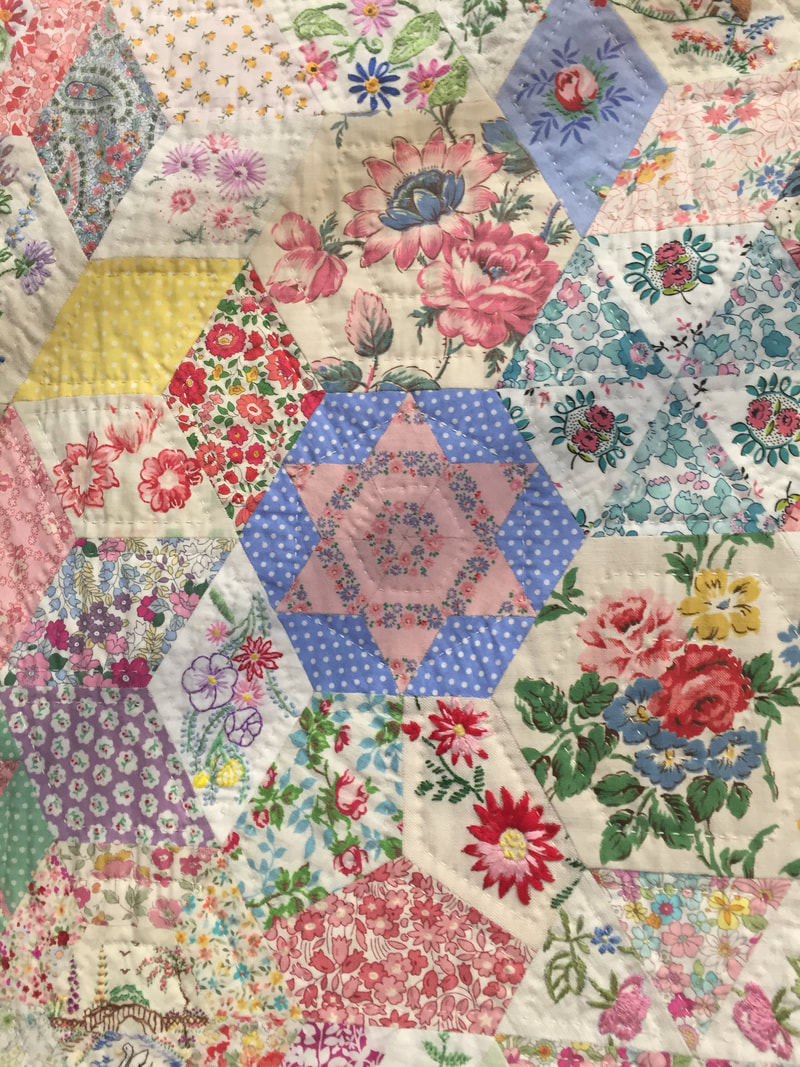 There is so much I could share about Festival of Quilts as there is so much to see, I've only really scratched the surface here. If you've never been before I highly recommend it as there really is something for everyone and it is such an exciting place to be. Well this became a rather long blog post, so stay tuned for part 2 in which I will share what I bought. I hope you've enjoyed seeing what I loved about the festival of quilts. Did you go? What were your highlights? Please let me know in the comments.
Happy sewing! 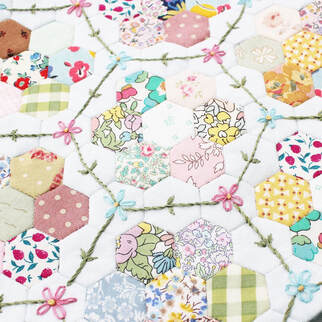 I'm going to tell you the little story about how and why I entered my mini quilt into a local art gallery competition. If you are like me and have never entered a competition or shown a quilt before, I hope that after reading this you will feel inspired to give it a go too! There is no doubt in my mind that patchwork is art. You only have to see the incredible quilts on display at the Festival of Quilts to appreciate just how talented quilters are. From choosing colour palettes to complex patterns, accurate cutting, matching seams and points, intricate piecing, quilting designs, the list goes on and on! Despite this I've had a hard time seeing my work as artistic, which is a reflection of my own lack of self-confidence. When my Dad saw my half inch hexie mini quilt, he said it was artistic, and that is a big compliment coming from him! I was eventually talked into entering it into the Lancashire Open Art Exhibition at Chapel Gallery and I was completely surprised when it was accepted! 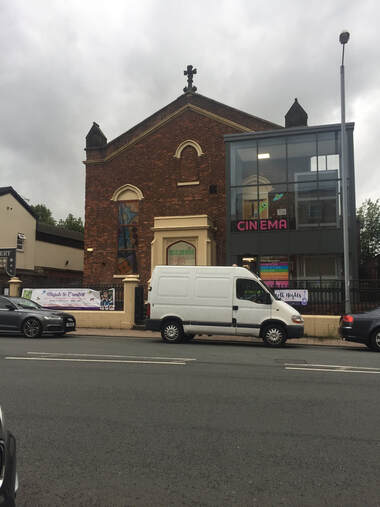 When it comes to art and art competitions, textiles is underrated and under represented. It is seen by some as less skilled than drawing or using paint and often viewed as more of a homemade crafts/hobby type thing. So I was really pleased that my piece was chosen and I was also glad to see a few other textile pieces in the exhibition. I find it difficult to promote myself and put myself out there in terms of my work, but thinking of it as a way of promoting textiles really helped me push past this. The more of us who show our work in these sorts of events, the better it is for the quilting industry and the more likely it is that quilting, embroidery and textiles in general, will be seen as artistic forms by more people. Maybe some people don't think of quilting as art because they haven't seen the amazing quilts that are out there? I know when I mentioned I was going to the Festival of Quilts to my brother he said, is that about duvets?! 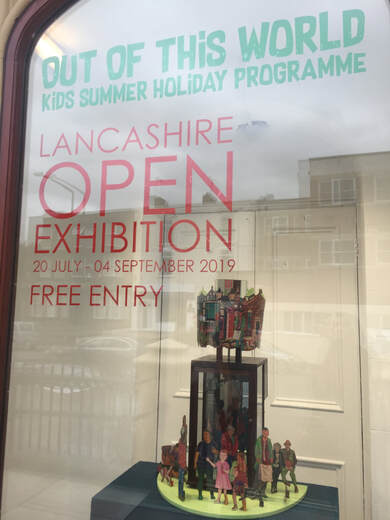 Now I've never entered a quilt into a quilt show, so I can't speak about what that is like, but I can tell you a bit about my experience of entering it into an art gallery and give you some tips for if you are going to do this one day. Tip 1 - Frame your work. Mine is a mini quilt so this was easy to do. I turned up to submit my piece with it unmounted and was told that it couldn't be accepted like this because it could be taken easily off the wall. (I had put two felt loops on the back with a dowel running through so it could hang off a nail!) It needs to be in a frame or mounted on a board which can be fixed to the wall with mirror plate fixings. Tip 2 - Don't frame it yourself unless you know what you are doing - unlike me! I bought an inexpensive frame from a shop, put my piece inside and then proceeded to struggle for half an hour to attach the mirror plate fixings to the back of the frame, resulting in splitting the wood. Keep in mind that I was rushing to do this as I knew there was a deadline to submit it. In the end I went to a local framers and explained my frame emergency and they sorted it out for me, and even gave me an 'artist's discount'! I am so glad I got it framed in the end because next to the other pieces of work it looked right. Unmounted would have looked wrong, so this was a good decision. Tip 3 - When you submit your piece to the gallery and they ask 'What's the title?" they mean what is the piece called, not what is your title (i.e. Mrs or Mr), yes, I made this rookie artist mistake!! Tip 4 - If you want to sell your piece, you will have to put a price on it. I had no idea what to sell it for so I put it not for sale. I've had some interest in it and somebody I know asked to buy it! But this is a sentimental piece so I'm leaving it not for sale. It's really hard to put a price on your work, especially if you are like me and are just starting out, but whatever you do, be sure not to undervalue your skills. Tip 5 - Enjoy the process! I felt nervous about the whole thing and now I look back, there was really no need. It's really fun that my piece is hanging in the gallery for the entire summer. 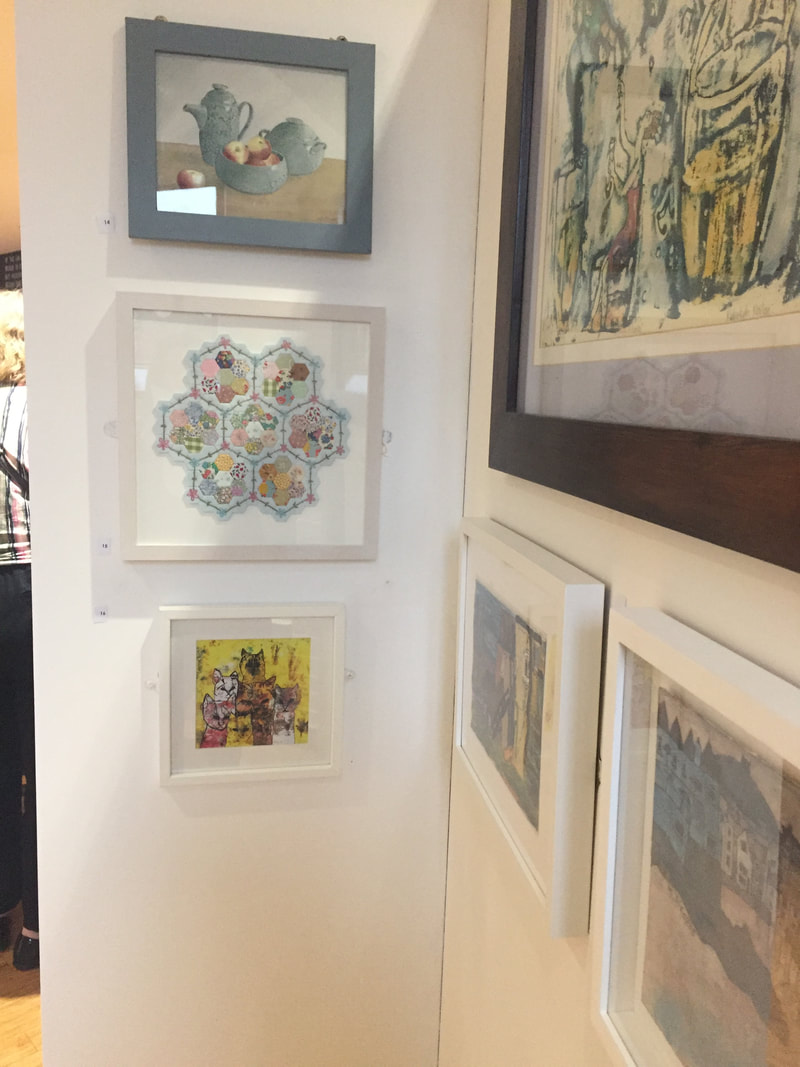 I named my piece Mabel's Garden. Mabel was my Gran who I sadly lost this year. She was a massive inspiration to me as she took a keen interest in my sewing and was a fantastic embroiderer, knitter and crocheter herself. She regularly used to visit Chapel Gallery to view the art and have a latte in the cafe. I think she would have been so happy to see my work in there. When we were little her garden was lots of different flowerbeds with paths in between so this mini quilt reflects that (the blue hexagons are the paths). My quilt is based on a traditional quilting pattern called Grandmother's Flower Garden so I thought this would be a fitting tribute to my Gran. 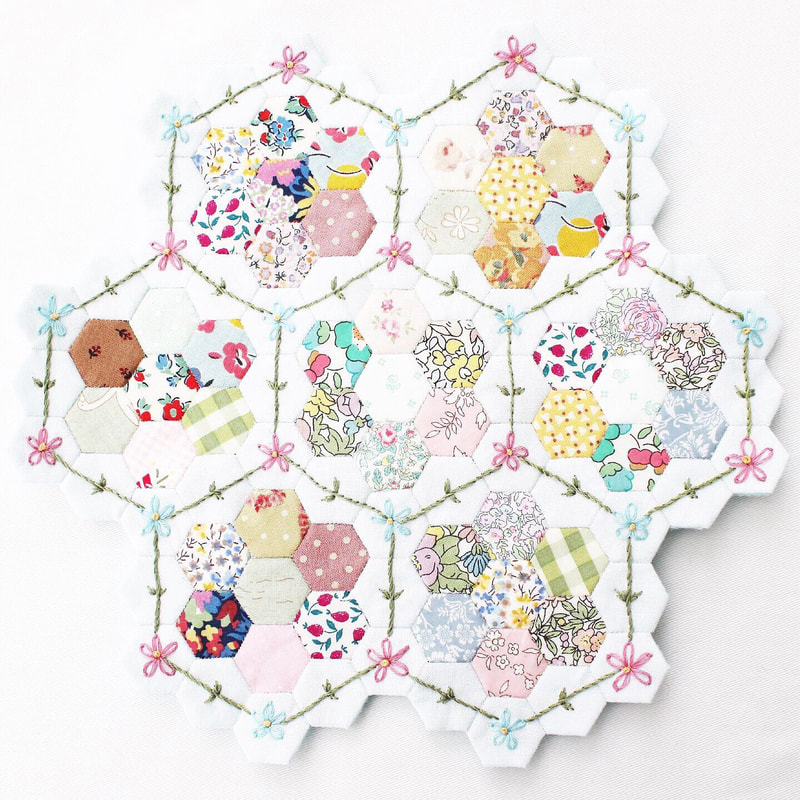 Have you ever shown your work in a show, gallery or competition? I'd love to hear your experience in the comments below.
Happy sewing! 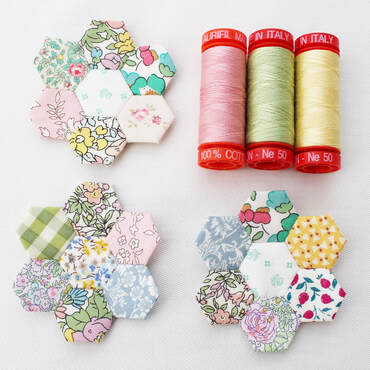 I love English Paper Piecing so much, but I love tiny EPP the most! I'm currently working on a half inch hexagon project which will become a wall hanging. I love half inch hexagons and I think they might be my favourite size. I absolutely love combining embroidery and EPP and as I often use hexiform shapes rather than paper (which I buy from Ashmead Designs) embroidering into them is even easier! I'm really passionate about sewing being an accessible craft/hobby to all people, which is something I will talk about more in depth in another post. But for now I will say that EPP is a great hobby and anyone can do it. It's inexpensive, only requires a few tools (needle, thread, paper, fabric, scissors and maybe a glue pen if you don't want to thread baste) and is so portable. 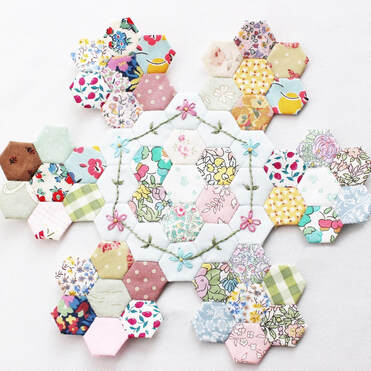 Recently I started a quarter inch hexagon project and I got lots of questions about it on Instagram. There was a lot of interest surrounding how I make the hexagons and sew them together. So I've made a little video tutorial that shows all of the steps and also how I made them into a little pincushion. I wanted a small pincushion to take around with me as when I'm stitching on the go I always need somewhere to park my needle in between stitches. I admit I was very tempted to make this little pincushion into a bracelet to wear whilst stitching, but maybe I will make another one for that. 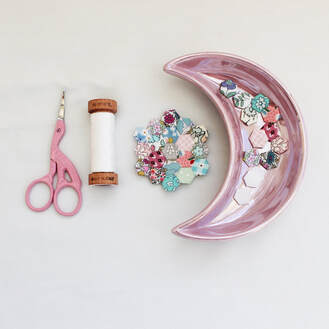 The beauty of half inch and quarter inch projects is that they use up the teeny tiniest of scraps which I think is brilliant. I don't have a lot of money to buy fabric so I like to use up what I have and also, this is better for our environment. 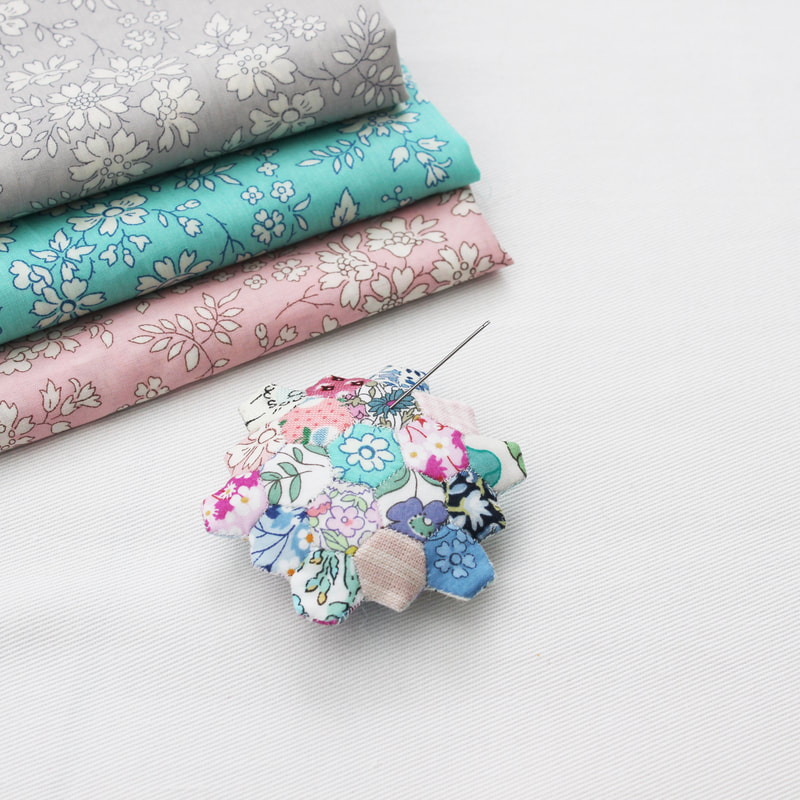 I hope you like my video tutorial and that you find it useful, especially if you are a beginner. You can find it on the video tutorials tab under quilting tutorials or click on one of the links in this post. There are, of course, many ways to make things, I am just showing you my way. The two halves of the pincushion could be stitched with a ladder stitch whereas I have used a whip stitch. Please feel free to use my video as inspiration and to make the project your own in any way you like by changing stitches or adding your own twist. If you have any comments or questions, please leave them below. Happy sewing!
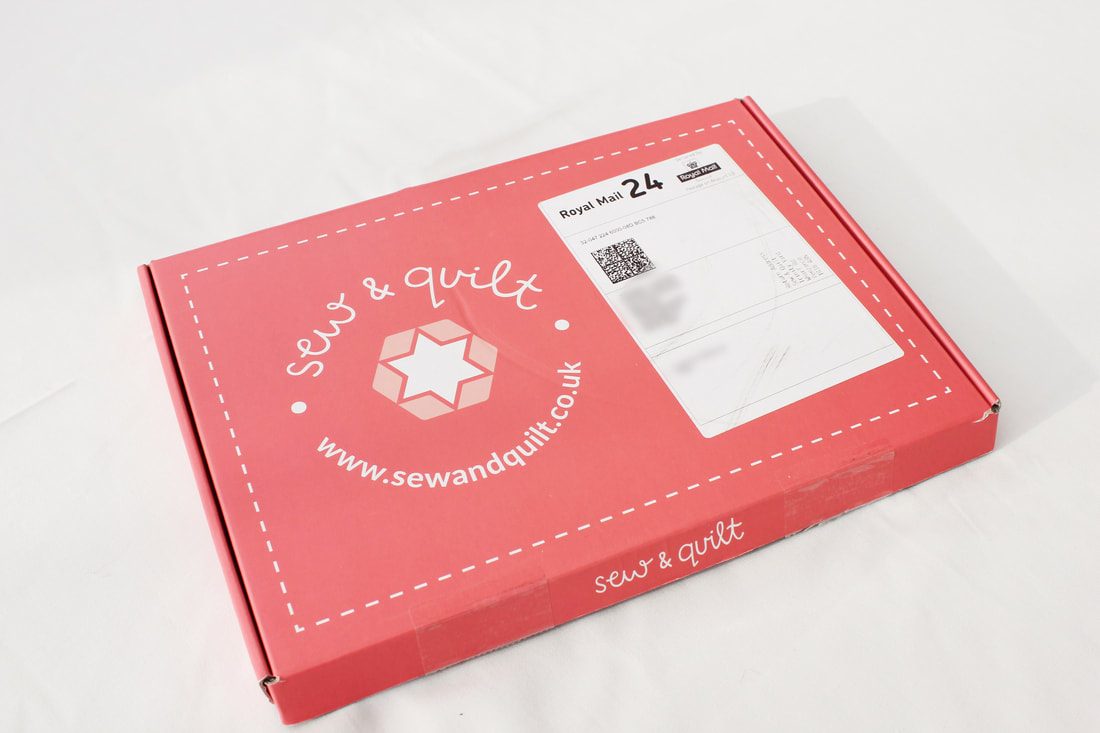 I'm lucky enough to have been able to sign up to the Sew and Quilt Block of the month subscription box so I thought I would tell you all about it. Sew and Quilt is a lovely online quilting shop based in Cornwall. For the past few years, they have been running a monthly subscription box where you receive all of the materials and paper pieces needed to make part of a quilt (English Paper Piecing) and at the end of the year, you will have a completed quilt! I've wanted to join up for a long time but I've been unsure if I could keep up with it each month as it involves a lot of sewing and I have lots of other projects on the go. This year they released an additional quilt to their subscription boxes called the Row by Row quilt and when I saw it, I knew it was the one for me! Each month you get everything to make a horizontal row of the quilt. The beauty of this quilt design is that every month is different (except the first and last months are the same to make the design symmetrical.) This appealed to me greatly as it wasn't going to get too repetitive and each month would be really exciting as it would be something new each time. 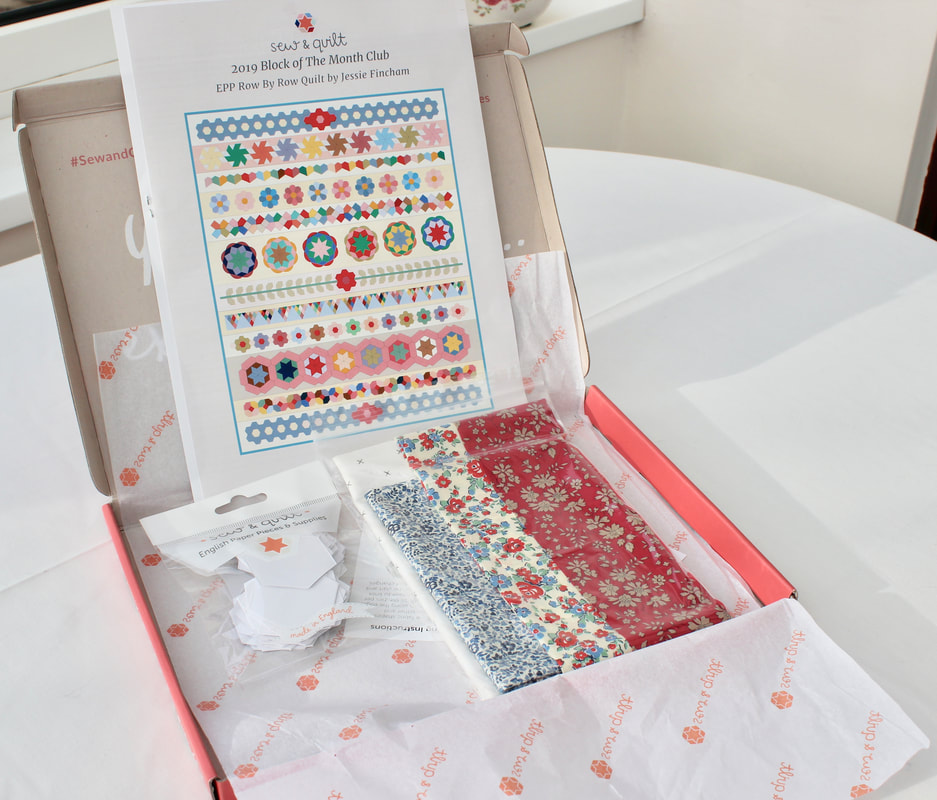 The materials arrive each month in a lovely pink box and you get detailed instructions so you can't go wrong. Each month always includes some Liberty Tana lawn fabric too. 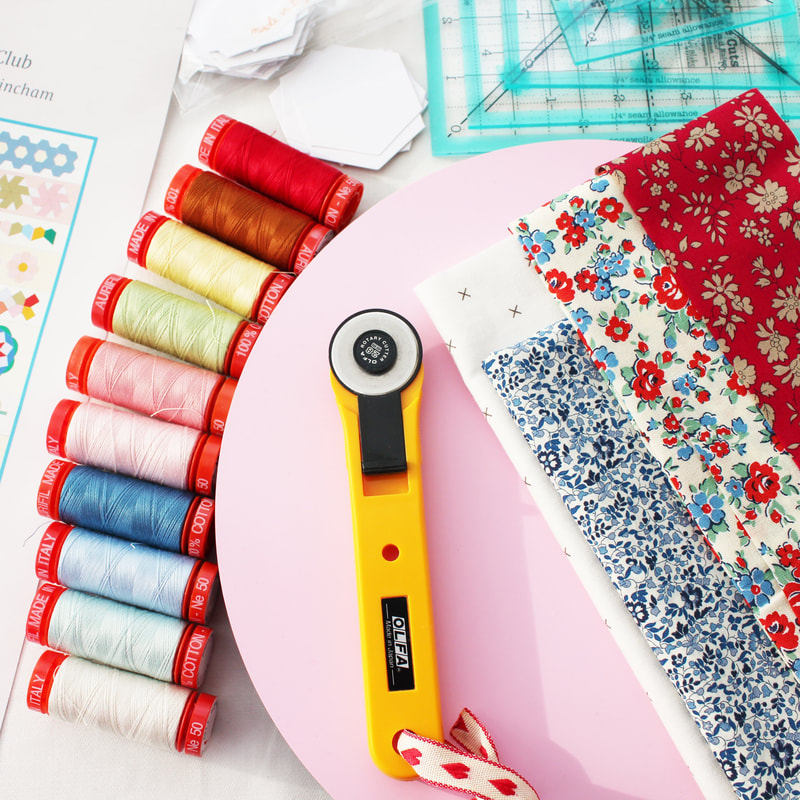 As soon as mine arrived I set myself up to cut the fabrics into the required shapes and I used glue to baste my hexagon shapes. That took me two days to complete. I then did a little each day to stay on track and so far I've managed to keep up with each month's box. 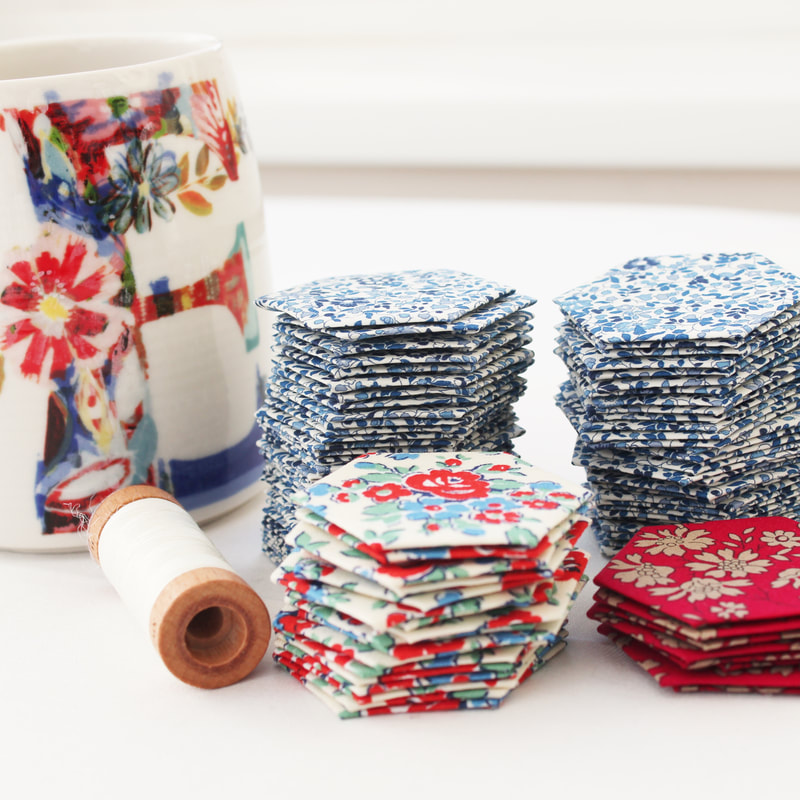 Once all of the shapes have been sewn together, the papers need to be removed and it then needs to be sewn to the backing fabric. Each strip of backing fabric is then sewn together to form the quilt. Here is mine so far. 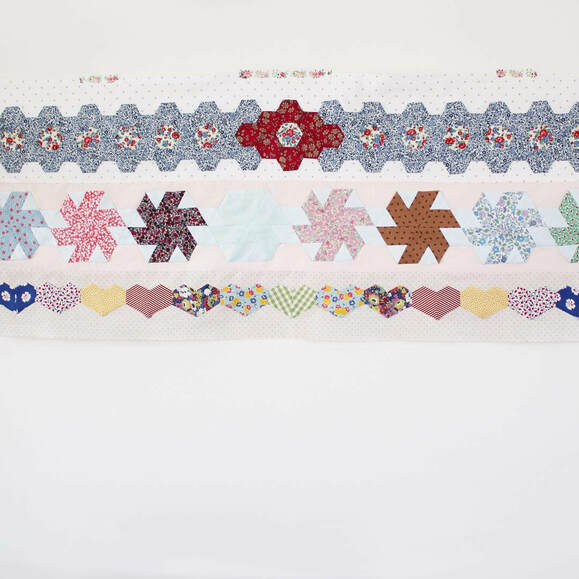 I love making this quilt so much and I really look forward to receiving the special box each month. It's really fun to sew along with other people and I love the community aspect to this project. 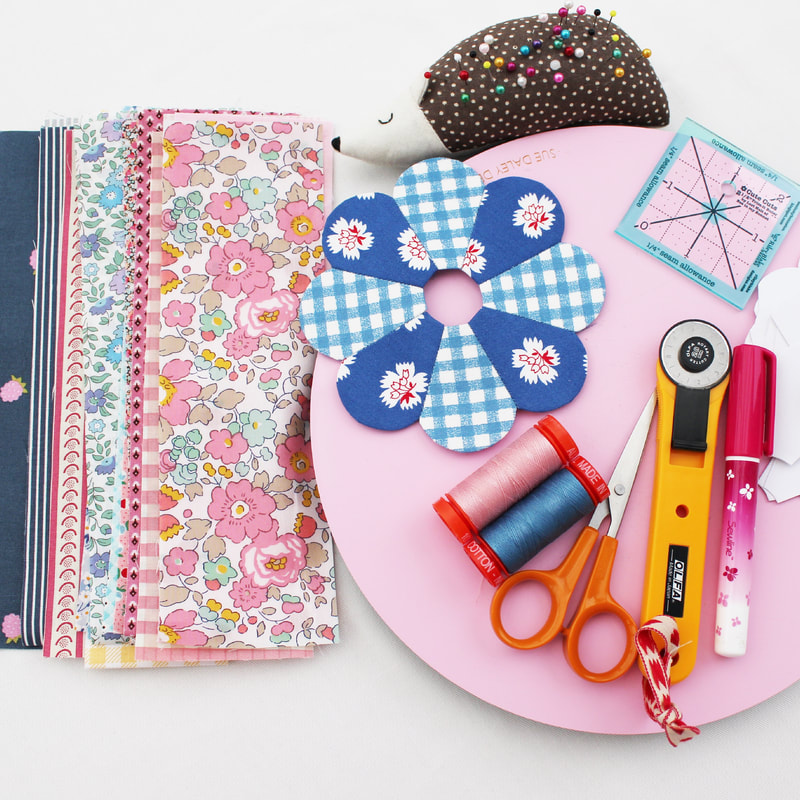 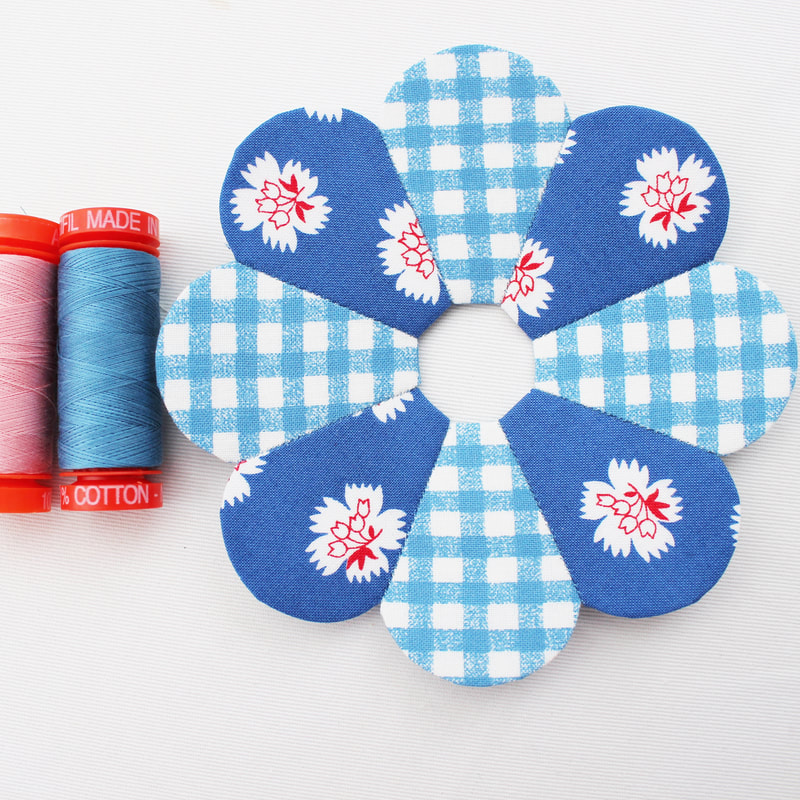 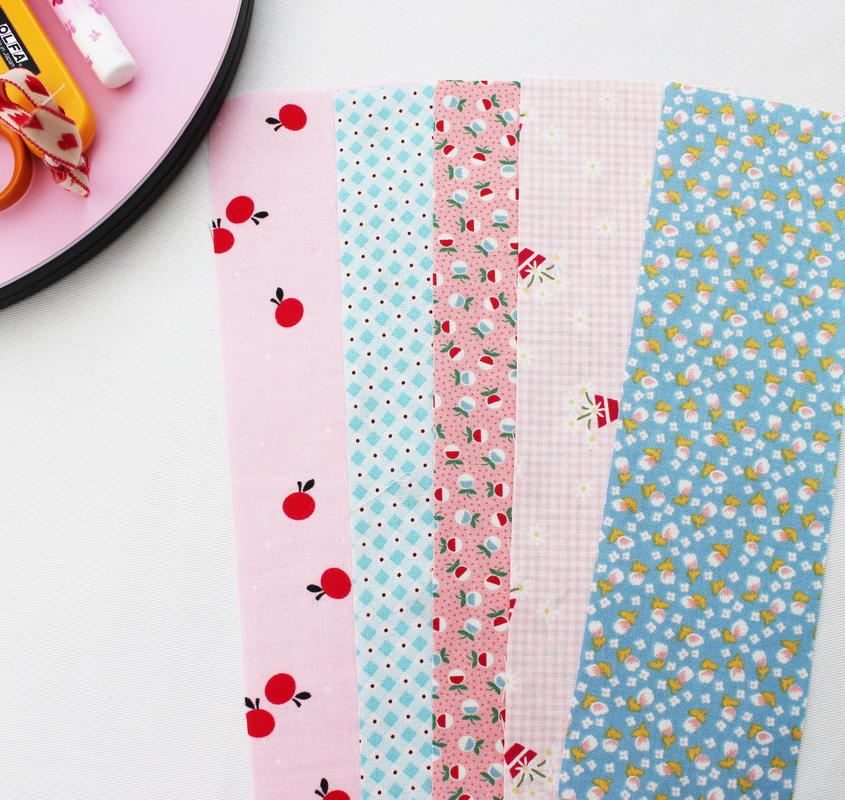 Jessie, who owns Sew and Quilt, designs the block of the month quilts and she always picks the most beautiful fabrics. I love her style which is why I knew I would love this subscription. 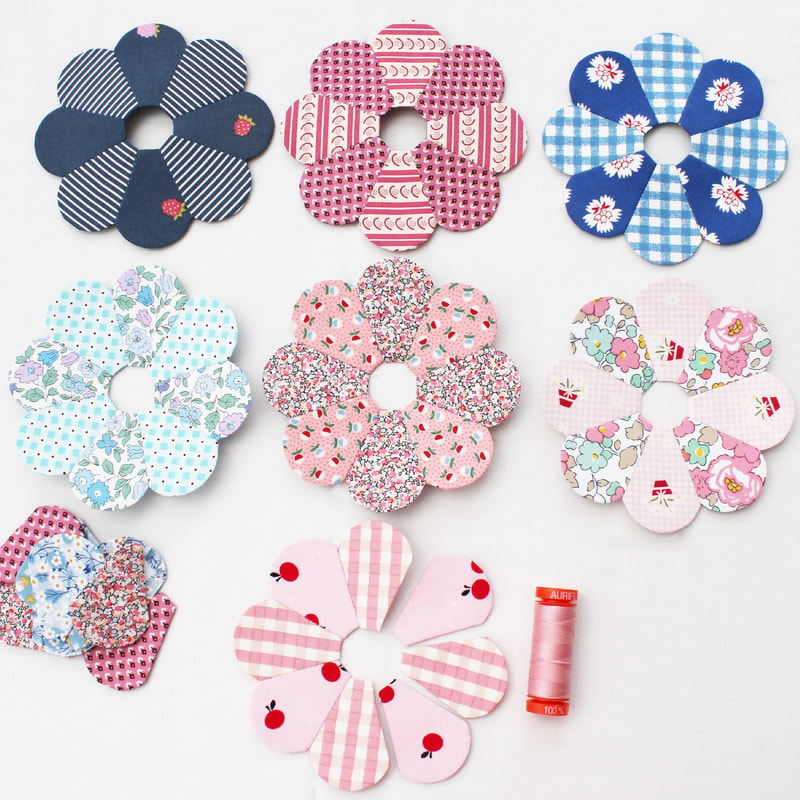 This month's box is my favourite so far. The design is Dresden flowers and they are so pretty! I love the fabrics that have been included too.
Have you ever signed up to a block of the month subscription? If so, which one? I think they are so much fun, I'm already thinking about which one I might do next year! Happy sewing!  Do you use Pinterest? I've been really getting into Pinterest lately and I'm finding it such an inspiring place. I have a lot of different boards over there, ranging from quilt inspiration to home decor, English Paper Piecing to making things for children. I fill my boards with images that I love, as well as images of things I've created. I'd love it if you would like to check out my boards, you can find me here. I spoke in my last post about how I think my style is vintage with a modern twist so here are some images that I think really sum that up. 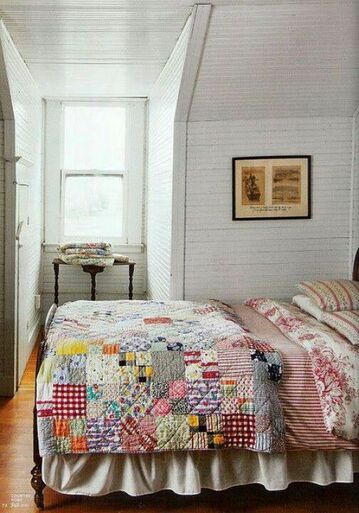 I love brightly coloured patchwork quilts against a neutral backdrop. I think it's the white walls that give this image a modern twist. 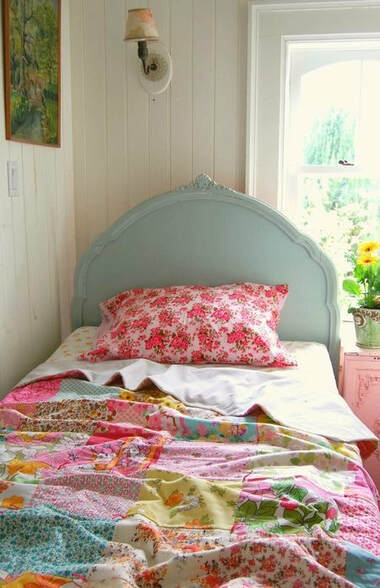 The room below looks so cosy. 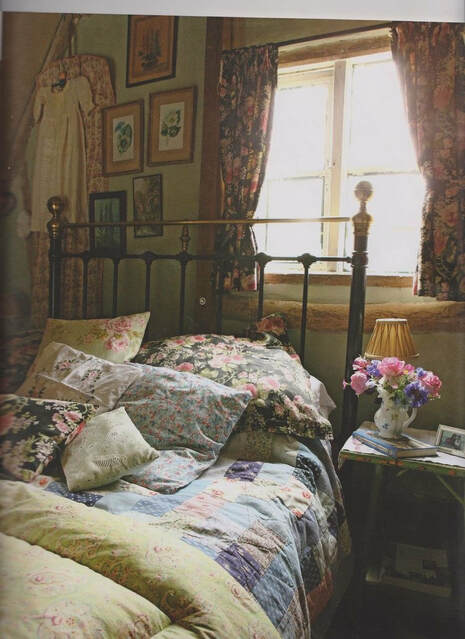 I love vintage china too! 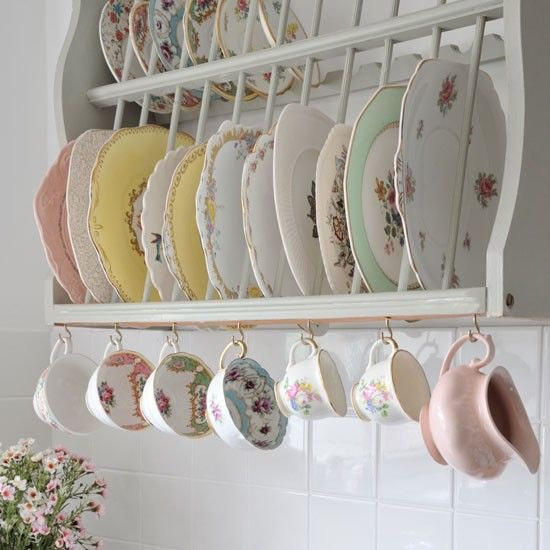 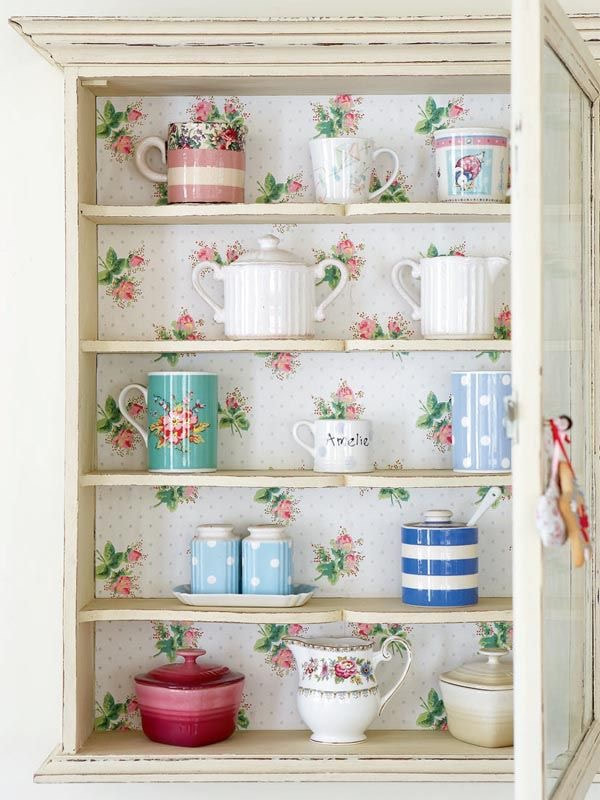 Do you have a Pinterest account? Let me know in the comments and I will be sure to check yours out too.
Happy pinning! 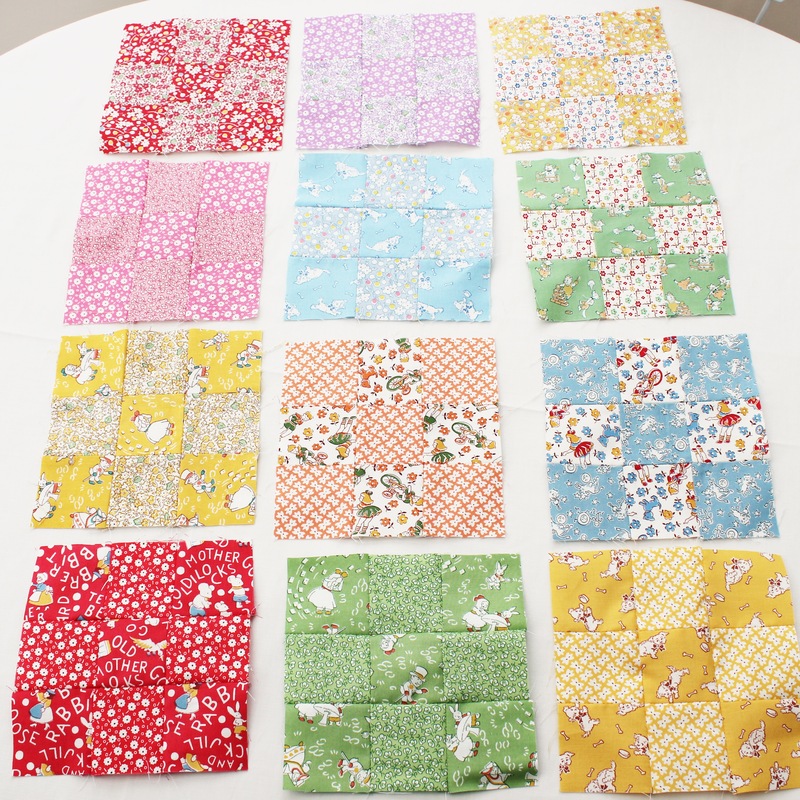 Continuing from my last post, you should now have all 12 blocks finished and ready to turn into a quilt. Play around with your blocks and decide on how you would like them to be arranged. You may also want to trim you blocks at this point to ensure they are all 6 inch squares. Now it's time to add the sashing. We will start with the vertical sashing between the blocks. 1. Cut 16 strips of fabric that are 6 inches long and 2.5 inches wide. 2. Take the first block of your quilt and lay a strip of sashing on top of it right sides together, lining up the raw edges on the left side as they face you. Sew together using a quarter inch seam allowance, open out and press the seam open. Repeat this to sew the sashing on the right side of the block. 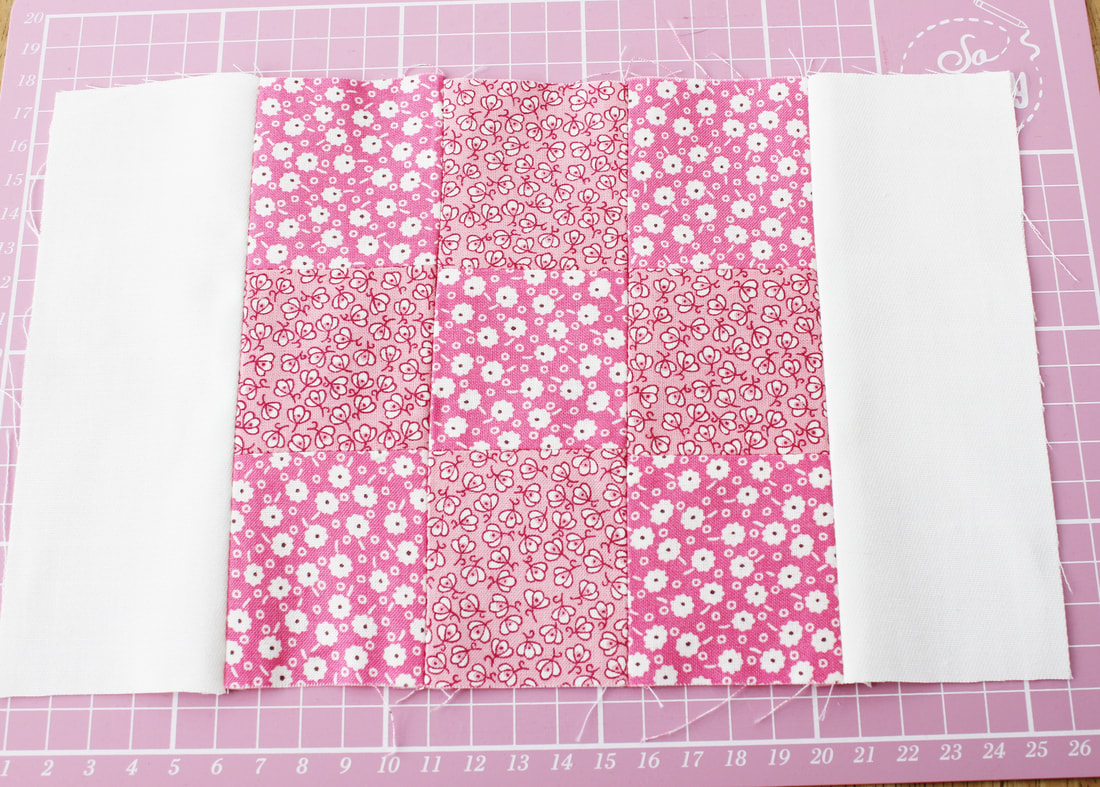 3. Take the next block in the row and place it on top of the righthand piece of sashing, right sides together. Line up the raw edges on the right side and sew together with a quarter inch seam allowance. Flip open and press the seam open.  4. Next add the another piece of sashing to the right side of block two, in the same way as you did in step 2. 5. Continuing in this way, add the third block in the row and the final piece of sashing. 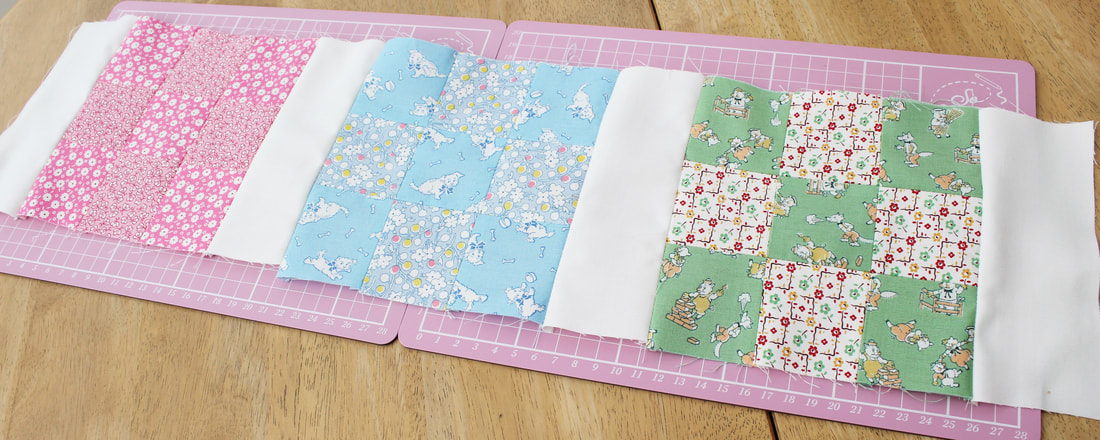 6. Repeat these steps for the remaining three rows of your quilt. 7. Next add the long, horizontal sashing strips to join the rows together. Take your first row and place a sashing strip along the top, right sides together. Sew with a quarter inch seam allowance and flip open and press the seam open. 8. Repeat this for the sashing on the bottom on the top row. 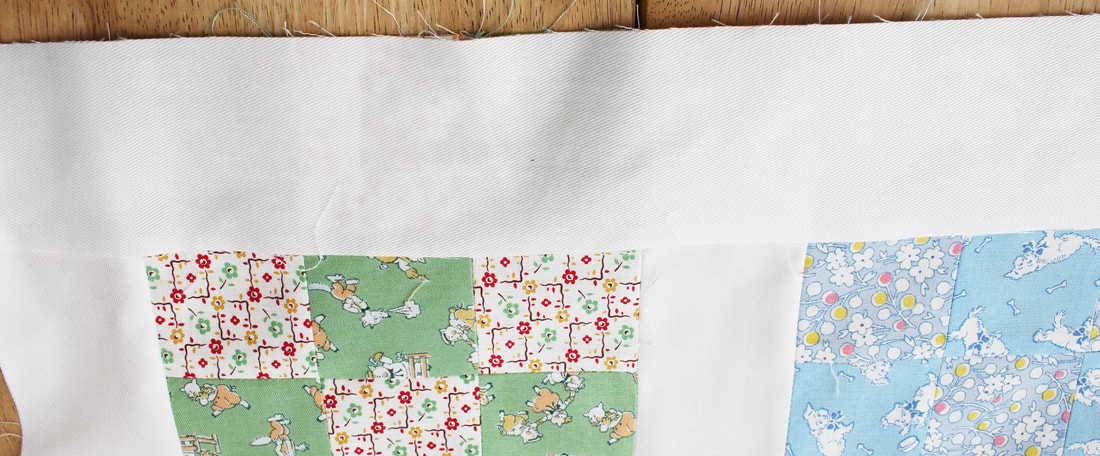 9. Now add the next row to that piece of sashing by placing the row, right sides together, on top of the sashing, lining up the raw edges. Flip open and press the seams open. Continue in this way to add each row with sashing in between. Now your quilt top is done! It's time to quilt. 10. I don't have a huge table for creating my quilt layers, so I use the floor. Spread out your backing fabric with the wrong side facing up and secure to the floor with masking tape. 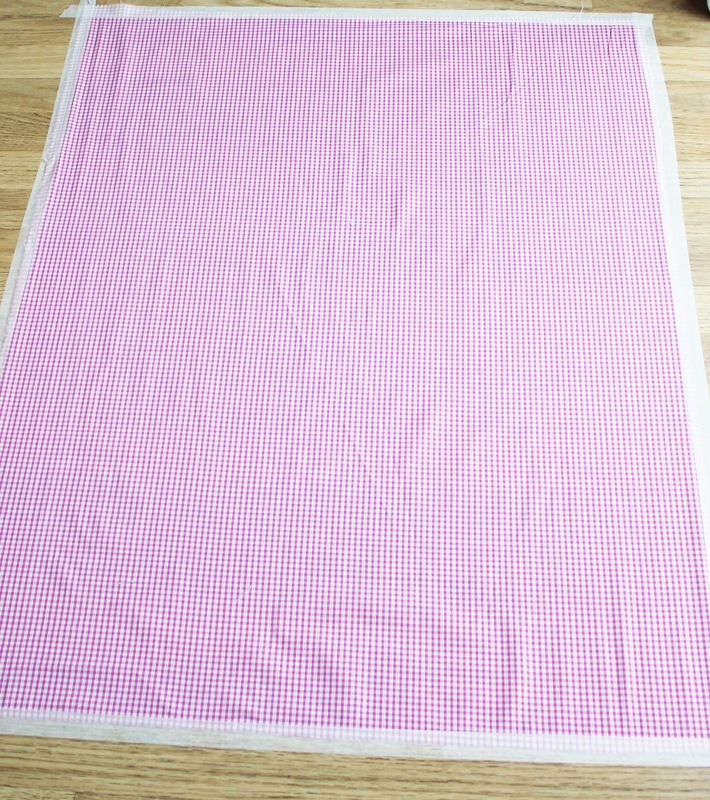 11. Next lay the wadding on top and the quilt top on top of that. 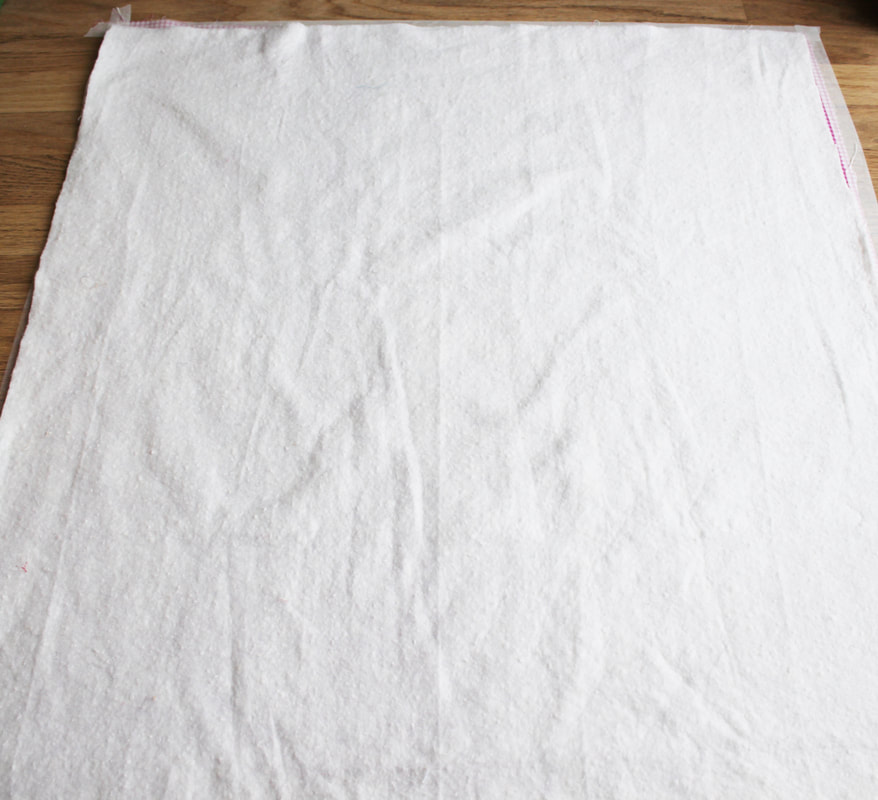 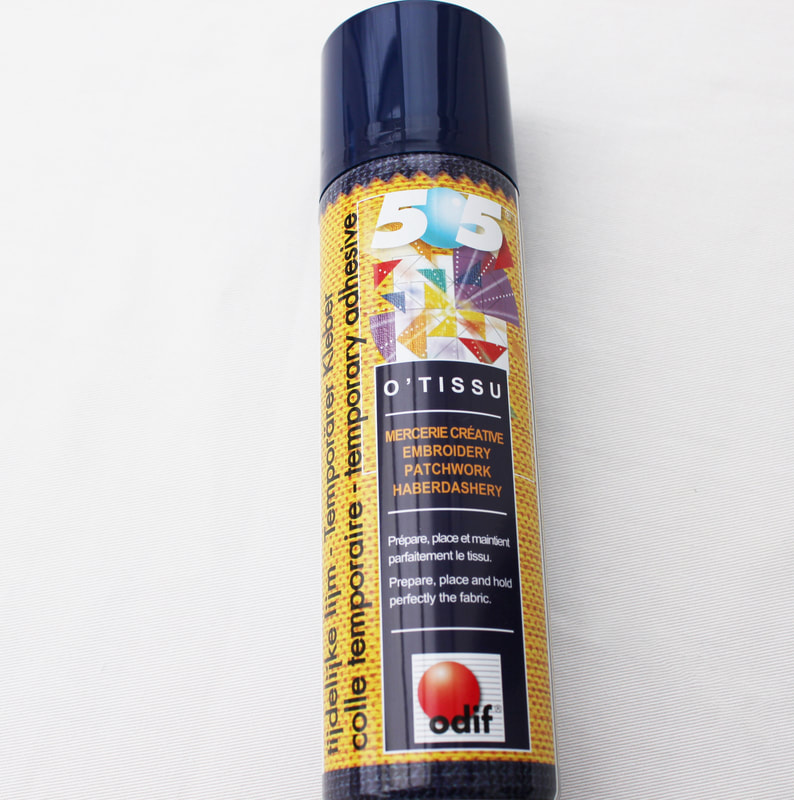 12. Pin the layers together using quilters pins, making sure your pin goes through all layers. I put a pin every few inches apart as I also sprayed some quilters basting glue on my layers to keep them together. If you don't use the glue, make sure you use more pins. 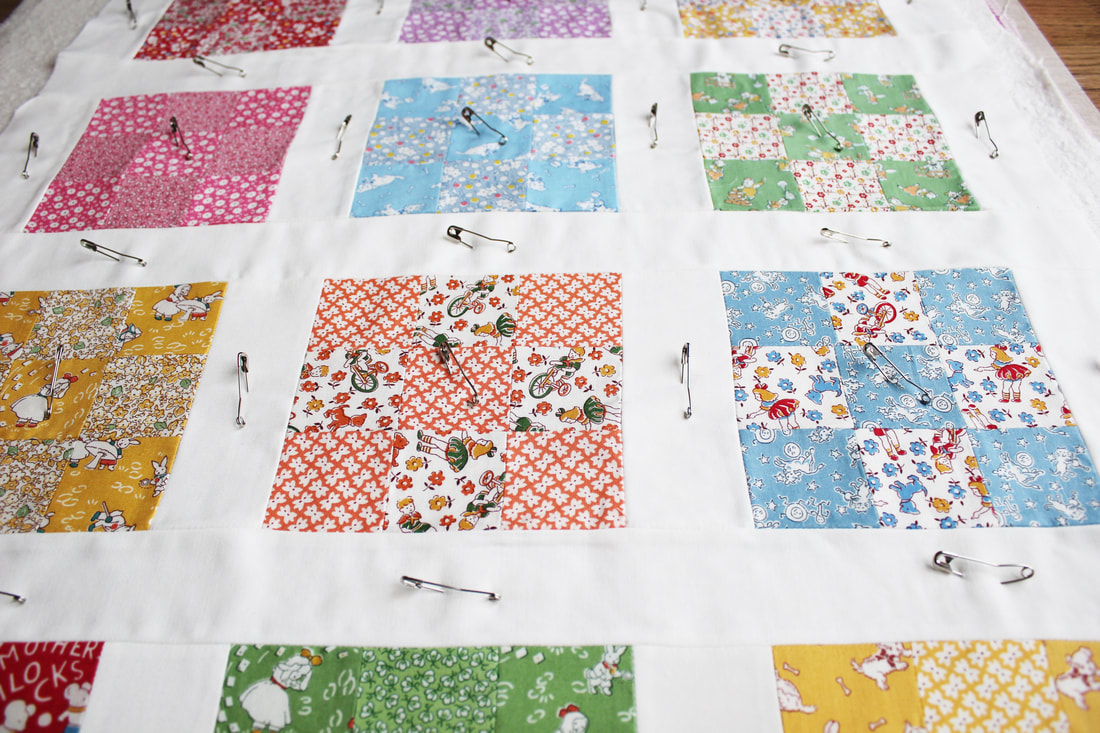 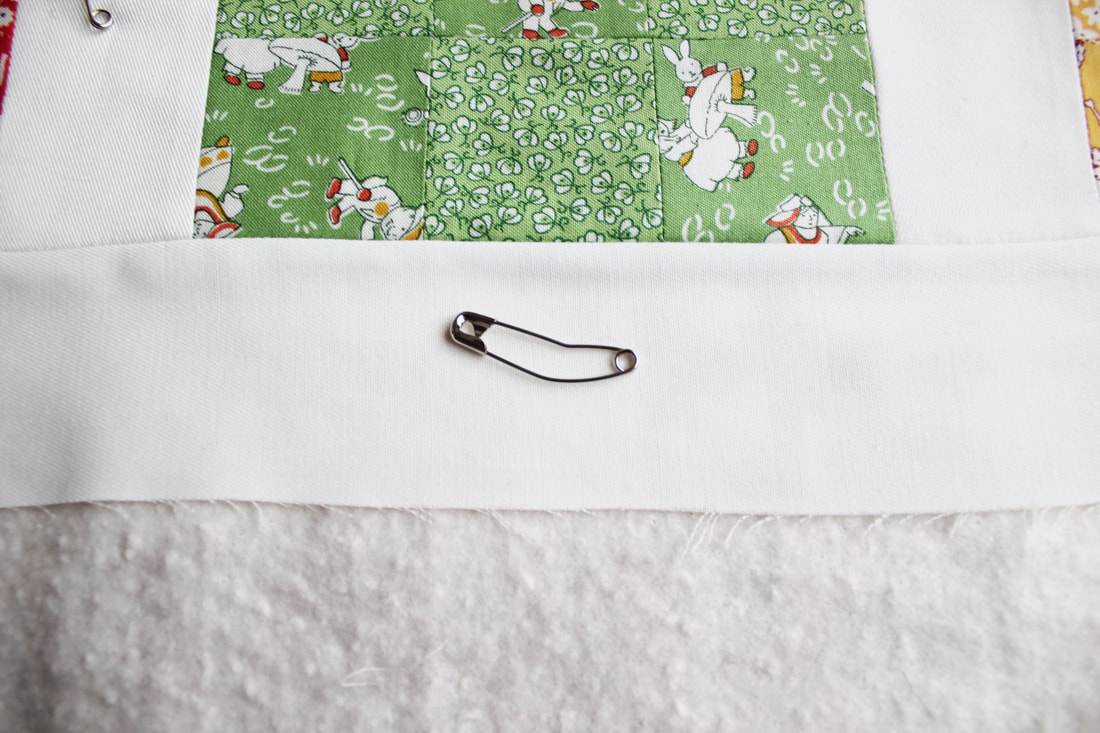 13. Now remove the masking tape and begin to quilt. I stitched in the ditch (sewing along each seam on the right side) and I quilted my squares diagonally but you can choose however you wish to quilt them. 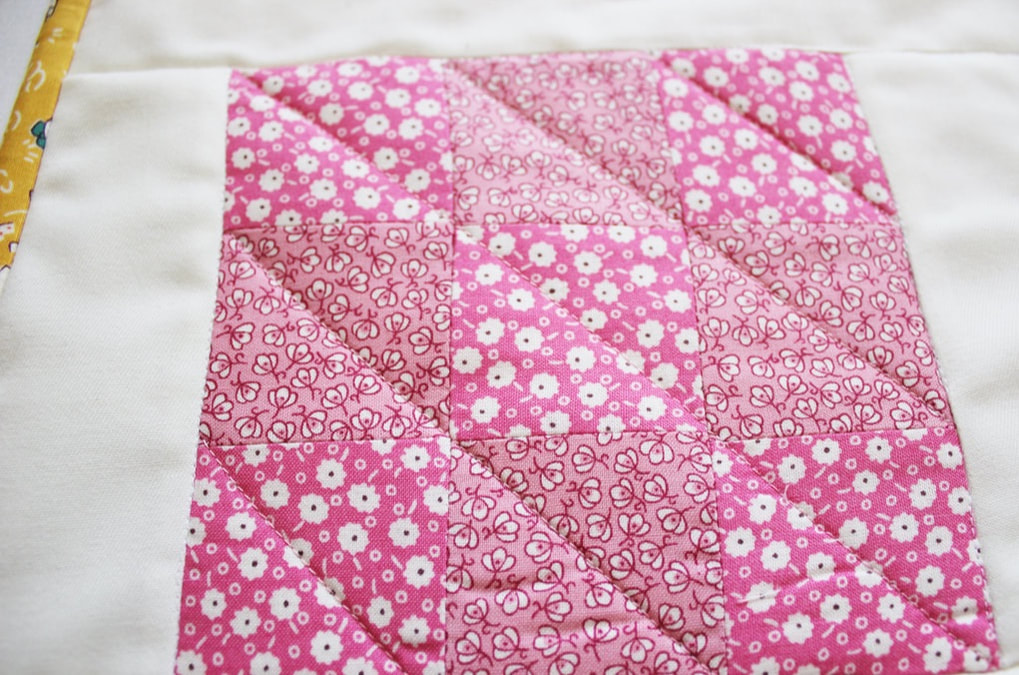 14. Once the quilting is done, trim your backing fabric and wadding to be the same size as your quilt top and remove your pins. 15. Now it's time to add the binding. Press your binding in half and pin in place on the quilt top, lining up the raw edges. 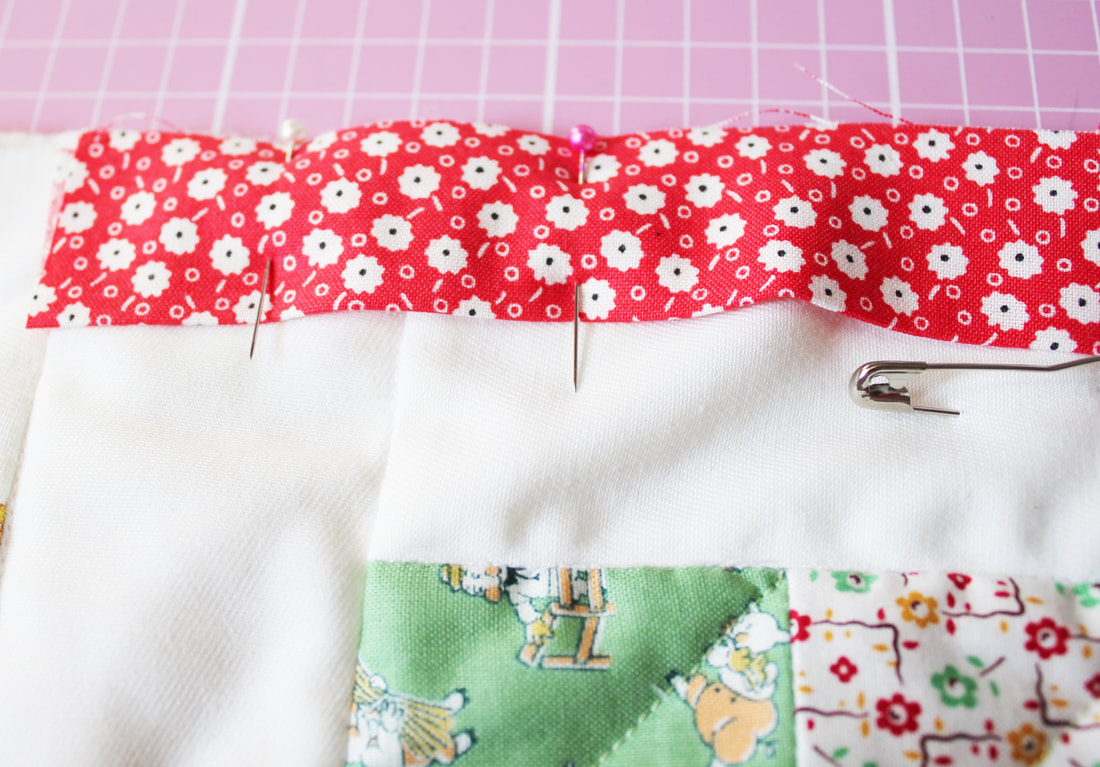 16. I turn the raw edge at the start in on itself to encase it. Sew in place with a quarter inch seam allowance. 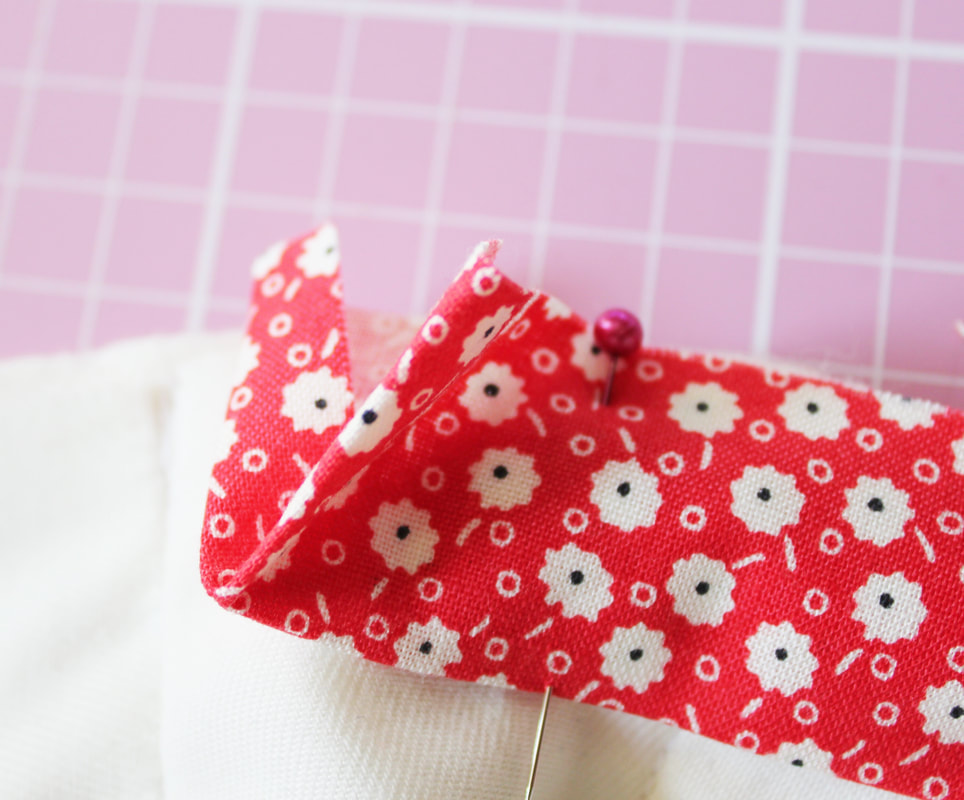 17. At each corner, I sew off the edge at the corner, lift the presser foot and readjust the angle of the binding so that it is a right angle. I then continue to sew along. This will give you a mitred corner. 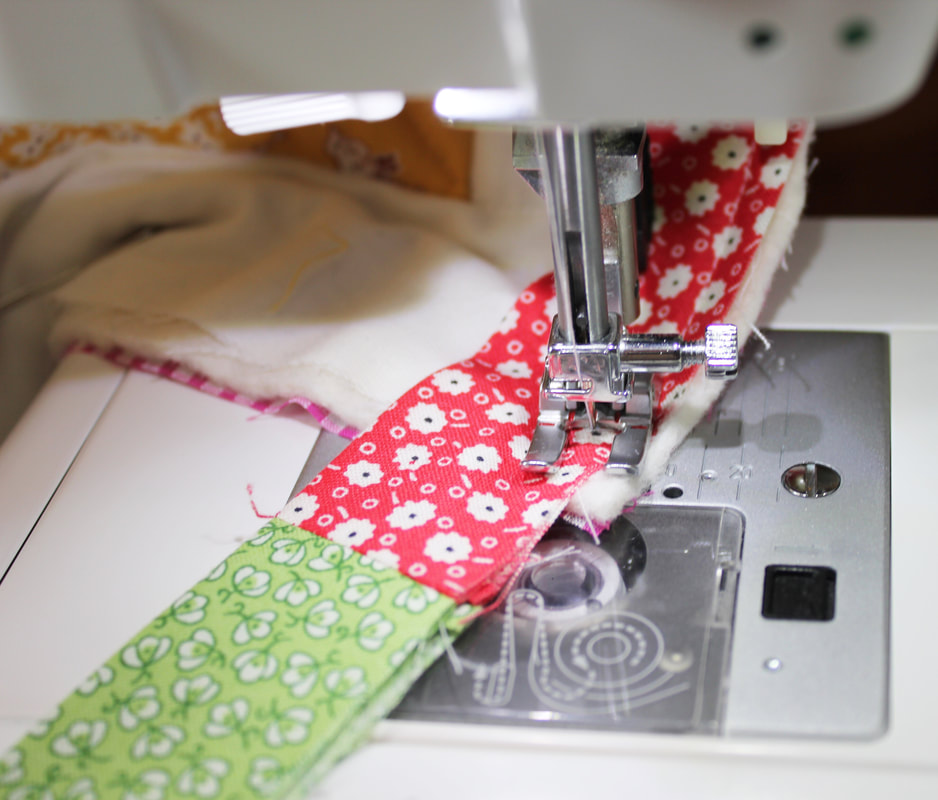 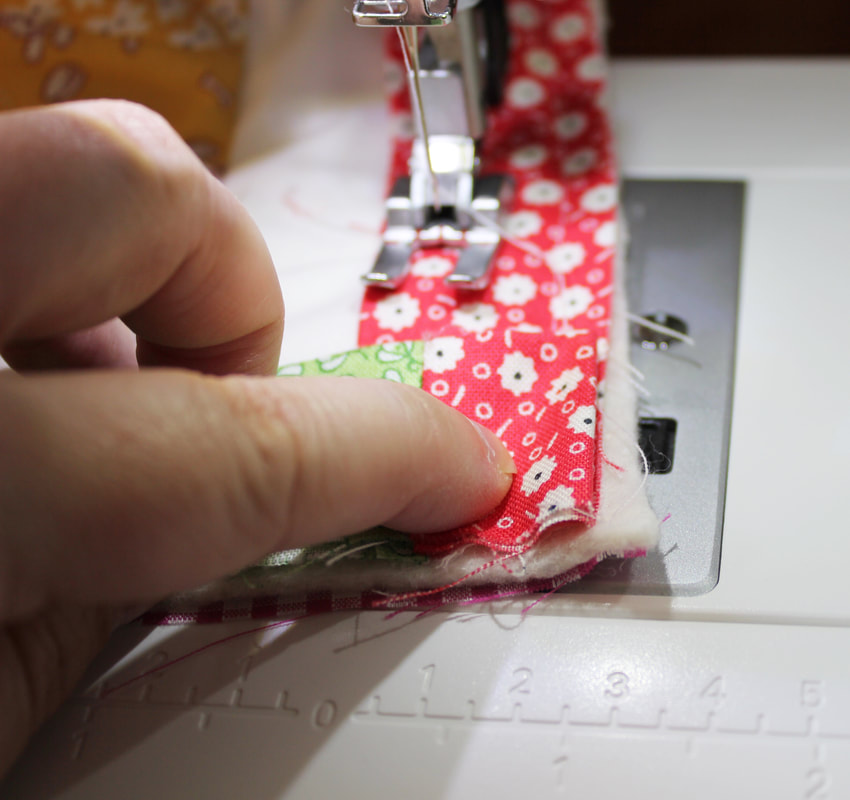 18. When you get back to the beginning, put the end of your binding inside the beginning of your binding to encase it. 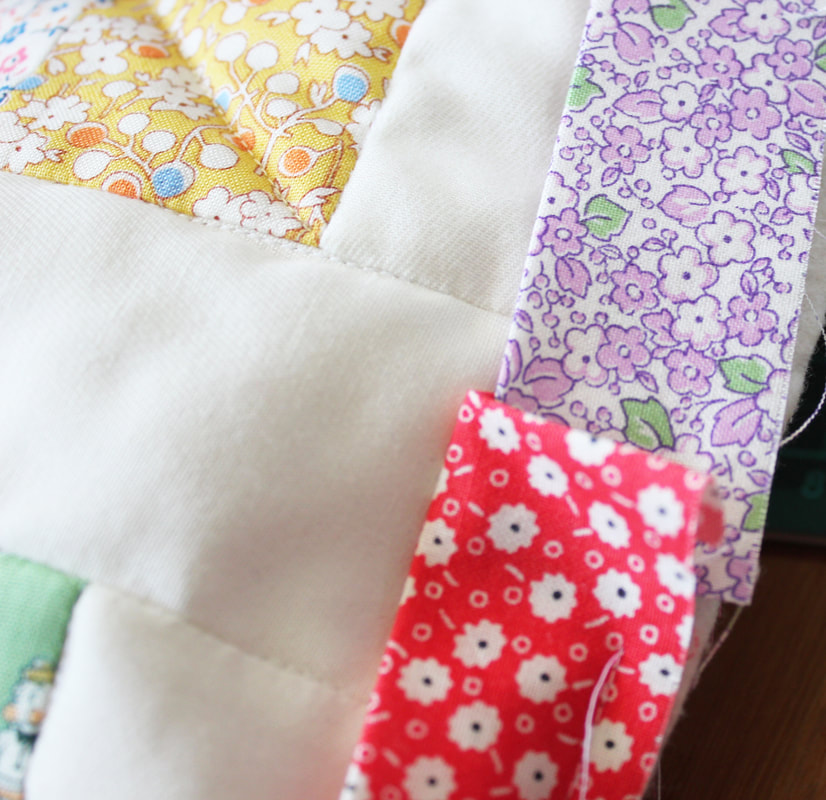 19. Now flip your binding round to the back of the quilt and stitch in place by hand with an invisible appliqué stitch. Your quilt is done! I hope you enjoy this tutorial. If you have any questions please contact me. Happy sewing!  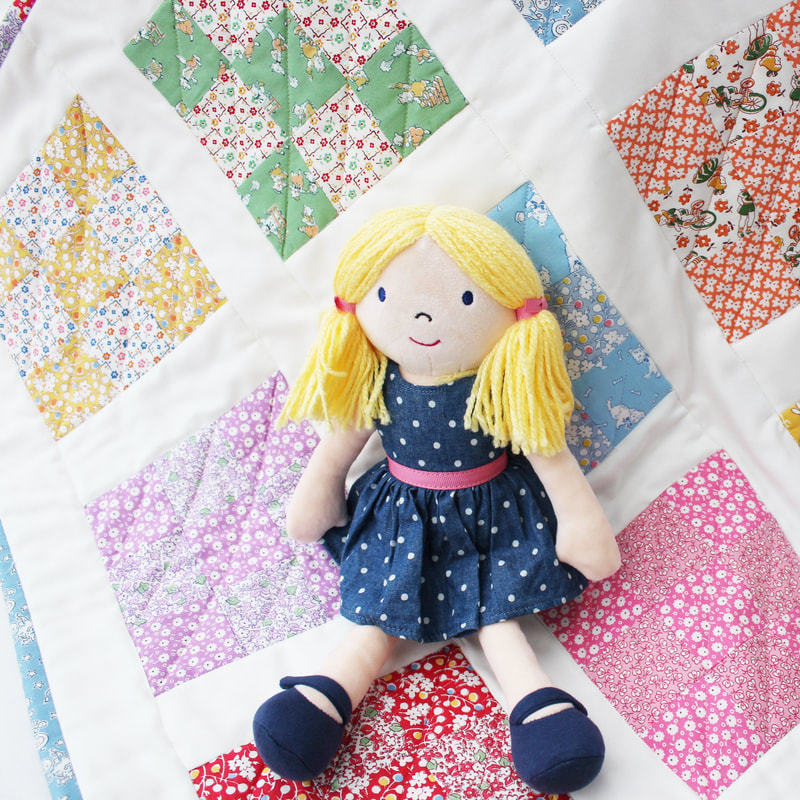 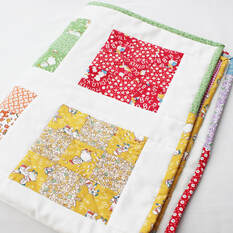 Let's start making the quilt! To start we need to cut our fabrics. This is really easy because we are working with strips that are 2.5 inches wide for everything! So that keeps things nice and simple. For the coloured nine patch blocks, you need will need 24 strips of fabric that are 2.5 inches wide. Each block uses two contrasting fabrics. So you will need one strip to be 10 inches long and one to be 12.5 inches long. 1. Cut your 10 inch long strip into four 2.5 inch squares. Cut your 12.5 inch long strip into five 2.5 inch squares. The photo shows how to line your ruler up with the 2.5 measurement in line with the edge of the fabric. Then you can cut along the edge of the ruler.  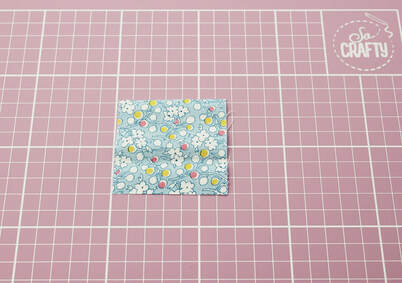  2. Decide which fabrics you are going to pair up for each block if you haven't already done so. We will be creating a pattern like this; 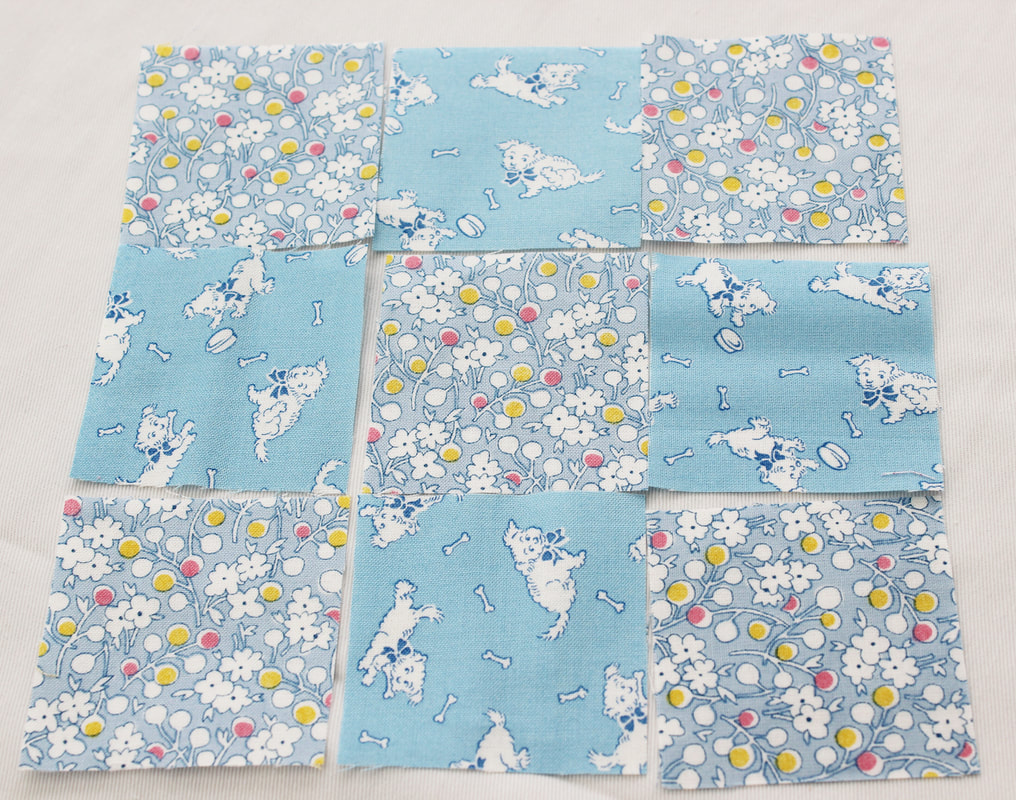 Once all of that cutting is done, it's time to get sewing! We will be sewing each block a row at a time, then joining them together. 3. Take the top left square and the top middle square. Place them right sides together and sew in place down one side using a quarter inch seam allowance. 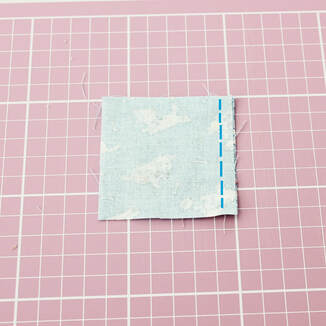 As I've used white thread I've drawn over it on the computer in blue to show you where to stitch. 4. Open it out and repeat on the other side of the central square with your top right square. 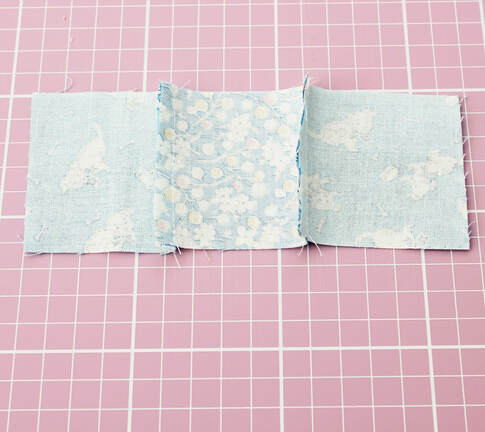 5. Now there are different opinions about what to do with your seams. Some people press them to one side. I press them open. I like this because I find it easier to line them up when joining them to other pieces. I've never had a problem with fabric showing through to the other side. So press your seams open if you wish. 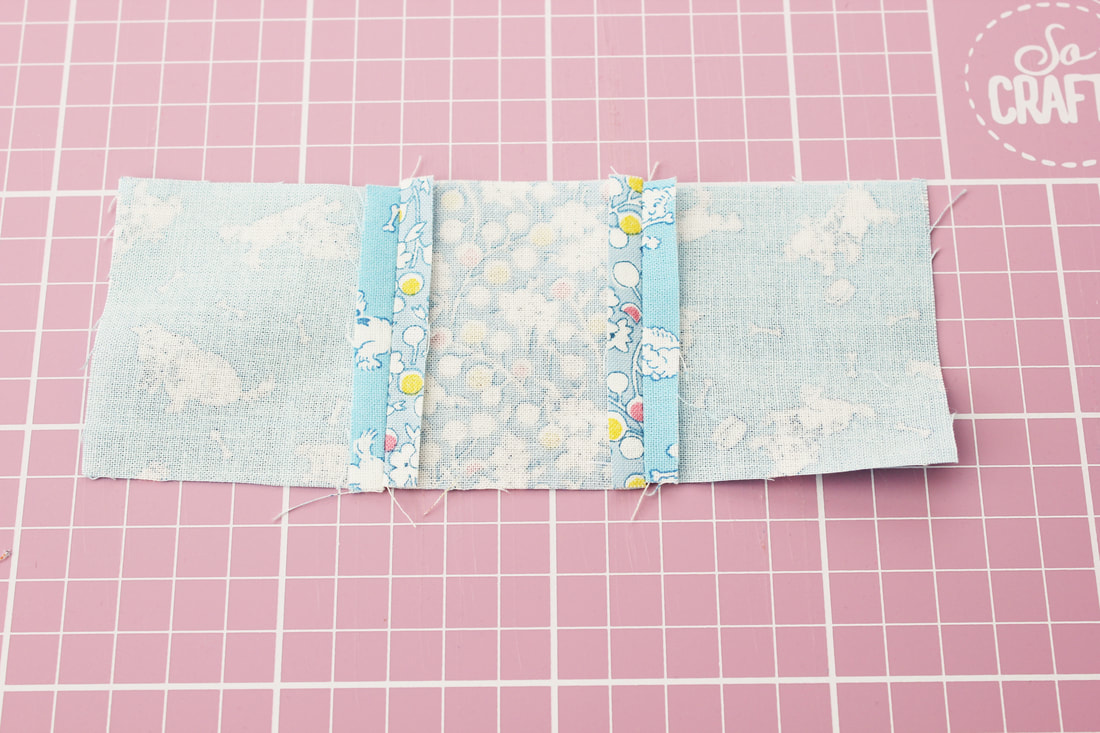 Repeat steps 3, 4 and 5 for the middle and bottom rows. 6. Now it's time to join your three rows together. Lay out your three rows how you'd like them to look when finished, with the right sides facing up. Pick up the top row and flip it over on top of the middle row so that the right sides of each row are facing each other. You need to make sure you have flipped the top row over towards you before placing it on top of the middle row, so that you are lining up the bottom raw edge of the top row and the top raw edge of the middle row! Sounds complicated but it isn't, it's just tricky to explain in words! So here is a photo. Sew along the blue line with a quarter inch seam allowance. 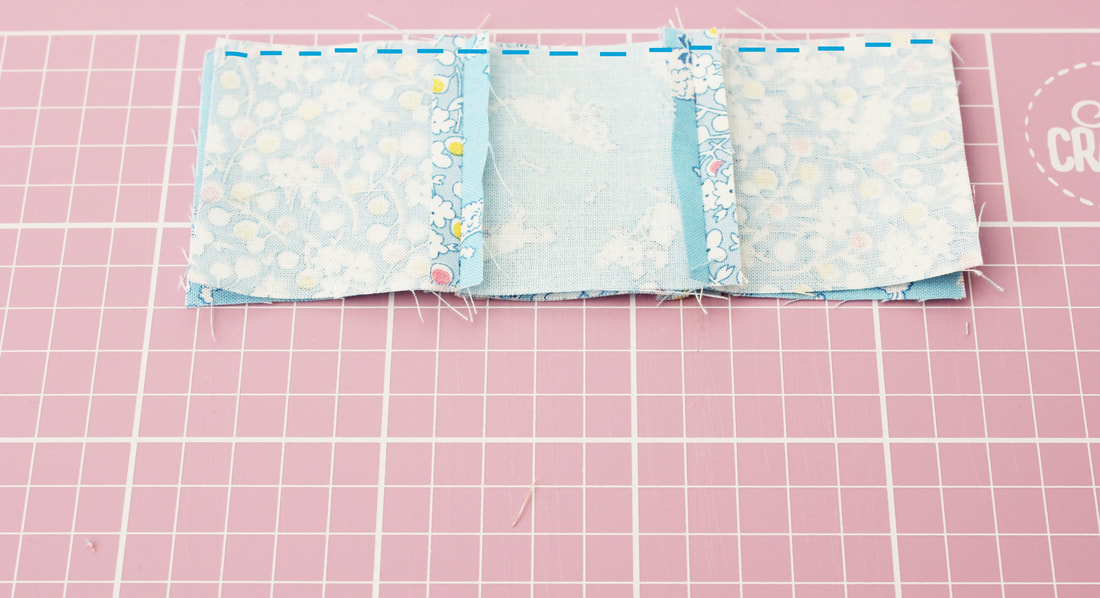 Top Tip! It is important to line the two middle seams up of both rows before you sew them together. I use pins to do this and I stick the pin through the middle of each seam, catching the middle of the seam on the other piece.
7. Open it out and press your seam open. 8. Repeat steps 6 and 7 to join the bottom row, making sure you flip the bottom row up, lining up the top raw edge of the bottom row with the bottom raw edge of the middle row! 9. And that is your block finished! Repeat for the rest of your blocks and you will be ready to add sashing. I will be back tomorrow showing you how to do that! As always, if you have any questions or need me to clarify anything, leave a comment or send me an email. Happy sewing! I've been sharing on Instagram a small quilt I've been making and I think it's perfect for beginners. It is the ideal size to be used in a pushchair/buggy or for a child to use with dolls and teddies as it measures just 26 inches wide and 34 inches long. I've created it using a simple nine patch block and I repeated that throughout the quilt, separating the blocks with sashing. 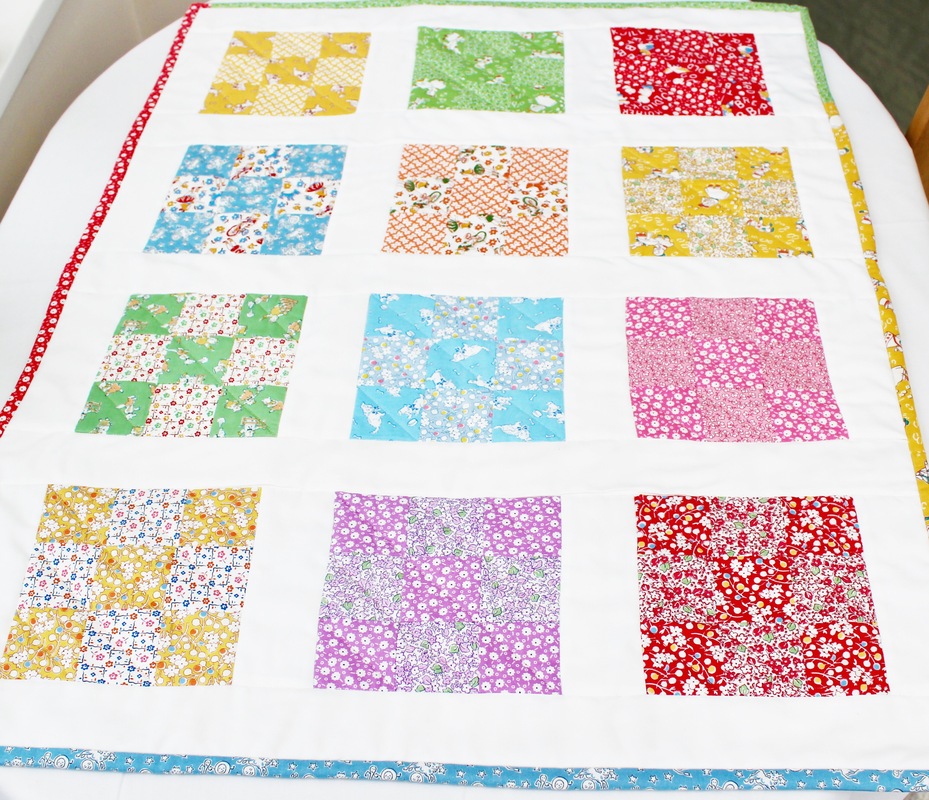 What's nice about this quilt is that you can easily make it larger if you wish and also, the nine patch block looks more complex than simple squares, but it really isn't hard to do at all. As a beginner, you'll learn some useful techniques that will have you feeling confident enough to tackle your next quilt. 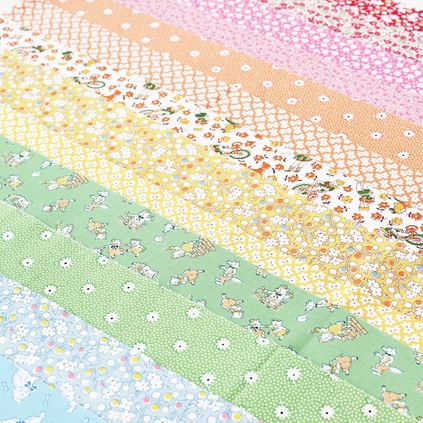 It's entirely up to you how you make this quilt. You can play around with fabrics, colours and size. To keep it simple, I will provide a list of what I used.
 That's it! Gather your supplies and I will be back with the next steps - how to piece the quilt top. Happy sewing!
 I'm starting a new series of blog posts aimed at anyone who would like to make a quilt for the first time and is not sure where to begin. There is already a wealth of information out there but it can be quite overwhelming. So my aim is to break it all down and to make it easy to understand and follow. This post will explain some quilting terminology and there will be subsequent posts about the materials you need, how to make a simple quilt top, how to turn it into a quilt and how to bind the edge. 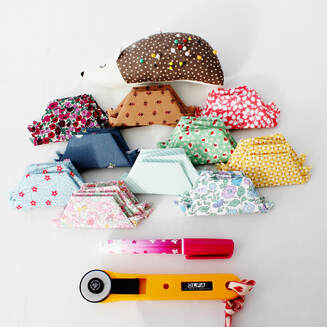 As with any craft, quilting comes with an array of terminology that might be confusing to you if you are entering the world of quilting for the first time. So let's simplify some of the common terms. 1. Quilt - a quilt is made up of three layers, a quilt top which is created using some sort of patchwork, the middle layer which is some sort of wadding or batting which gives the quilt its warmth, and a backing fabric which is typically one single piece of fabric. 2. Piecing - this means the creation of a quilt top, by cutting fabrics into smaller pieces and joining them back together again in a particular design. This is typically done on a sewing machine. 3. English paper piecing - a style of patchwork that is done by hand. It involves cutting fabrics into small shapes and wrapping them around paper templates, joining them together with other shapes to form a design and removing the paper templates when the quilt top is complete.  4. Binding - a strip of fabric that is wrapped around the edge of the quilt to conceal the raw edges. 5. Blocks - Quilts can be large so they are usually made from small segments that are joined together. These smaller parts are called blocks and they are usually square. 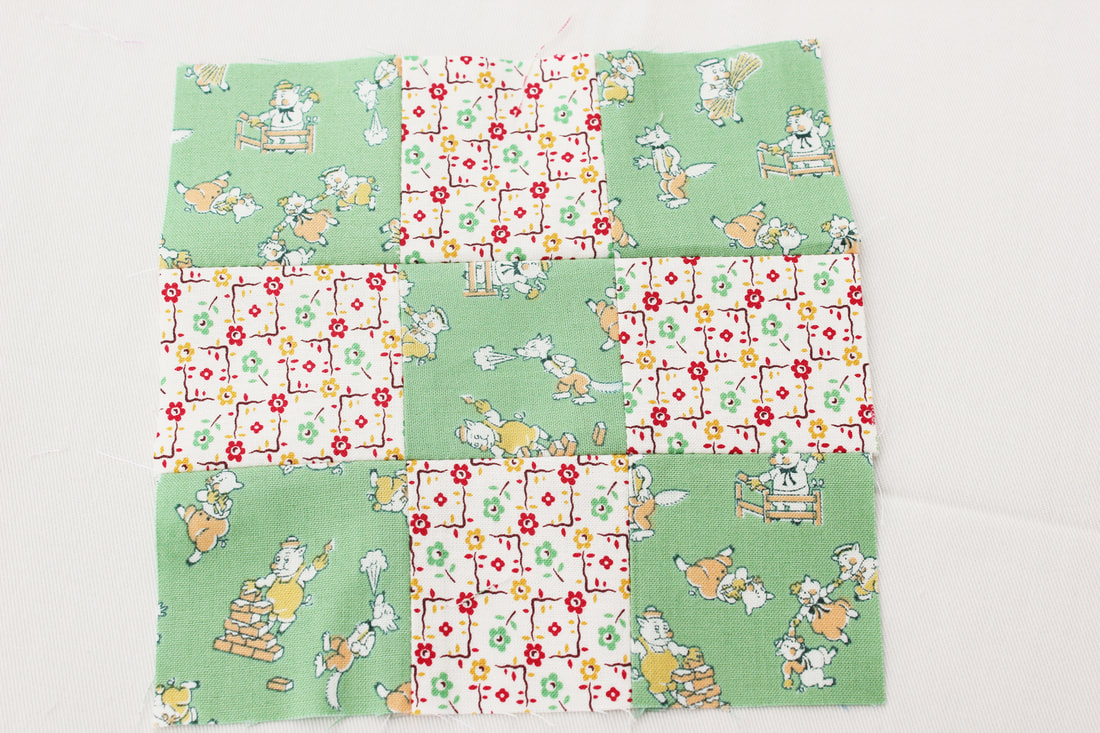 5. Quilt sandwich - this refers to the layering up of your quilt, comprising of your quilt top, your wadding and your backing fabric. The wadding is the 'filling' and the quilt top and backing are the 'bread'.
6. Basting - a temporary way of keeping your layers together whilst they are being quilted. You can baste them together using pins, spray glue or tacking stitches which will be removed when the quilting is done. 7. Quilting - this is the act of using the stitches to sew through all three layers to quilt them together. This can be done by machine or by hand. 8. Walking foot - a special sewing machine foot that helps to guide the layers of fabric through your machine in a way that prevents them from slipping. This foot is essential for quilting, unless your machine has a built in foot like mine does. 9. Free motion - this is when you drop the feed dogs on your sewing machine (the teeth that pull the fabric through the machine) and using an open toe free motion foot, you can quilt through the layers in any direction in which you move the fabric yourself. This opens up a world of design possibility. 10. Long arm quilting- this is done on a special, huge machine. The quilt is put on a frame and can be quilted with larger, all-over designs. This is a professional finish although some home sewers do have these machines. 11. Applique - the application of fabric shapes to a backing fabric. They can be sewn by hand, turning the edge of the shapes under first or they can be stuck to the backing fabric with either glue or iron-on fusible webbing and then sewn around the raw edge. Applique is a lovely technique for creating pictorial quilts. 12. Sashing - fabric strips that are sewn between the blocks of the quilt to space them out and create a clean, fresh look. 13. Low volume - this refers to fabrics that have a more neutral colour palette and have a less busy pattern. Low volume fabrics are important for creating contrast in your quilt design and allowing intricate pieced designs to really stand out. 14. Fussy cutting - when you cut your fabric into smaller pieces for patchwork, rather than cutting anywhere, you can pick a motif or part of the fabric that you want to be the focus of your shape, and centralise it. Fussy cutting offers a lot of scope for creating new designs from your fabric and you can create very intricate patterns this way, but it inevitably creates more fabric waste. And that's it for now! If you have come across any more terms you are unsure of then please leave them in the comments and I will try to answer what they mean. I will be back soon with another post about getting started with your first quilt. Thanks for reading and happy sewing! |
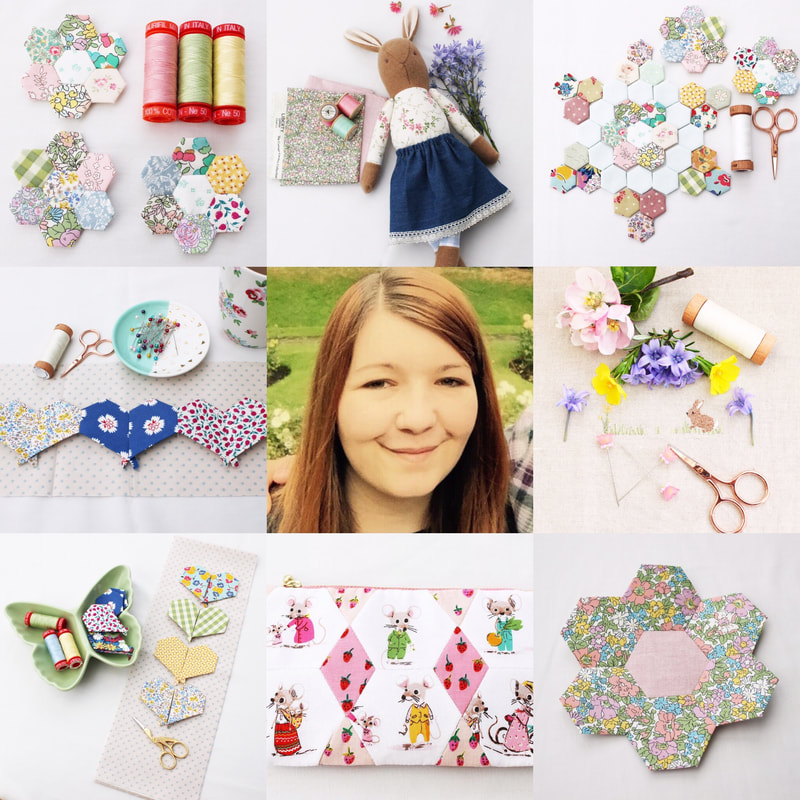
Follow me on InstagramAbout the Author
My name is Emma and I love all things sewing, especially EPP. My little blog is the place where I document what I'm making. I hope you enjoy reading what I'm up to! All opinions are my own and I only share things that I think you will love. Thank you for taking the time to stop by. Archives
September 2023
Categories
All
|
 RSS Feed
|
Copyright Vintage Sewing Box 2024
|
| ||||||